As with all my sculptures, this one started with a series of sketches.
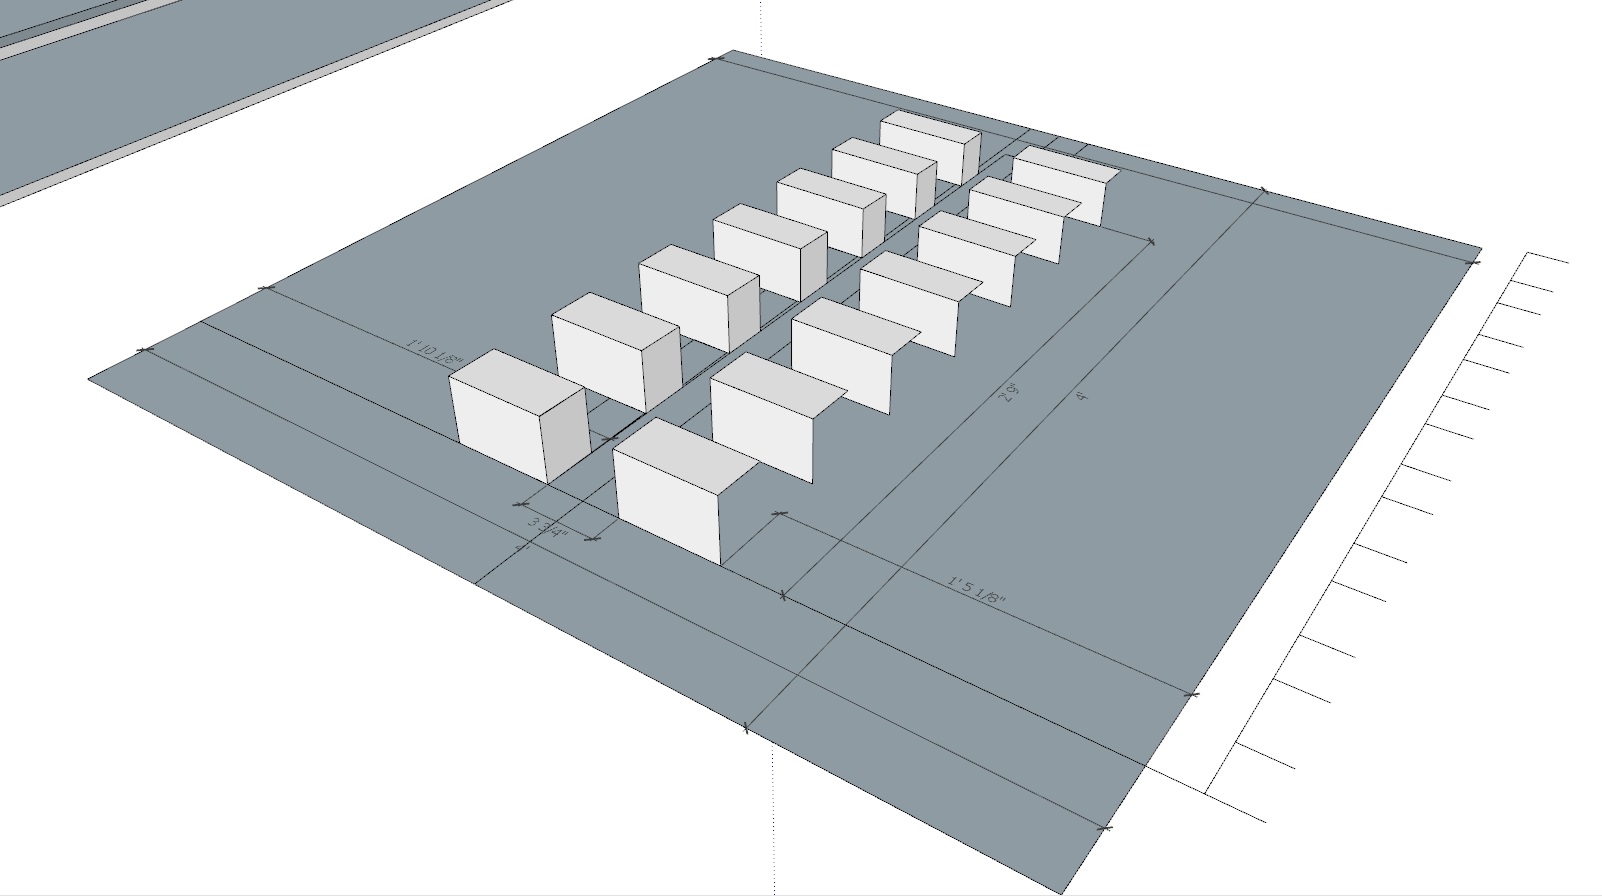
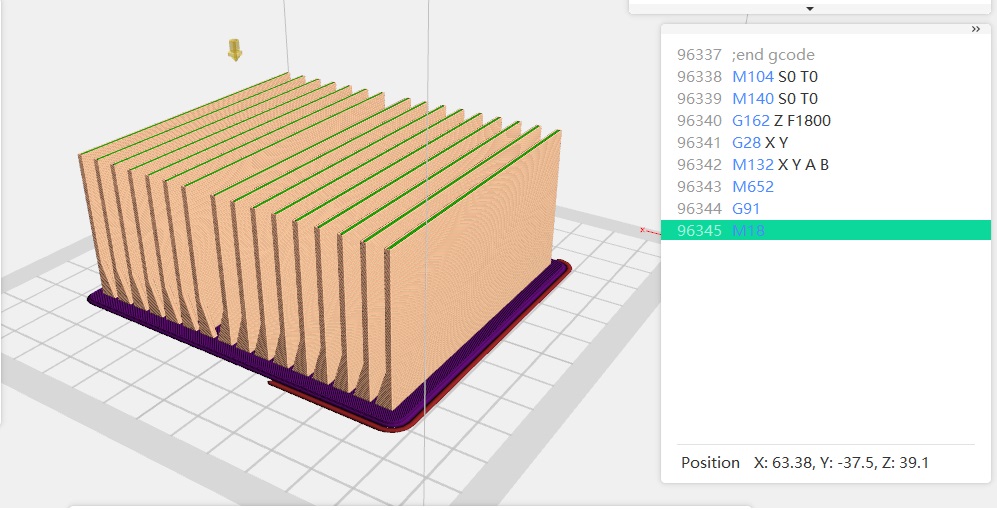
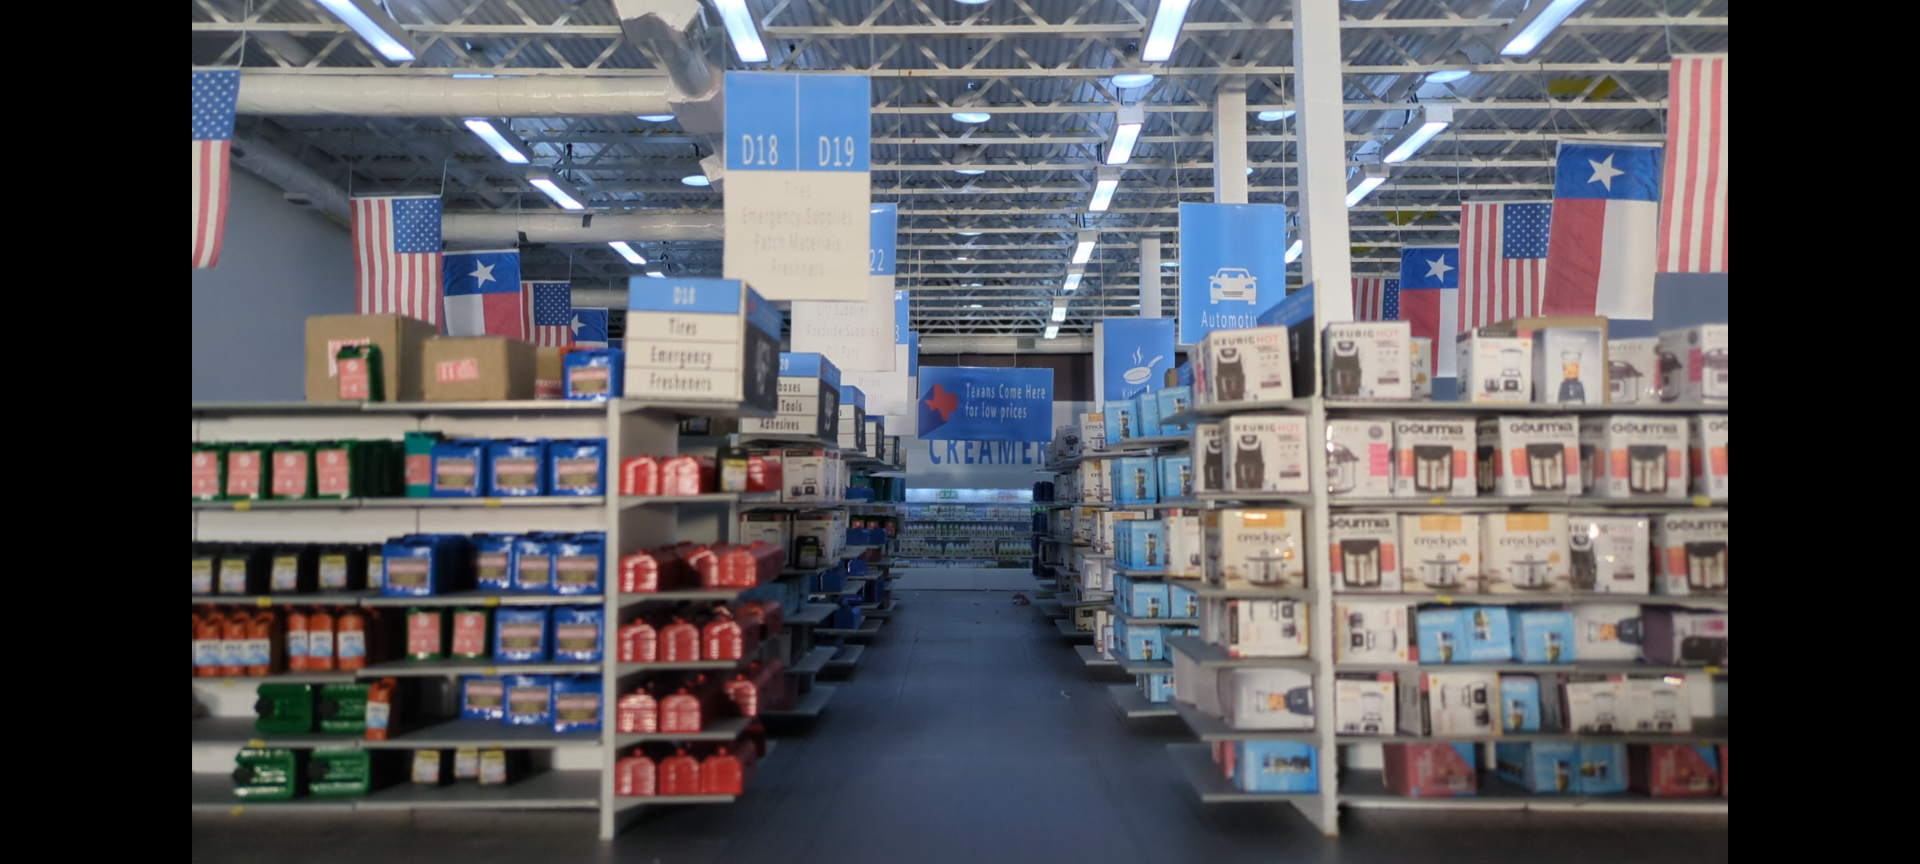
The initial idea of capturing part of a super market or in this case the “big blue market” was considered as early as 2020. The scale of the idea was at some point initially drawn out but not fully developed until mid 2024. The set was built at a 1:16 scale in foam, wood and PLA filament.
“Home” is the most personal piece in this series; as it depicts the horrific events that took place at Walmart , August 2019 in El Paso. My son had been born in May and my family and I were visiting my parents in El Paso the day of the shooting. That Saturday morning, my wife wanted to go a baby themed fair that would be hosted at Target Greatland in Bassett Center Mall near Cielo Vista Mall. I remember waiting in the parking listening to the radio when I received a call from my brother who was a police cadet at the time. First thing he asked when I answered was, Where are you? I told him our location and he told me to get out of the area immediately as there was an active shooter near us at both Cielo Vista Mall and Walmart. Once my wife got in the car we drove to my aunt’s house and started watching the news pouring in from all outlets. I remember having a terrible feeling in my stomach as I watched the broadcast unfold. Reporters were describing the scene and were outside of the store interviewing survivors, I almost threw up listening to their stories. I remember not understanding why the news was hitting me so hard. Perhaps it was the guilt of seeing that two of the victims were new parents that were shopping with their new born at the store when the massacre happened, perhaps it was the fact that we were so close to where it happened. What if the baby fair had been at Walmart instead of Target? or perhaps it was because after years of mass shootings and desensitization and numbness to a monthly new attack it had finally hit home.
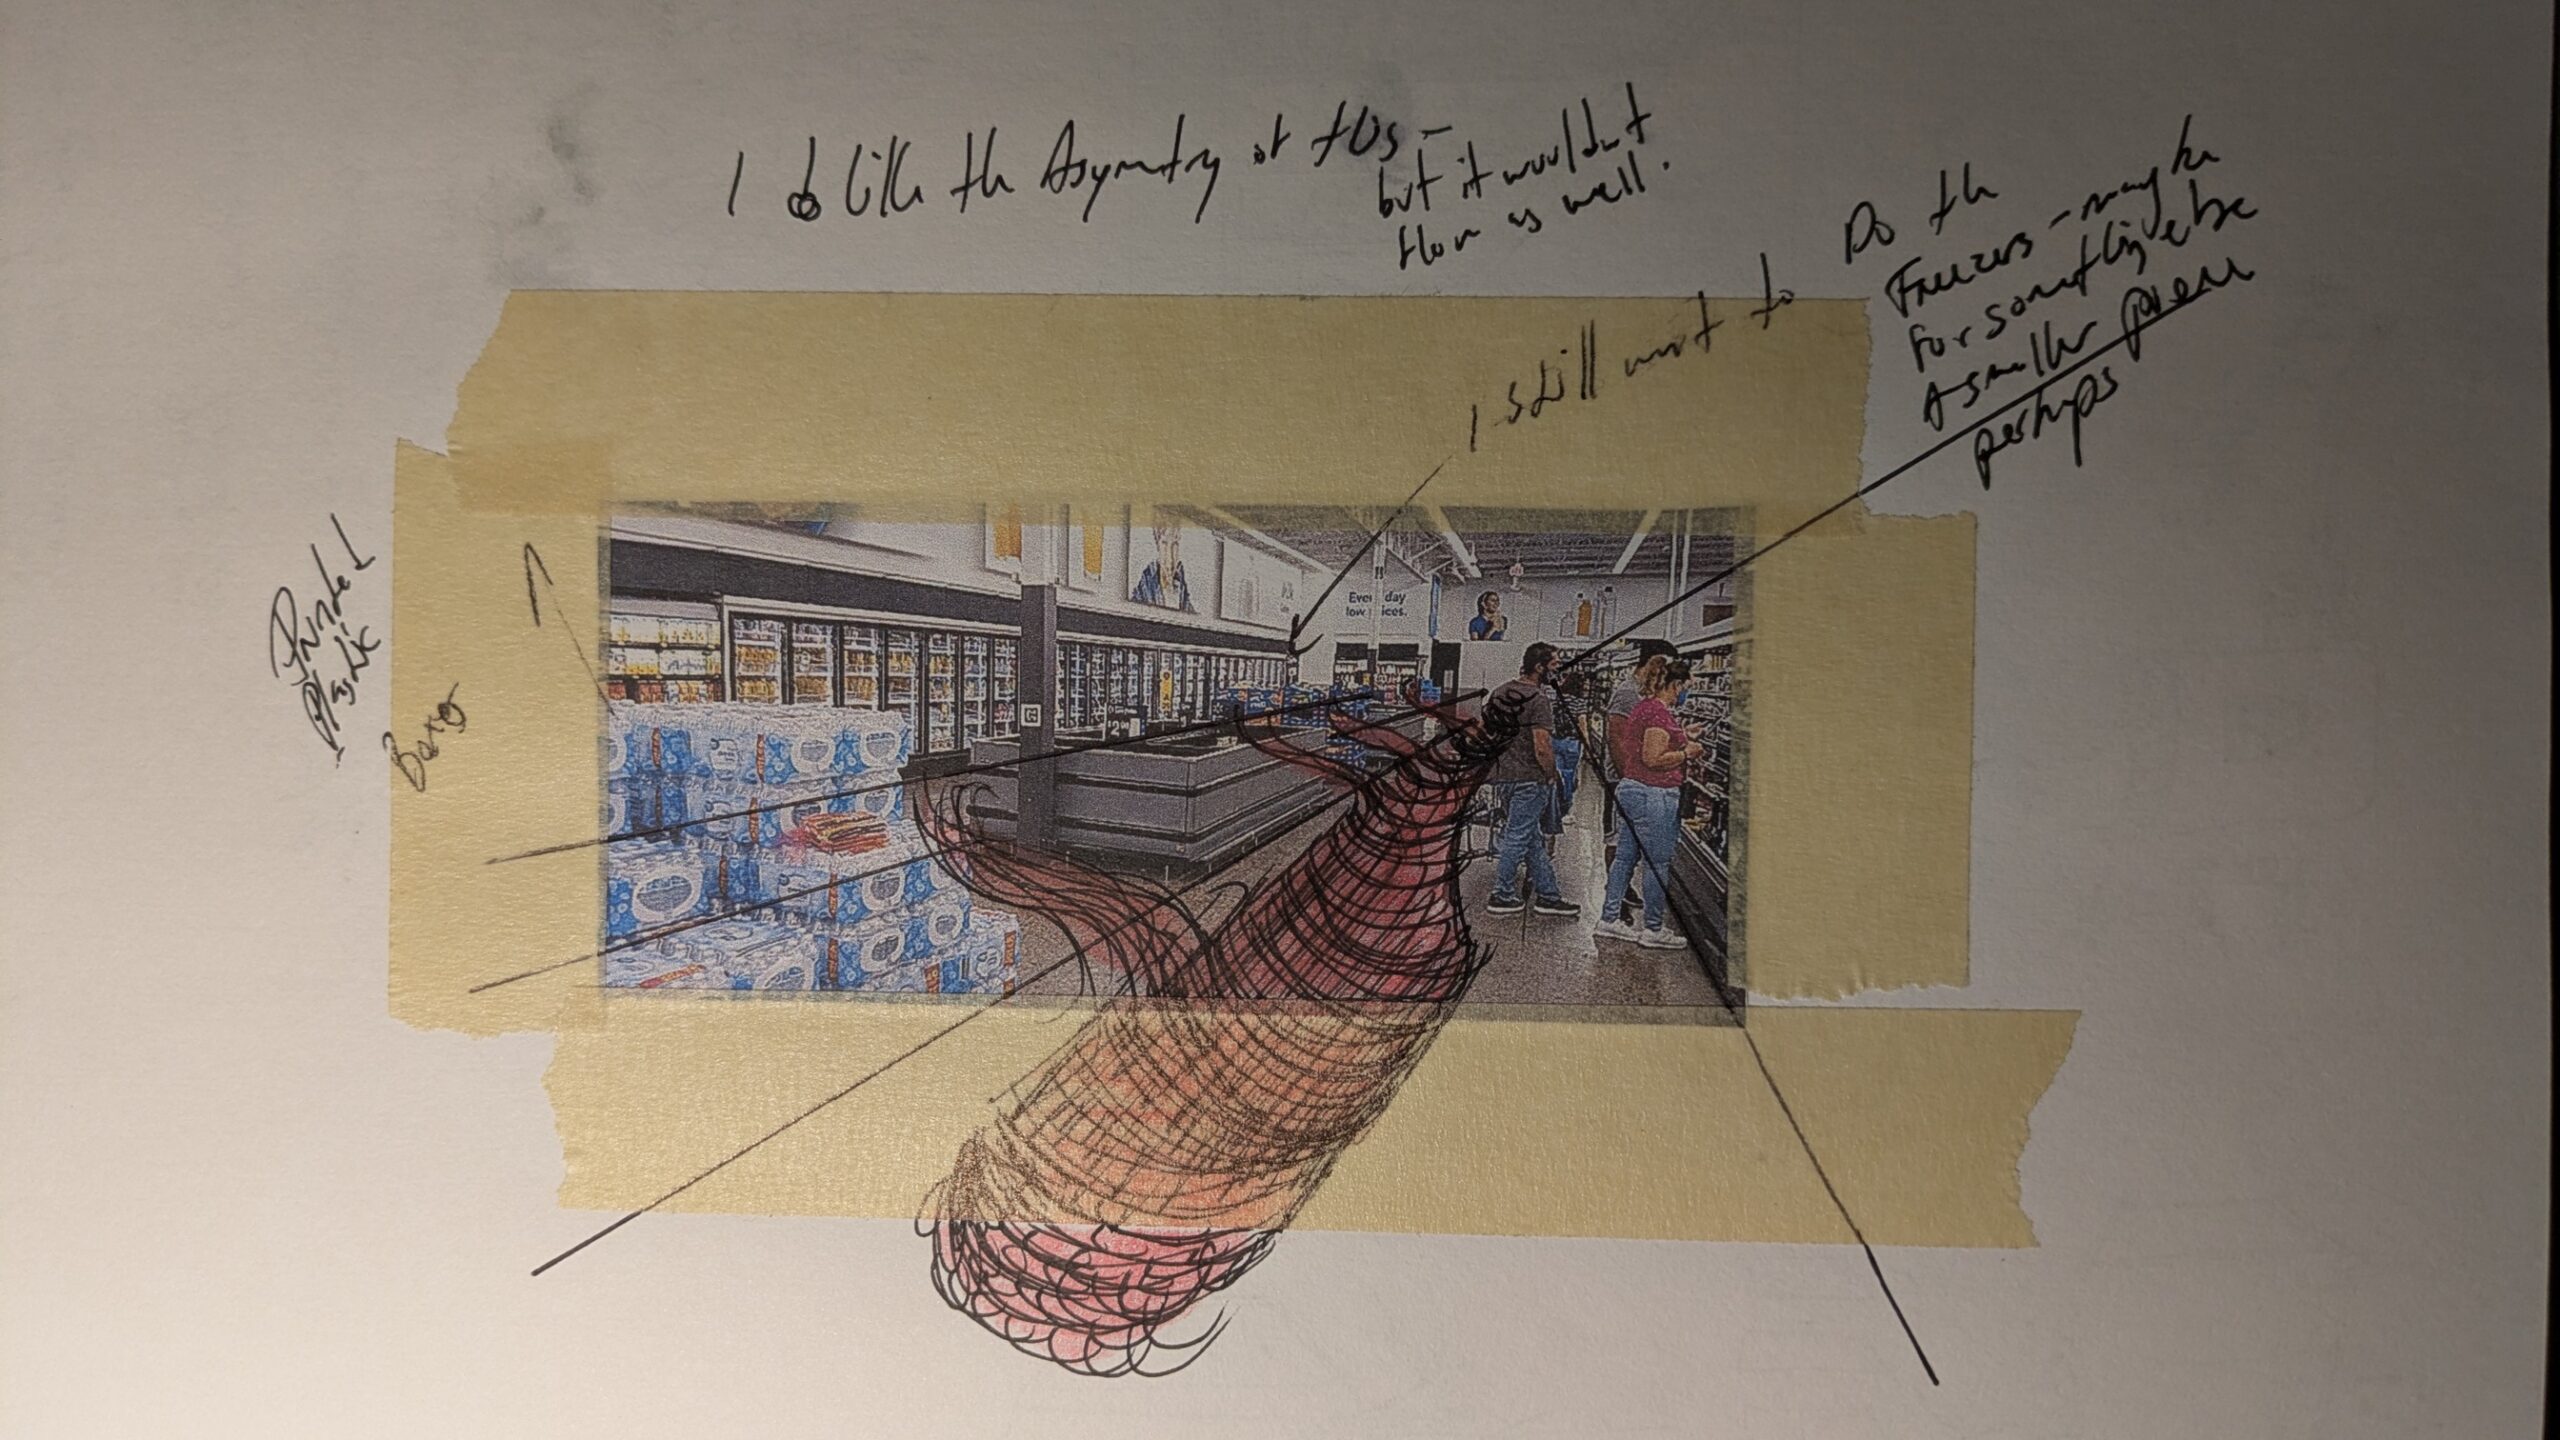
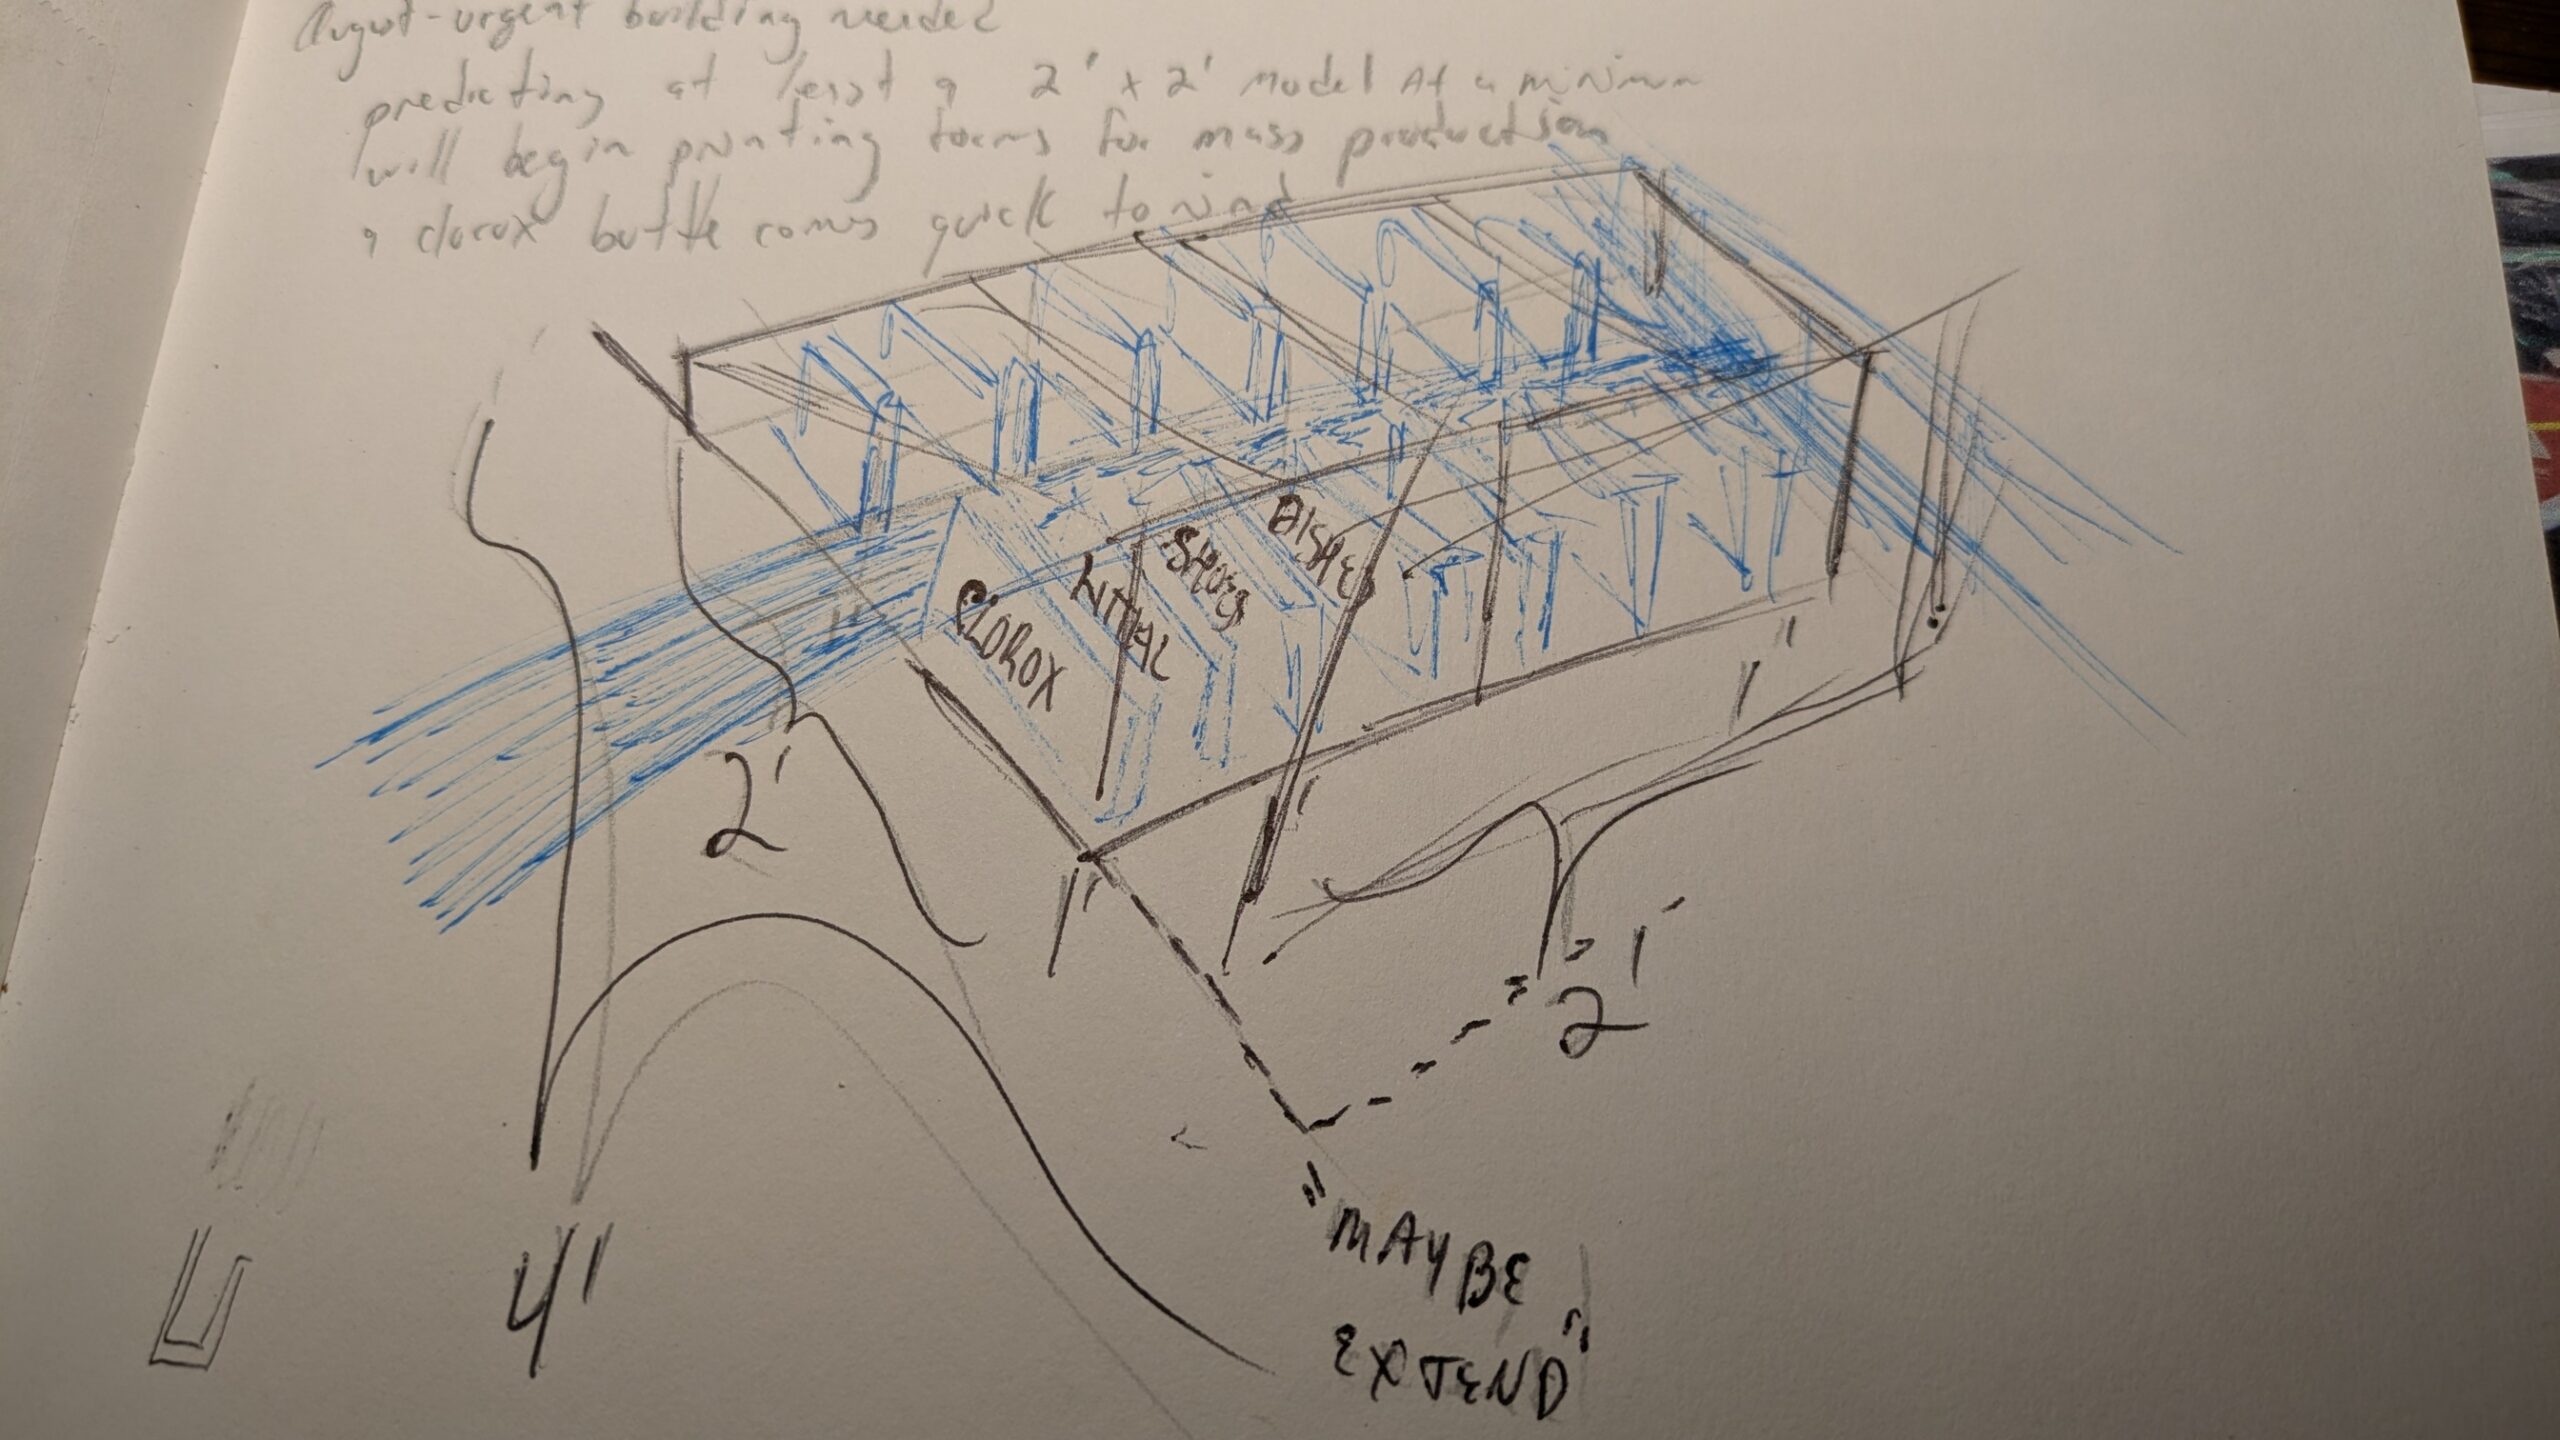
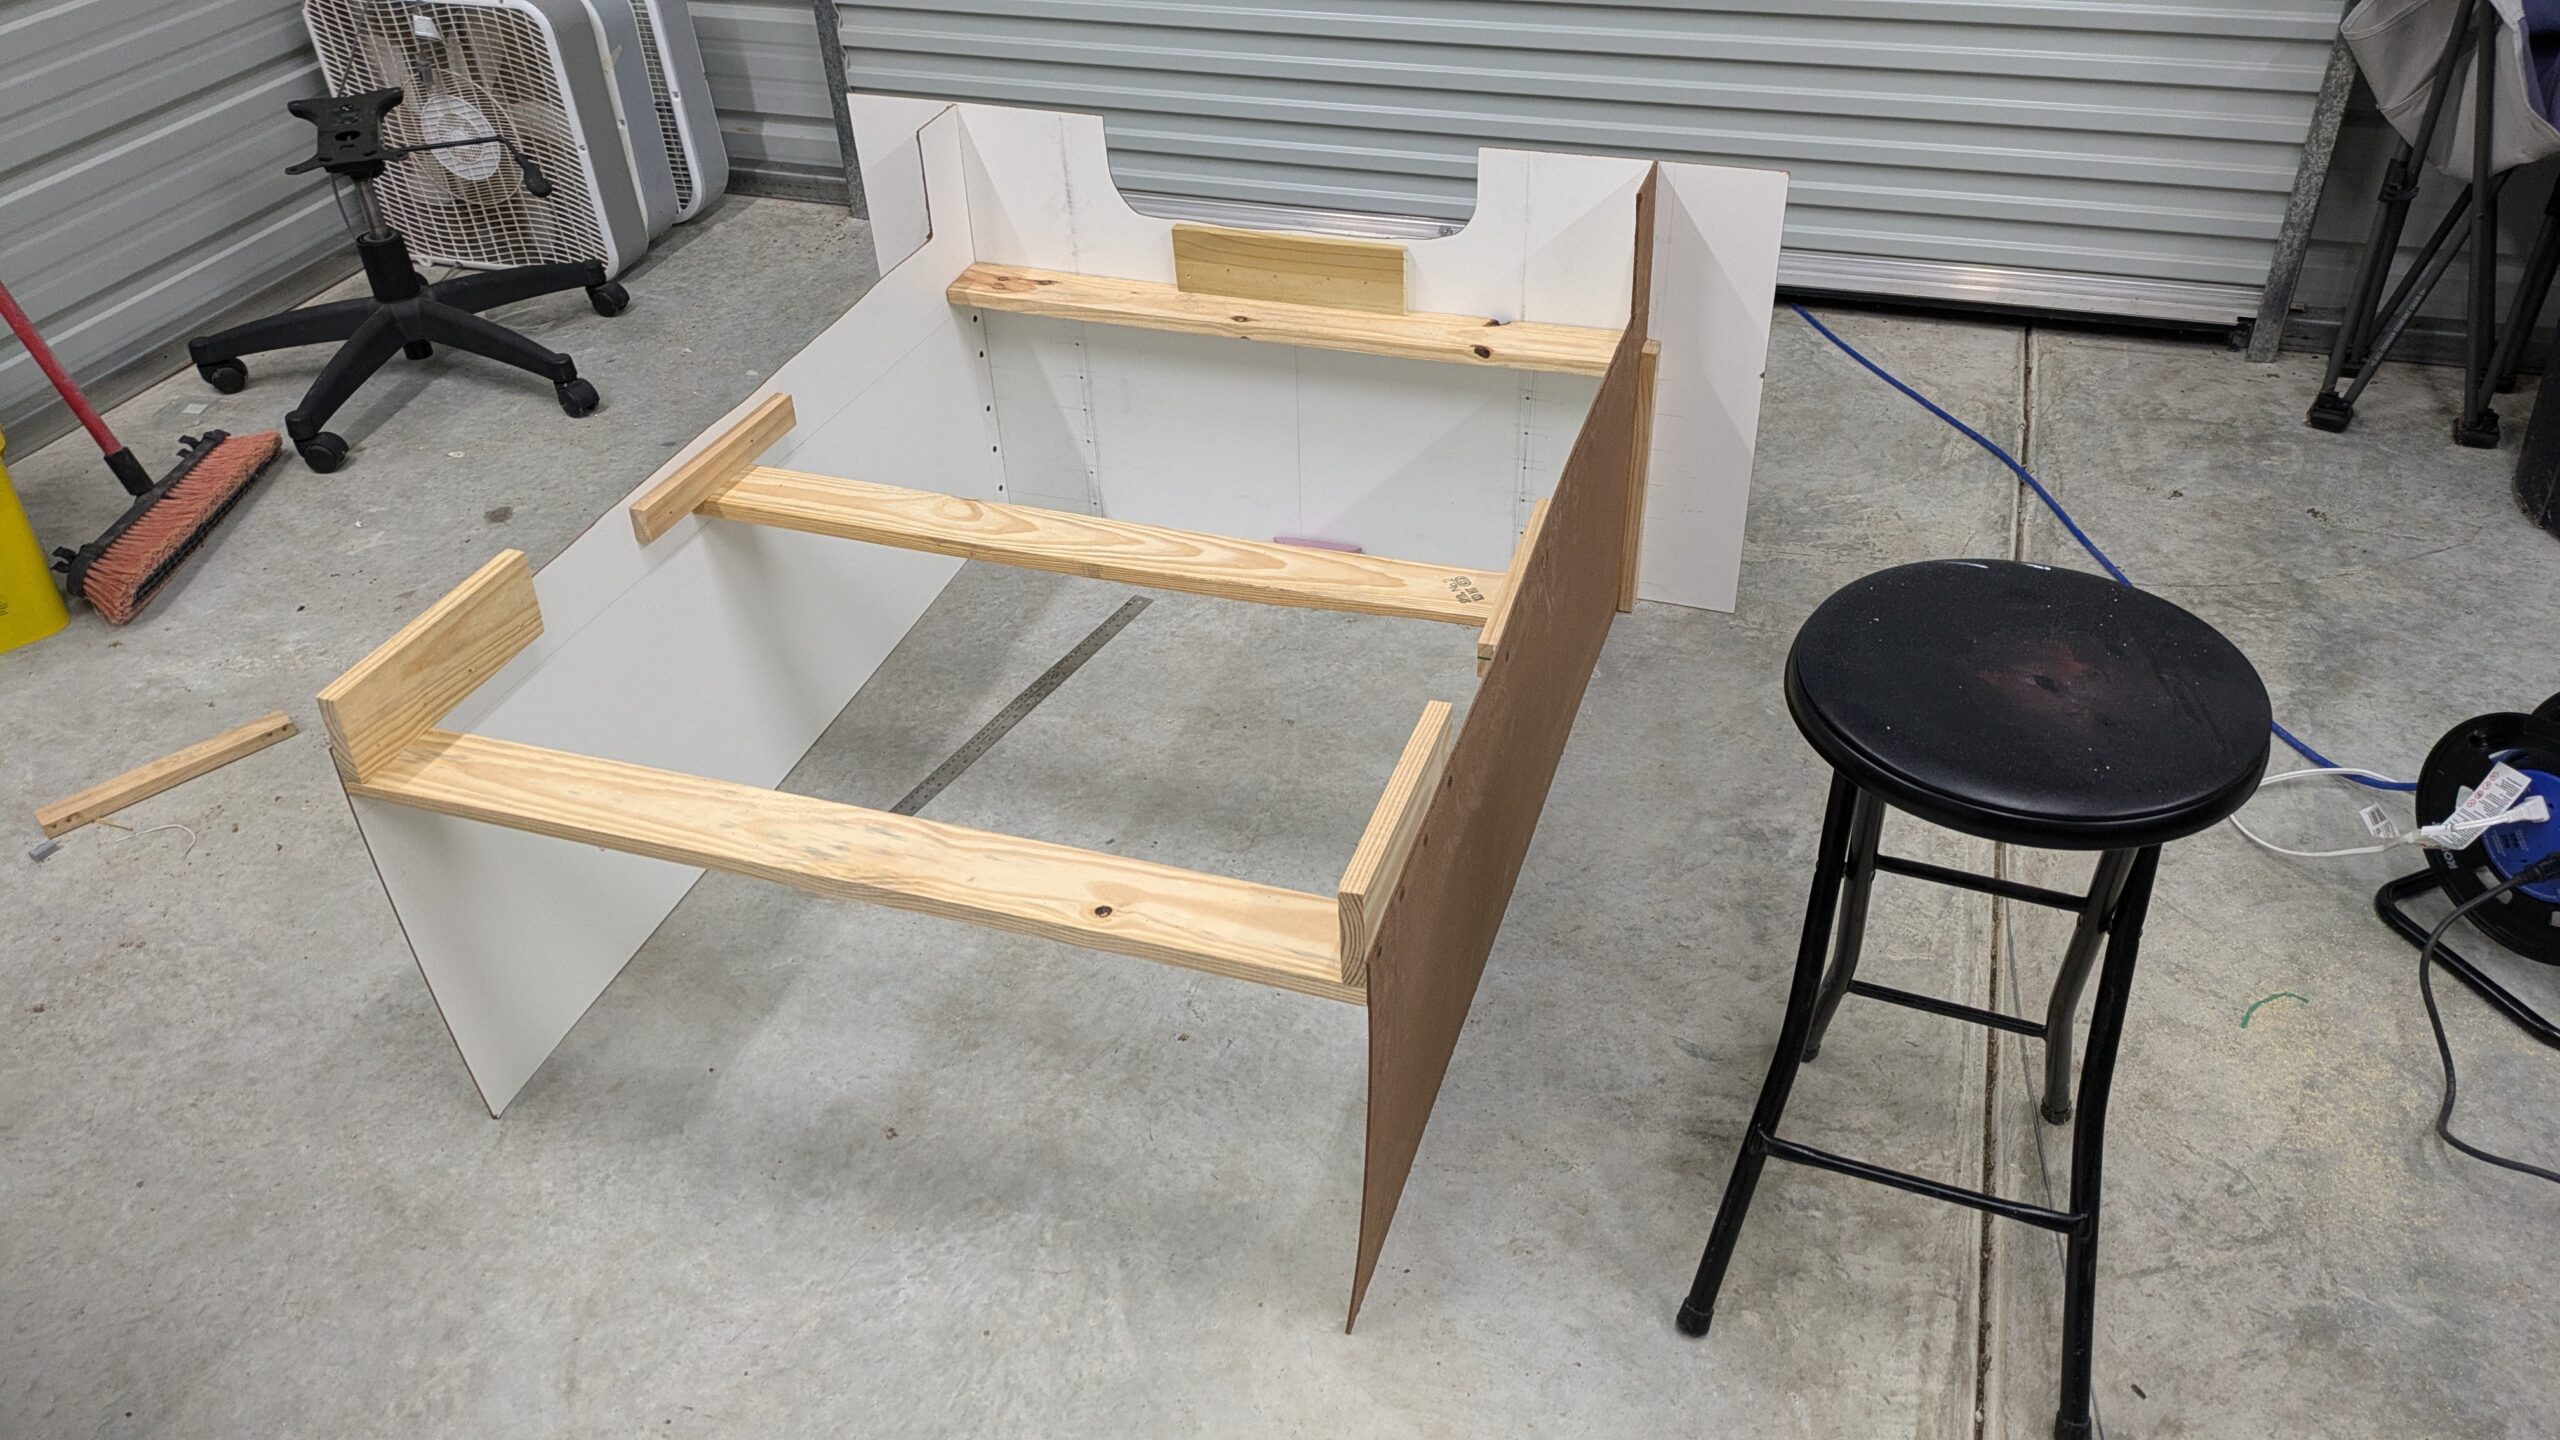
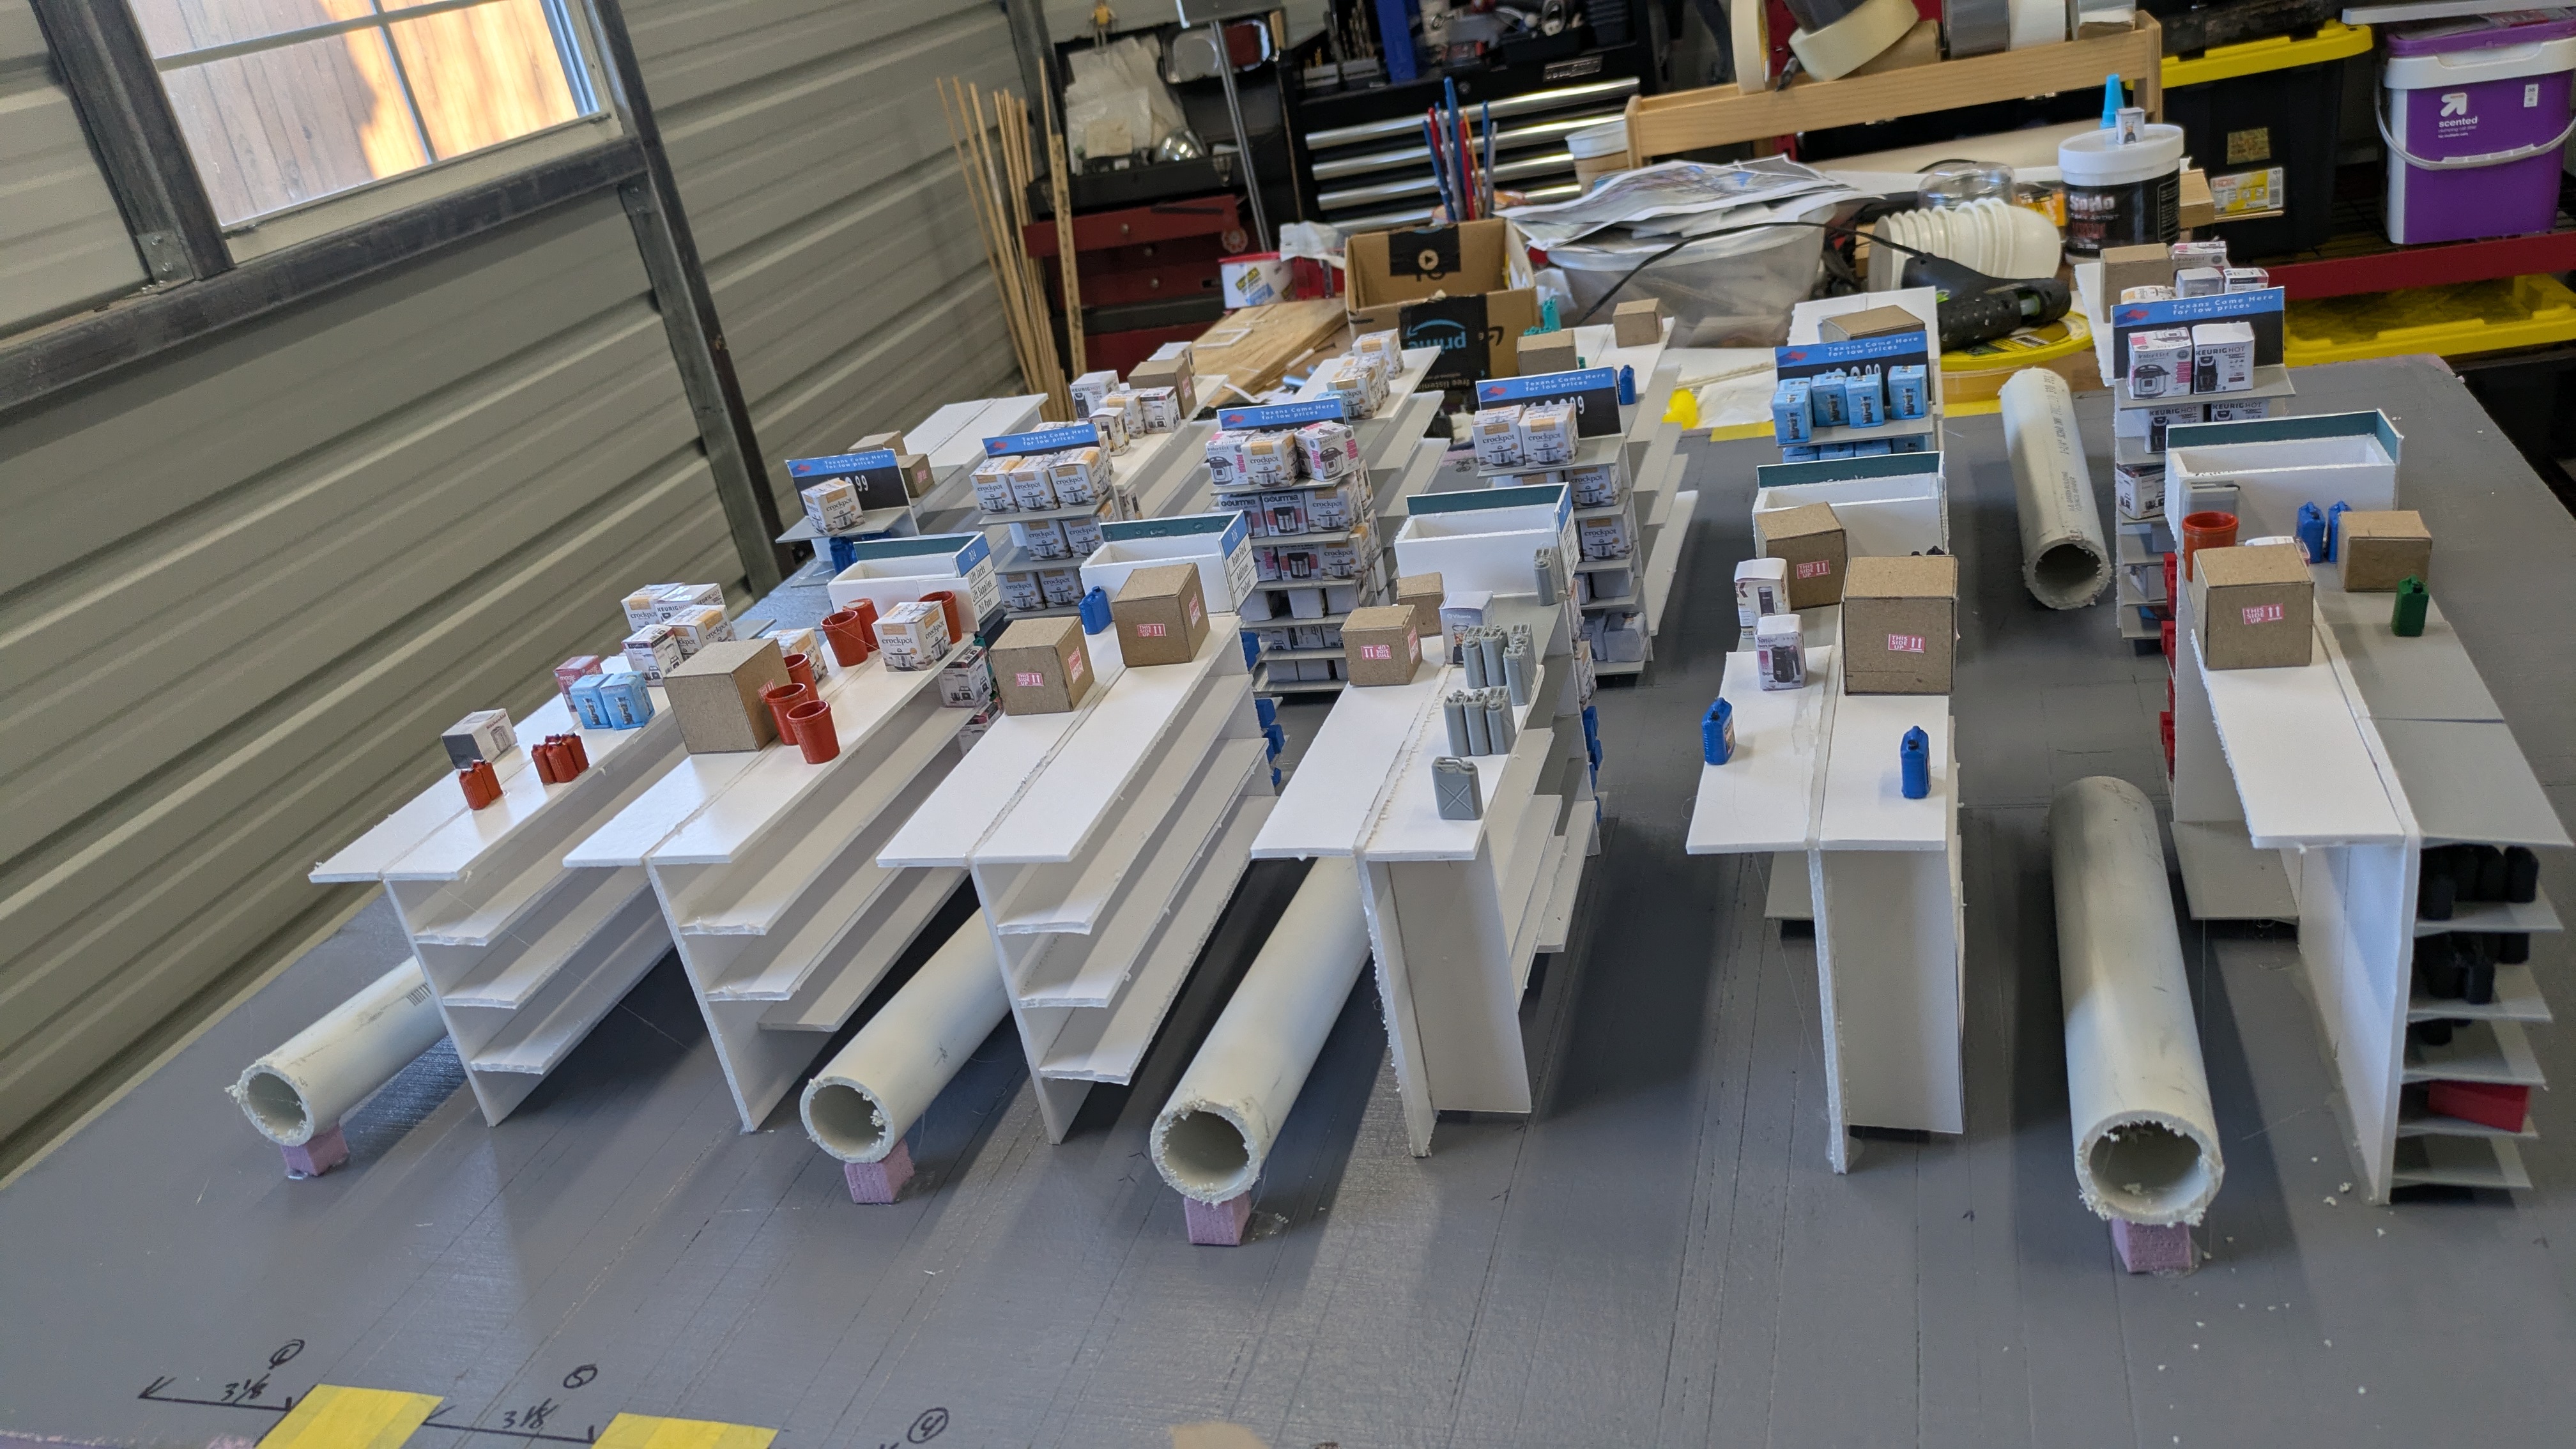
Figuring out the size of the model was quite tricky as I didn’t know how long, wide or tall to make any part of the model- making a whole store was not going to be possible or realistic so settling on a set of aisles was the next best choice as it could capture a good part of the scenery while focusing on the action that could happen within the frame.
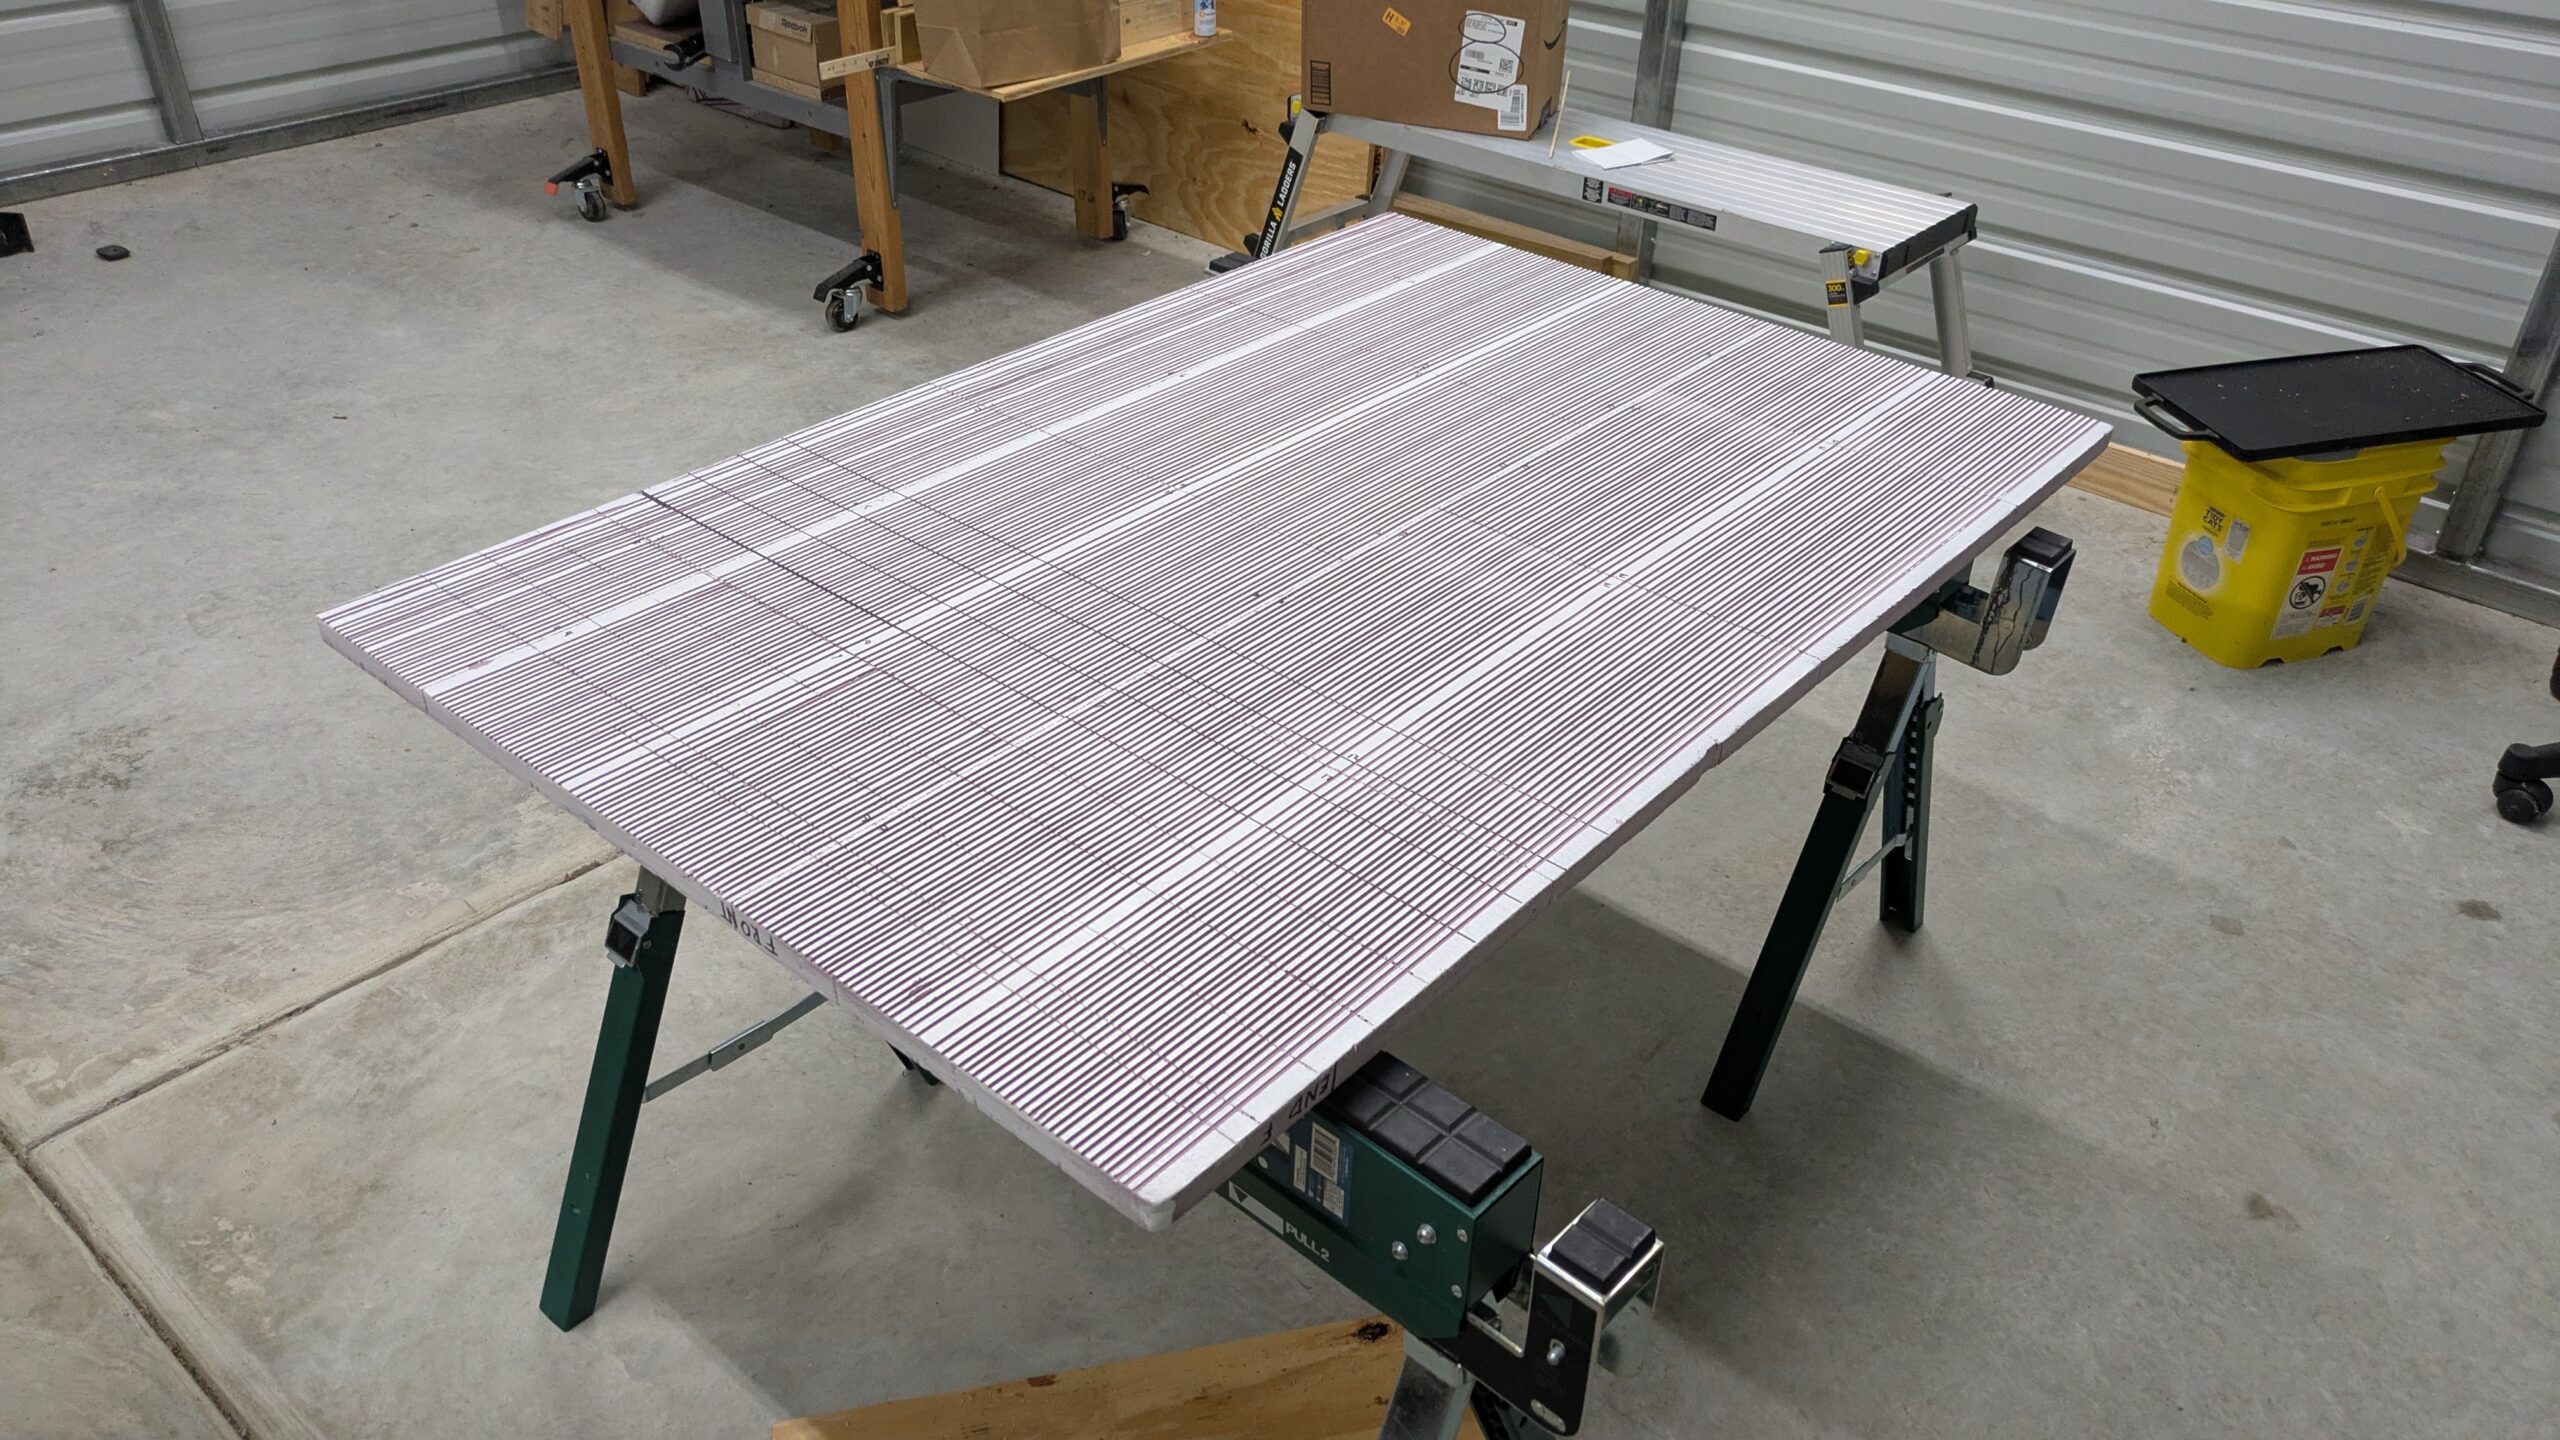
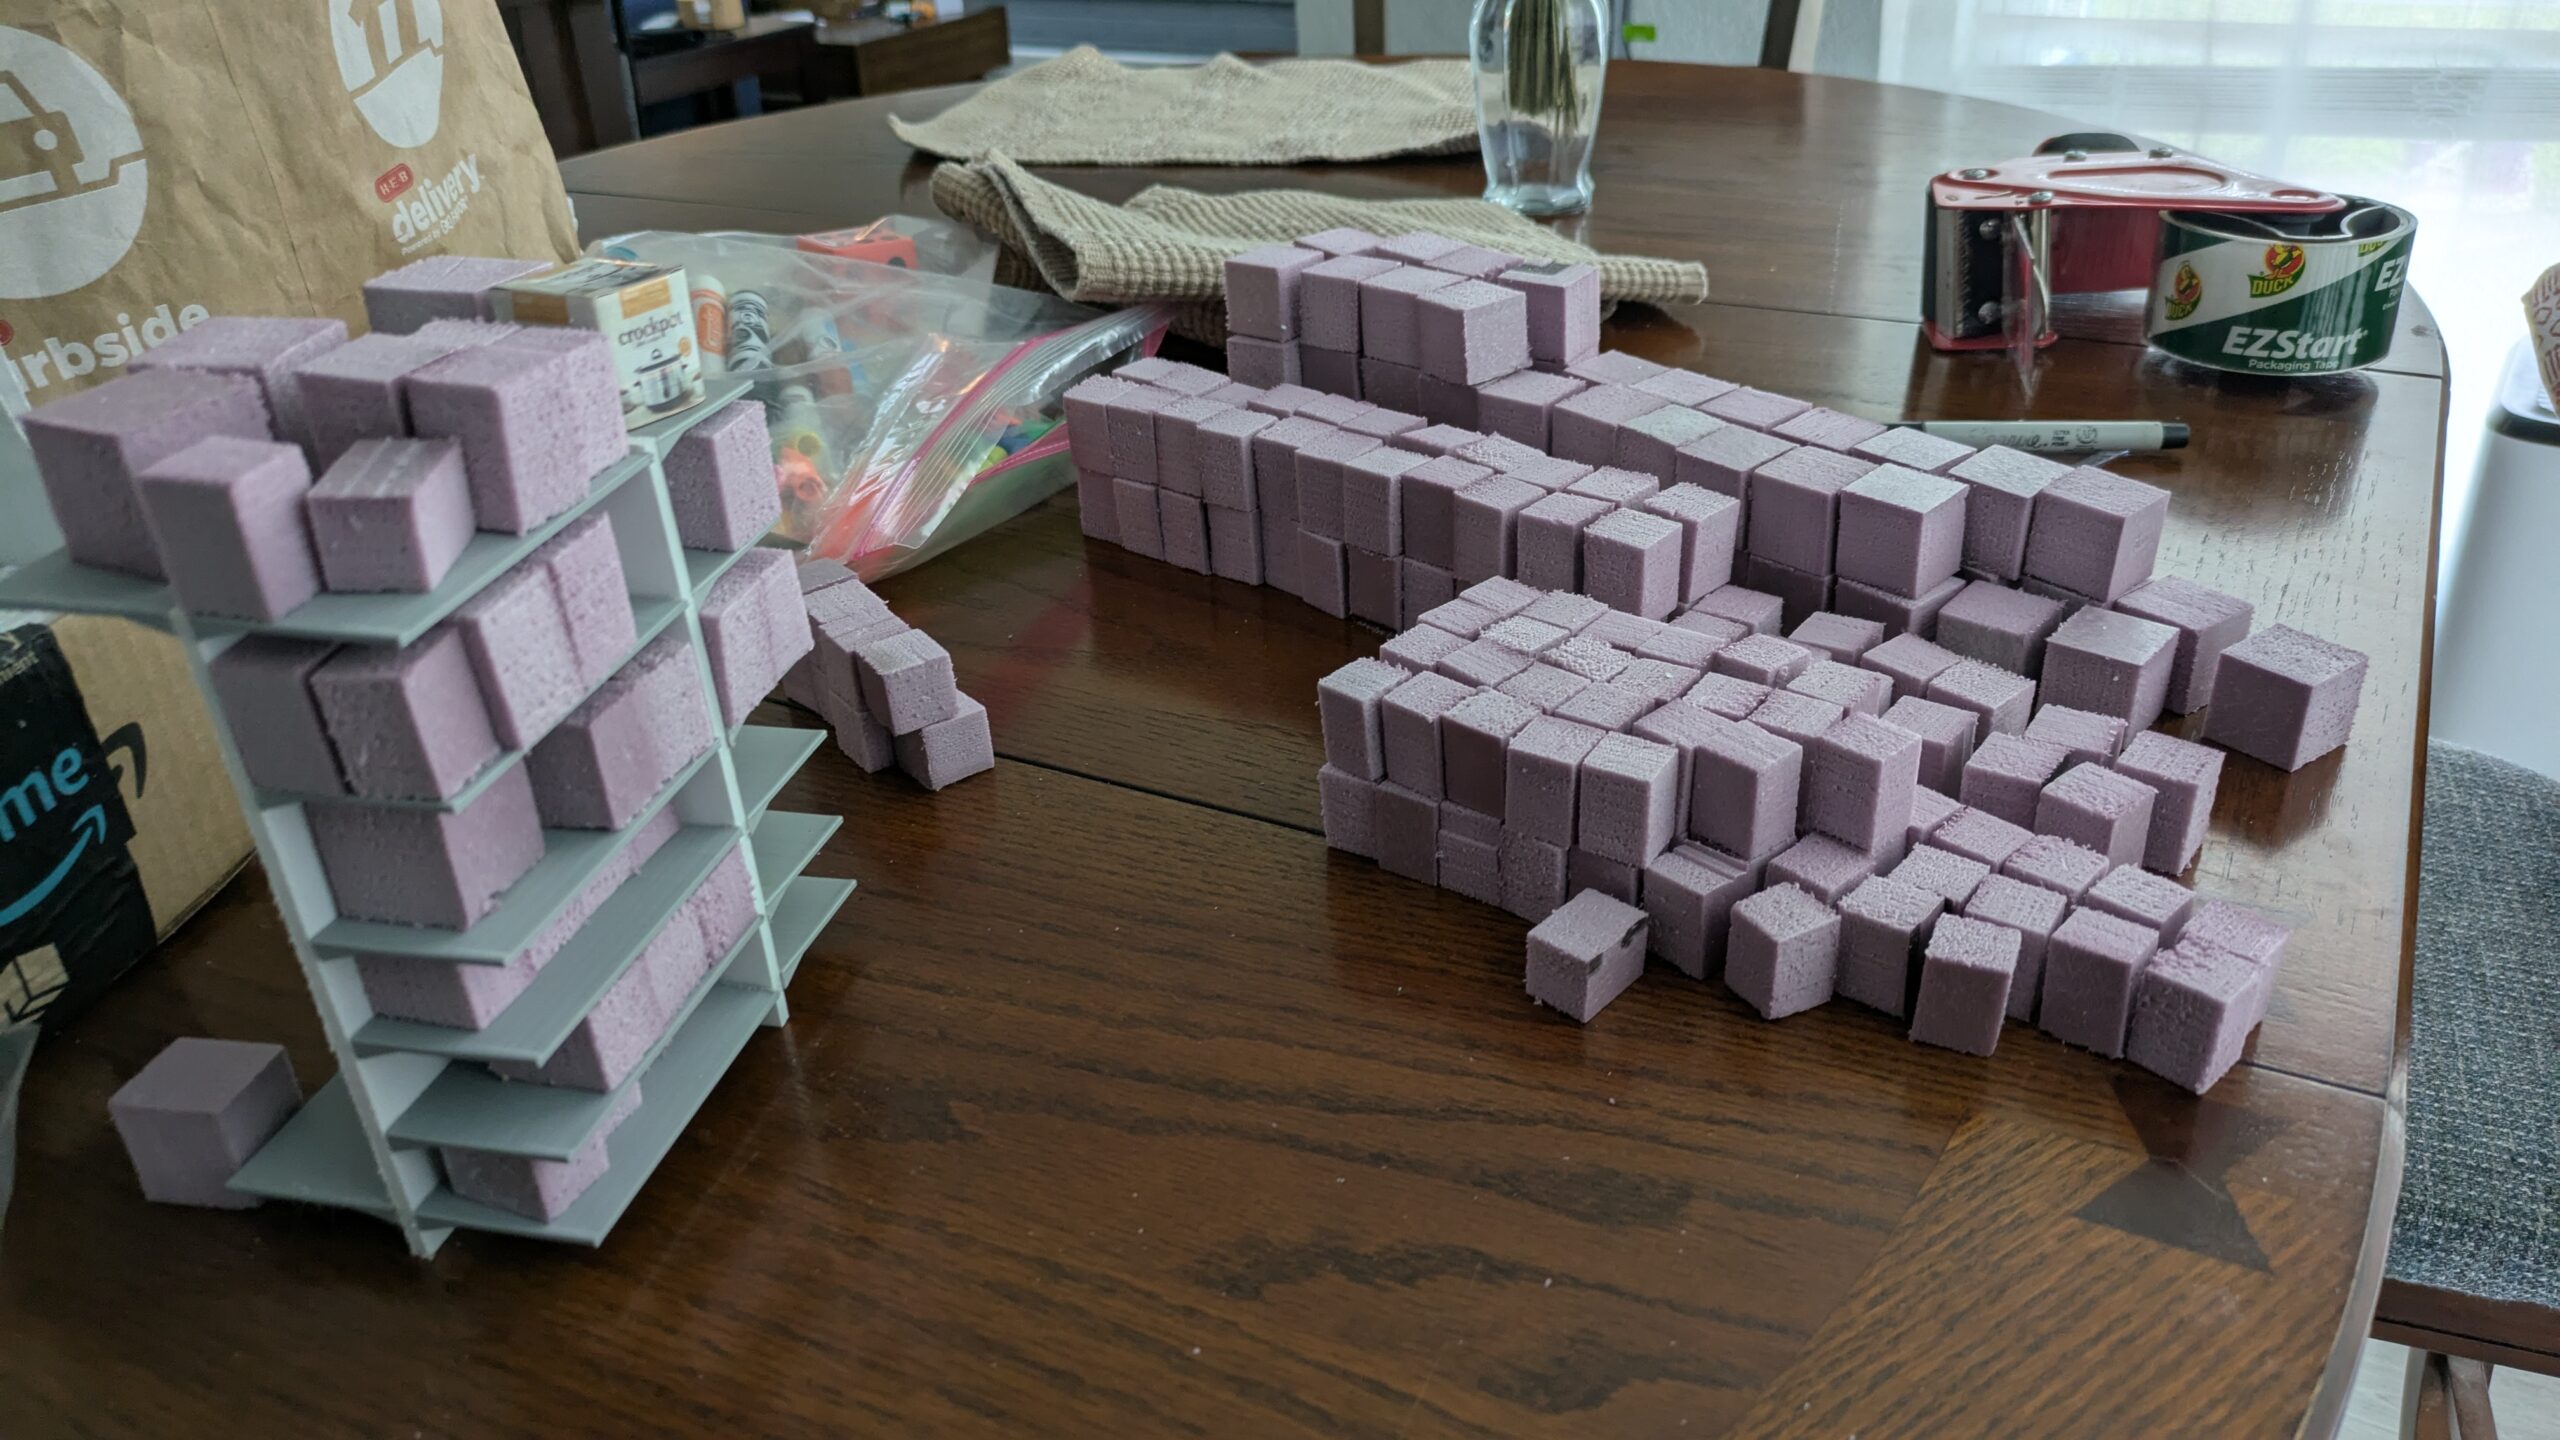
The initial phase of the set was built out of Masonite board and foam board for both the flooring and the celling. Early prototypes of the shelving units proved cardboard construction was not going to be able to hold the amount of weight possible for each shelf. 3D printing units on foam were ultimately chosen as replacements to the cardboard.
The amount of sag was too significant to overcome even with so little weight attached to the structures.
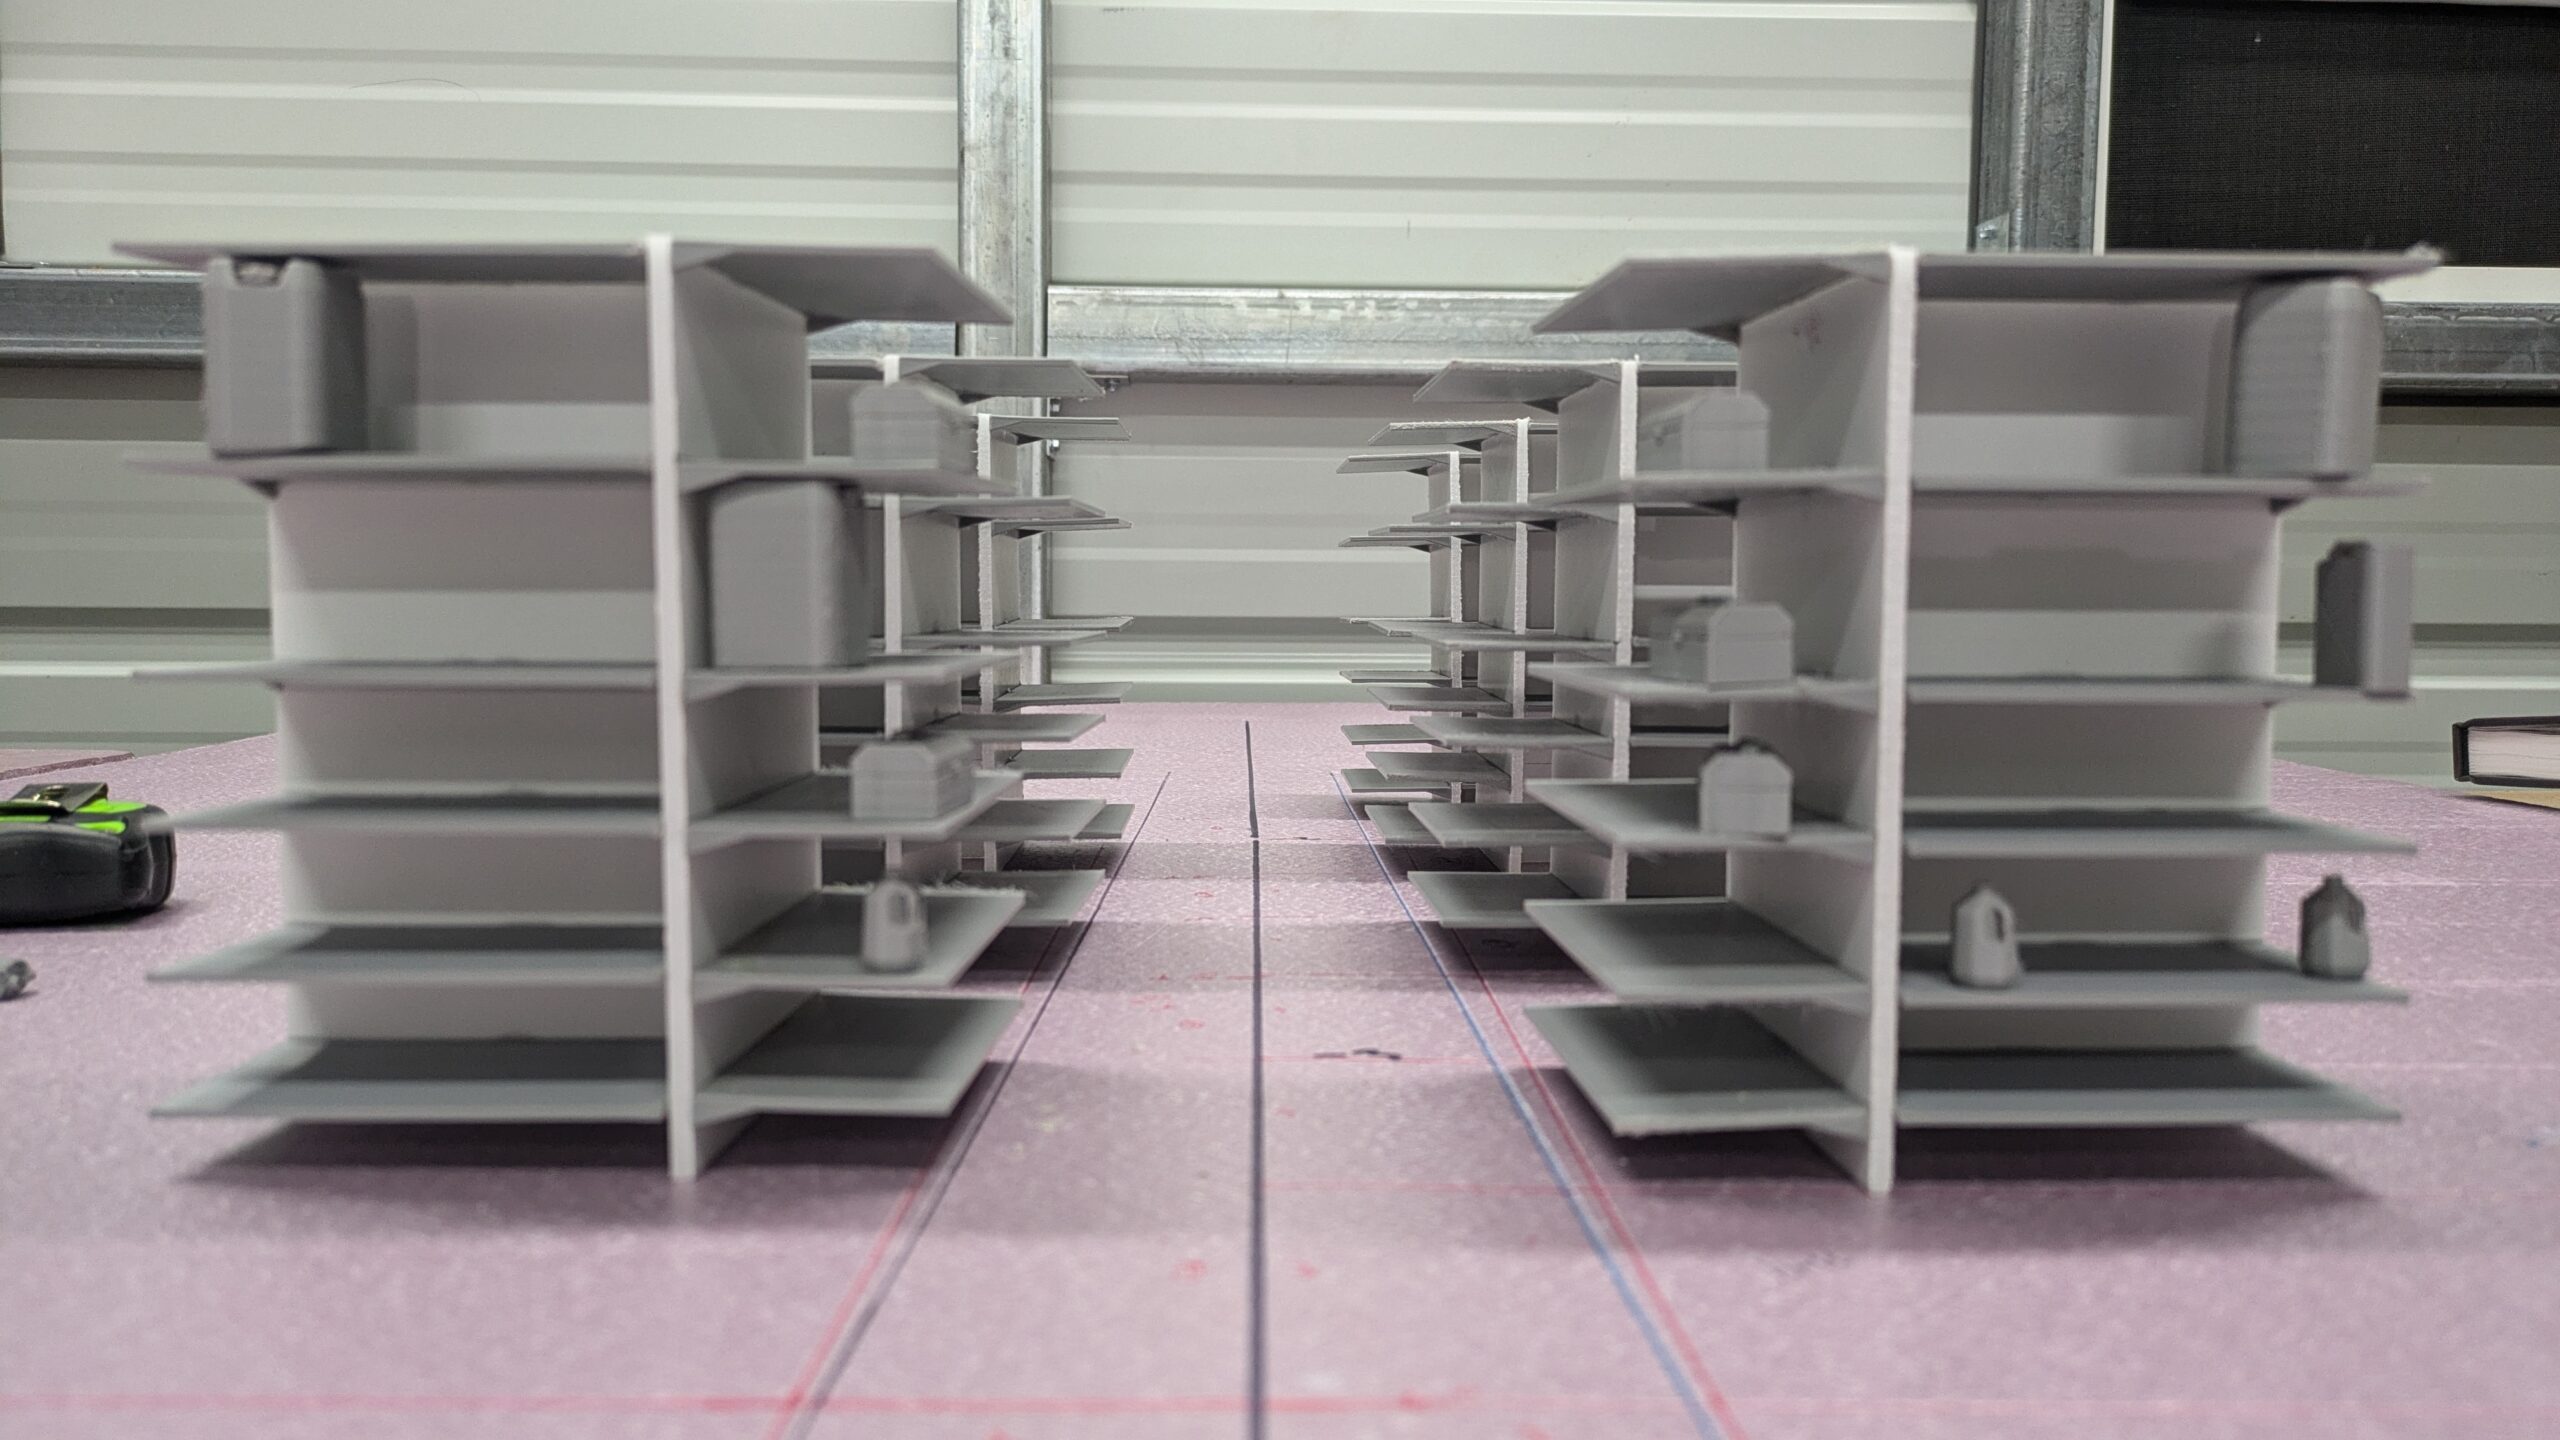
Foam units with 3D printed shelves were much better at both keeping straightness and not sagging as much if the weight overwhelmed the joint. Very early on in the project the idea of forced perspective was considered to add to the illusion of depth within the space- although the set was long I wanted it to look longer than it actually was.
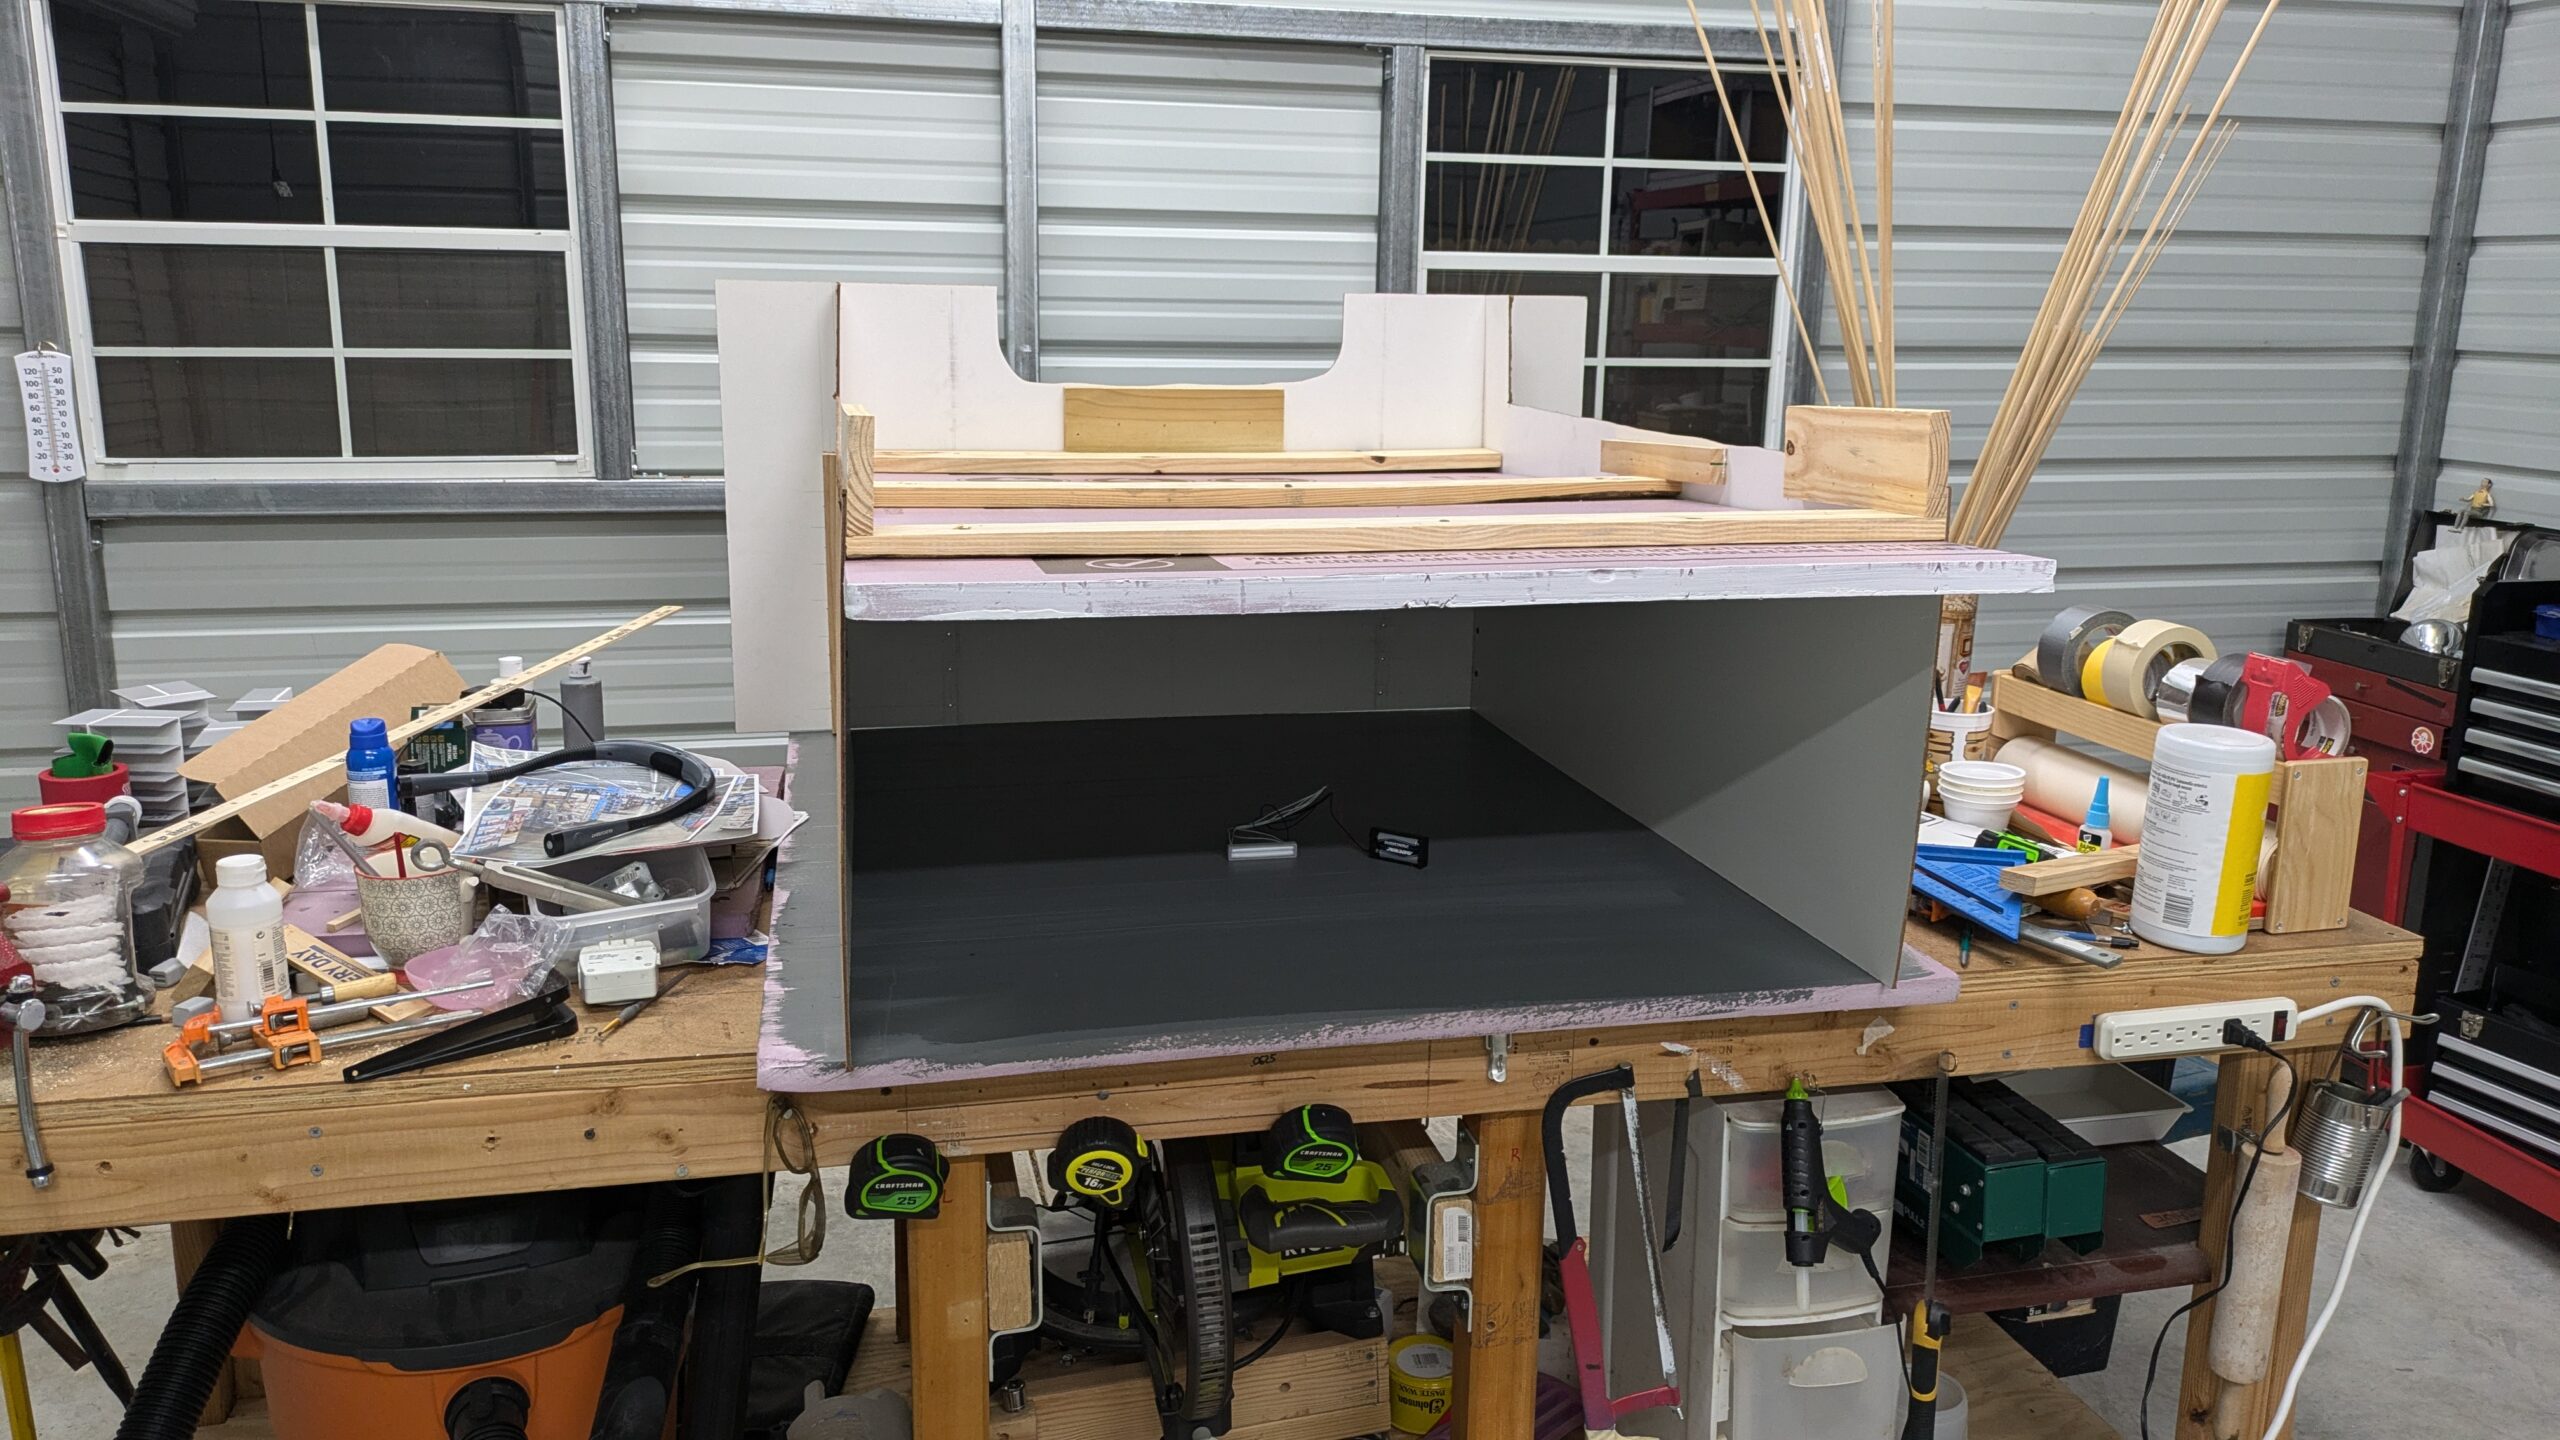
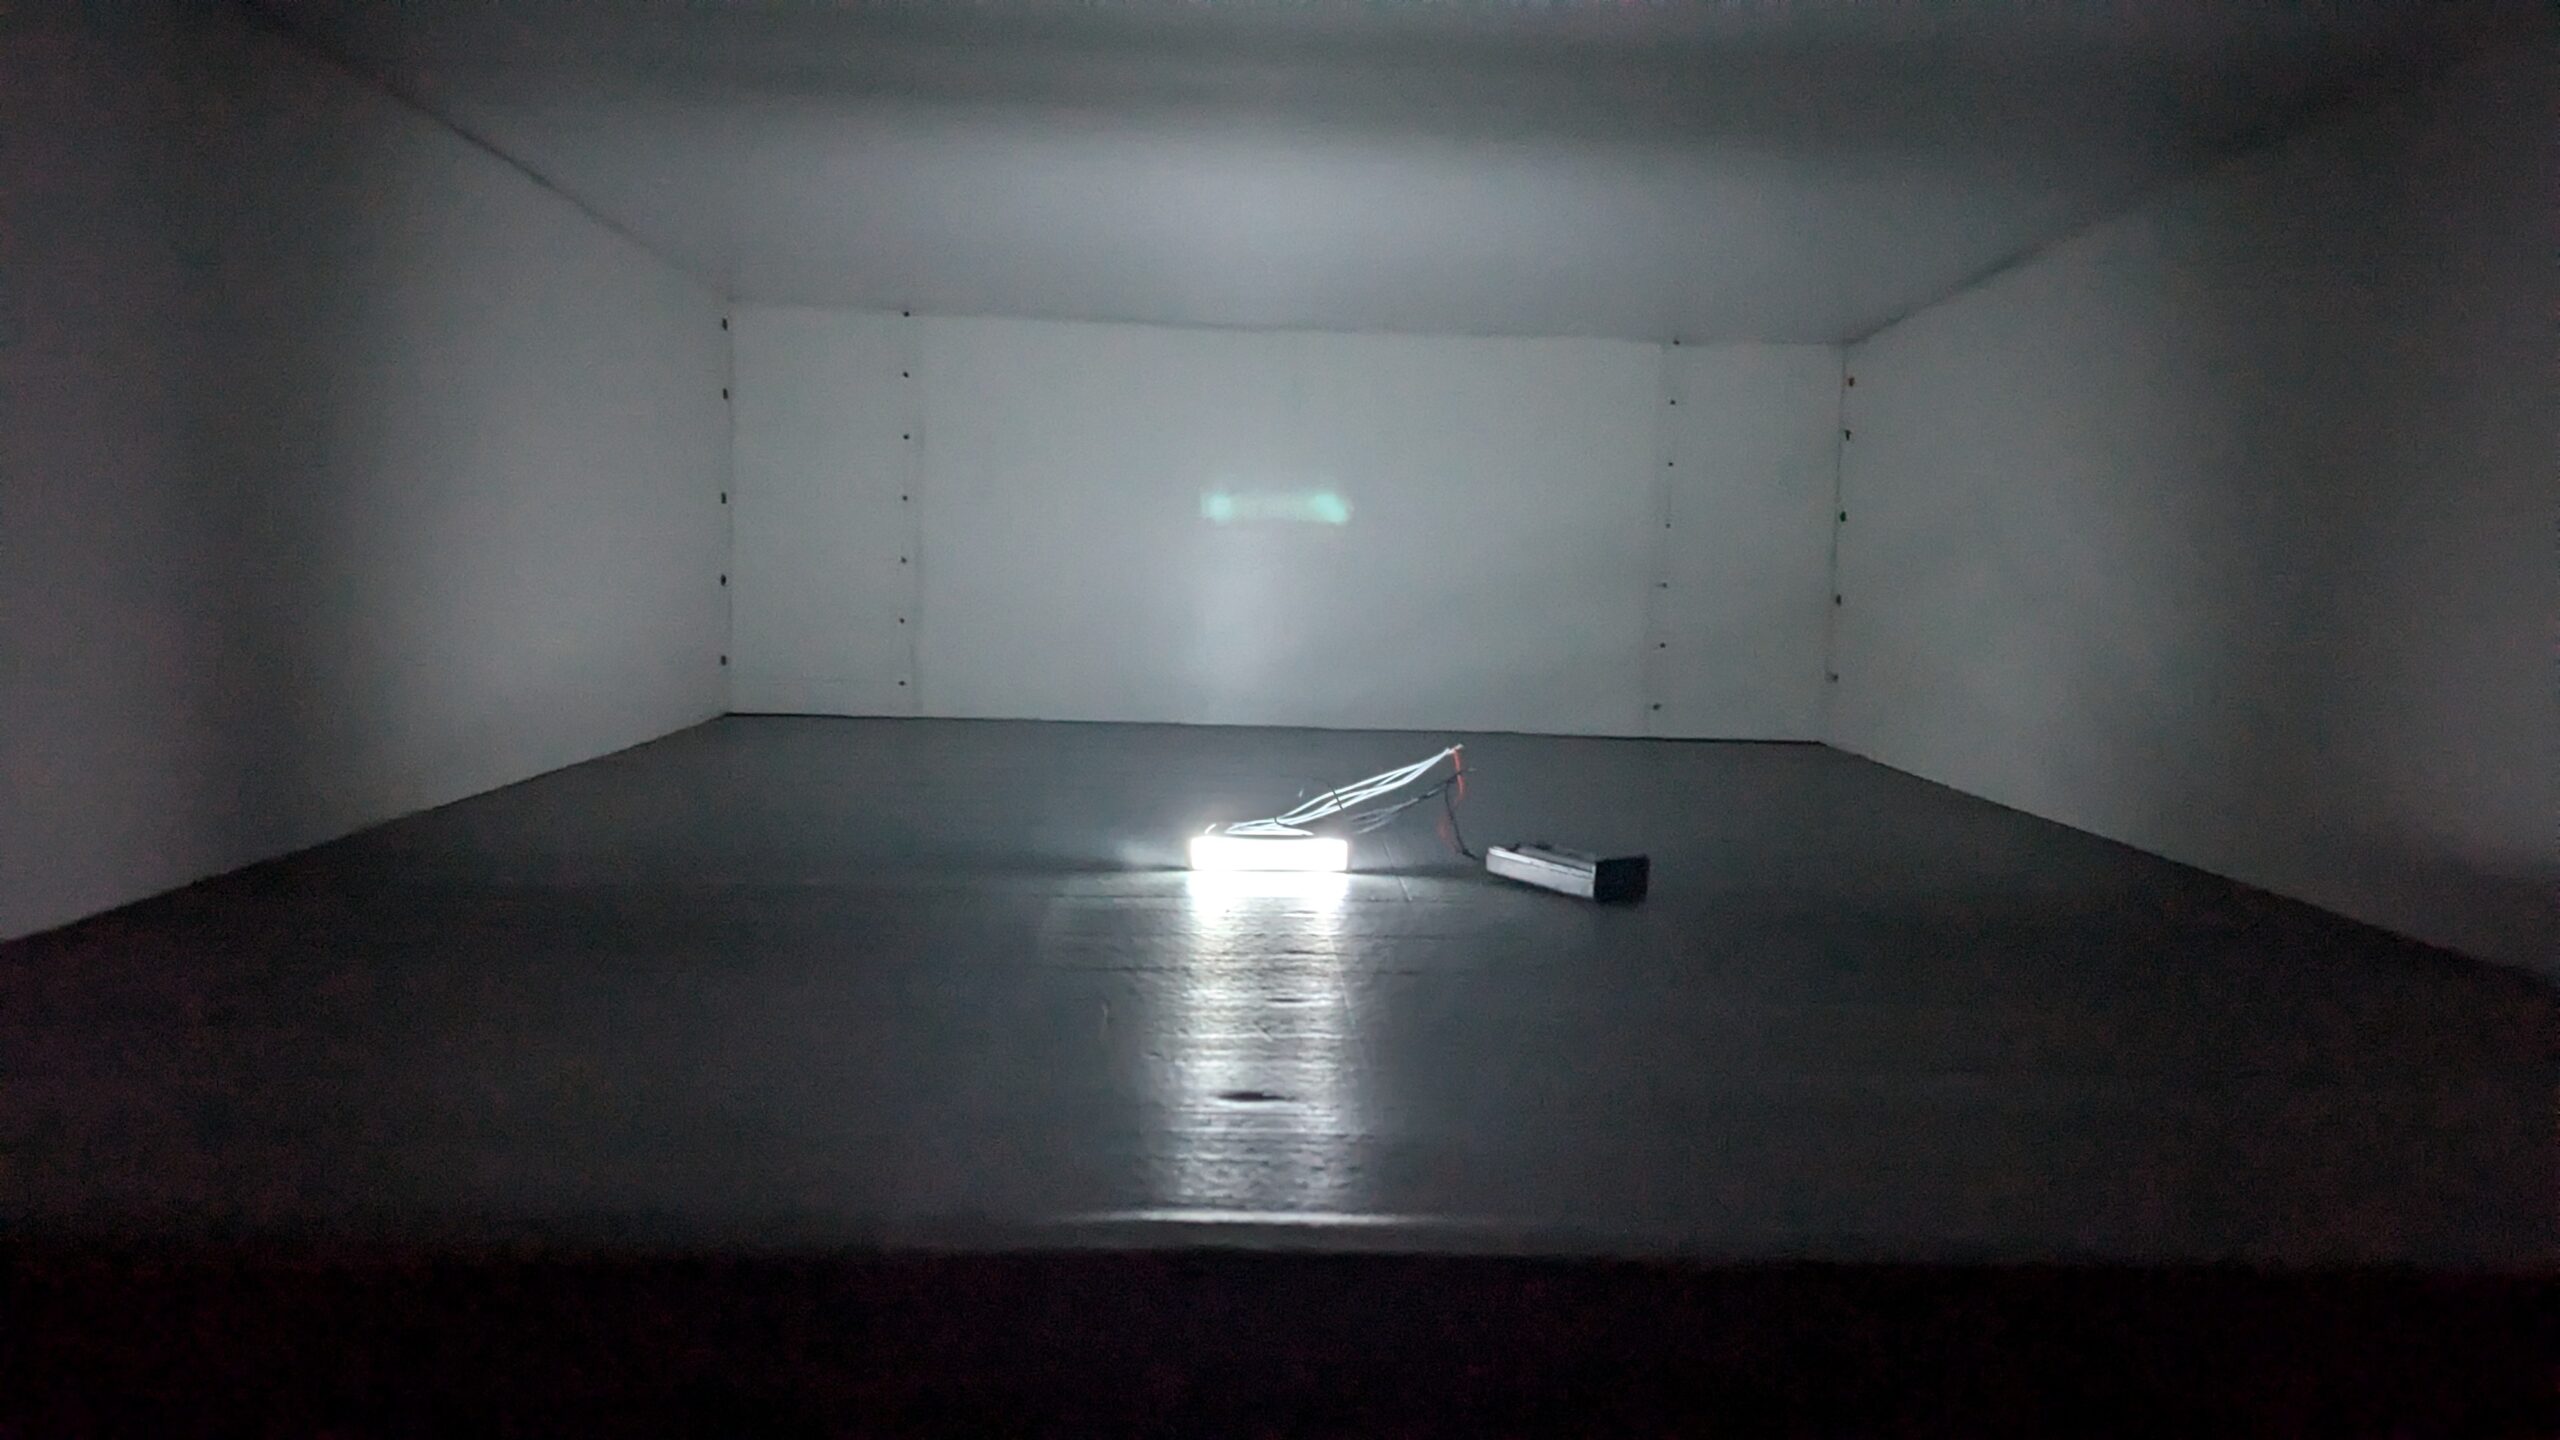
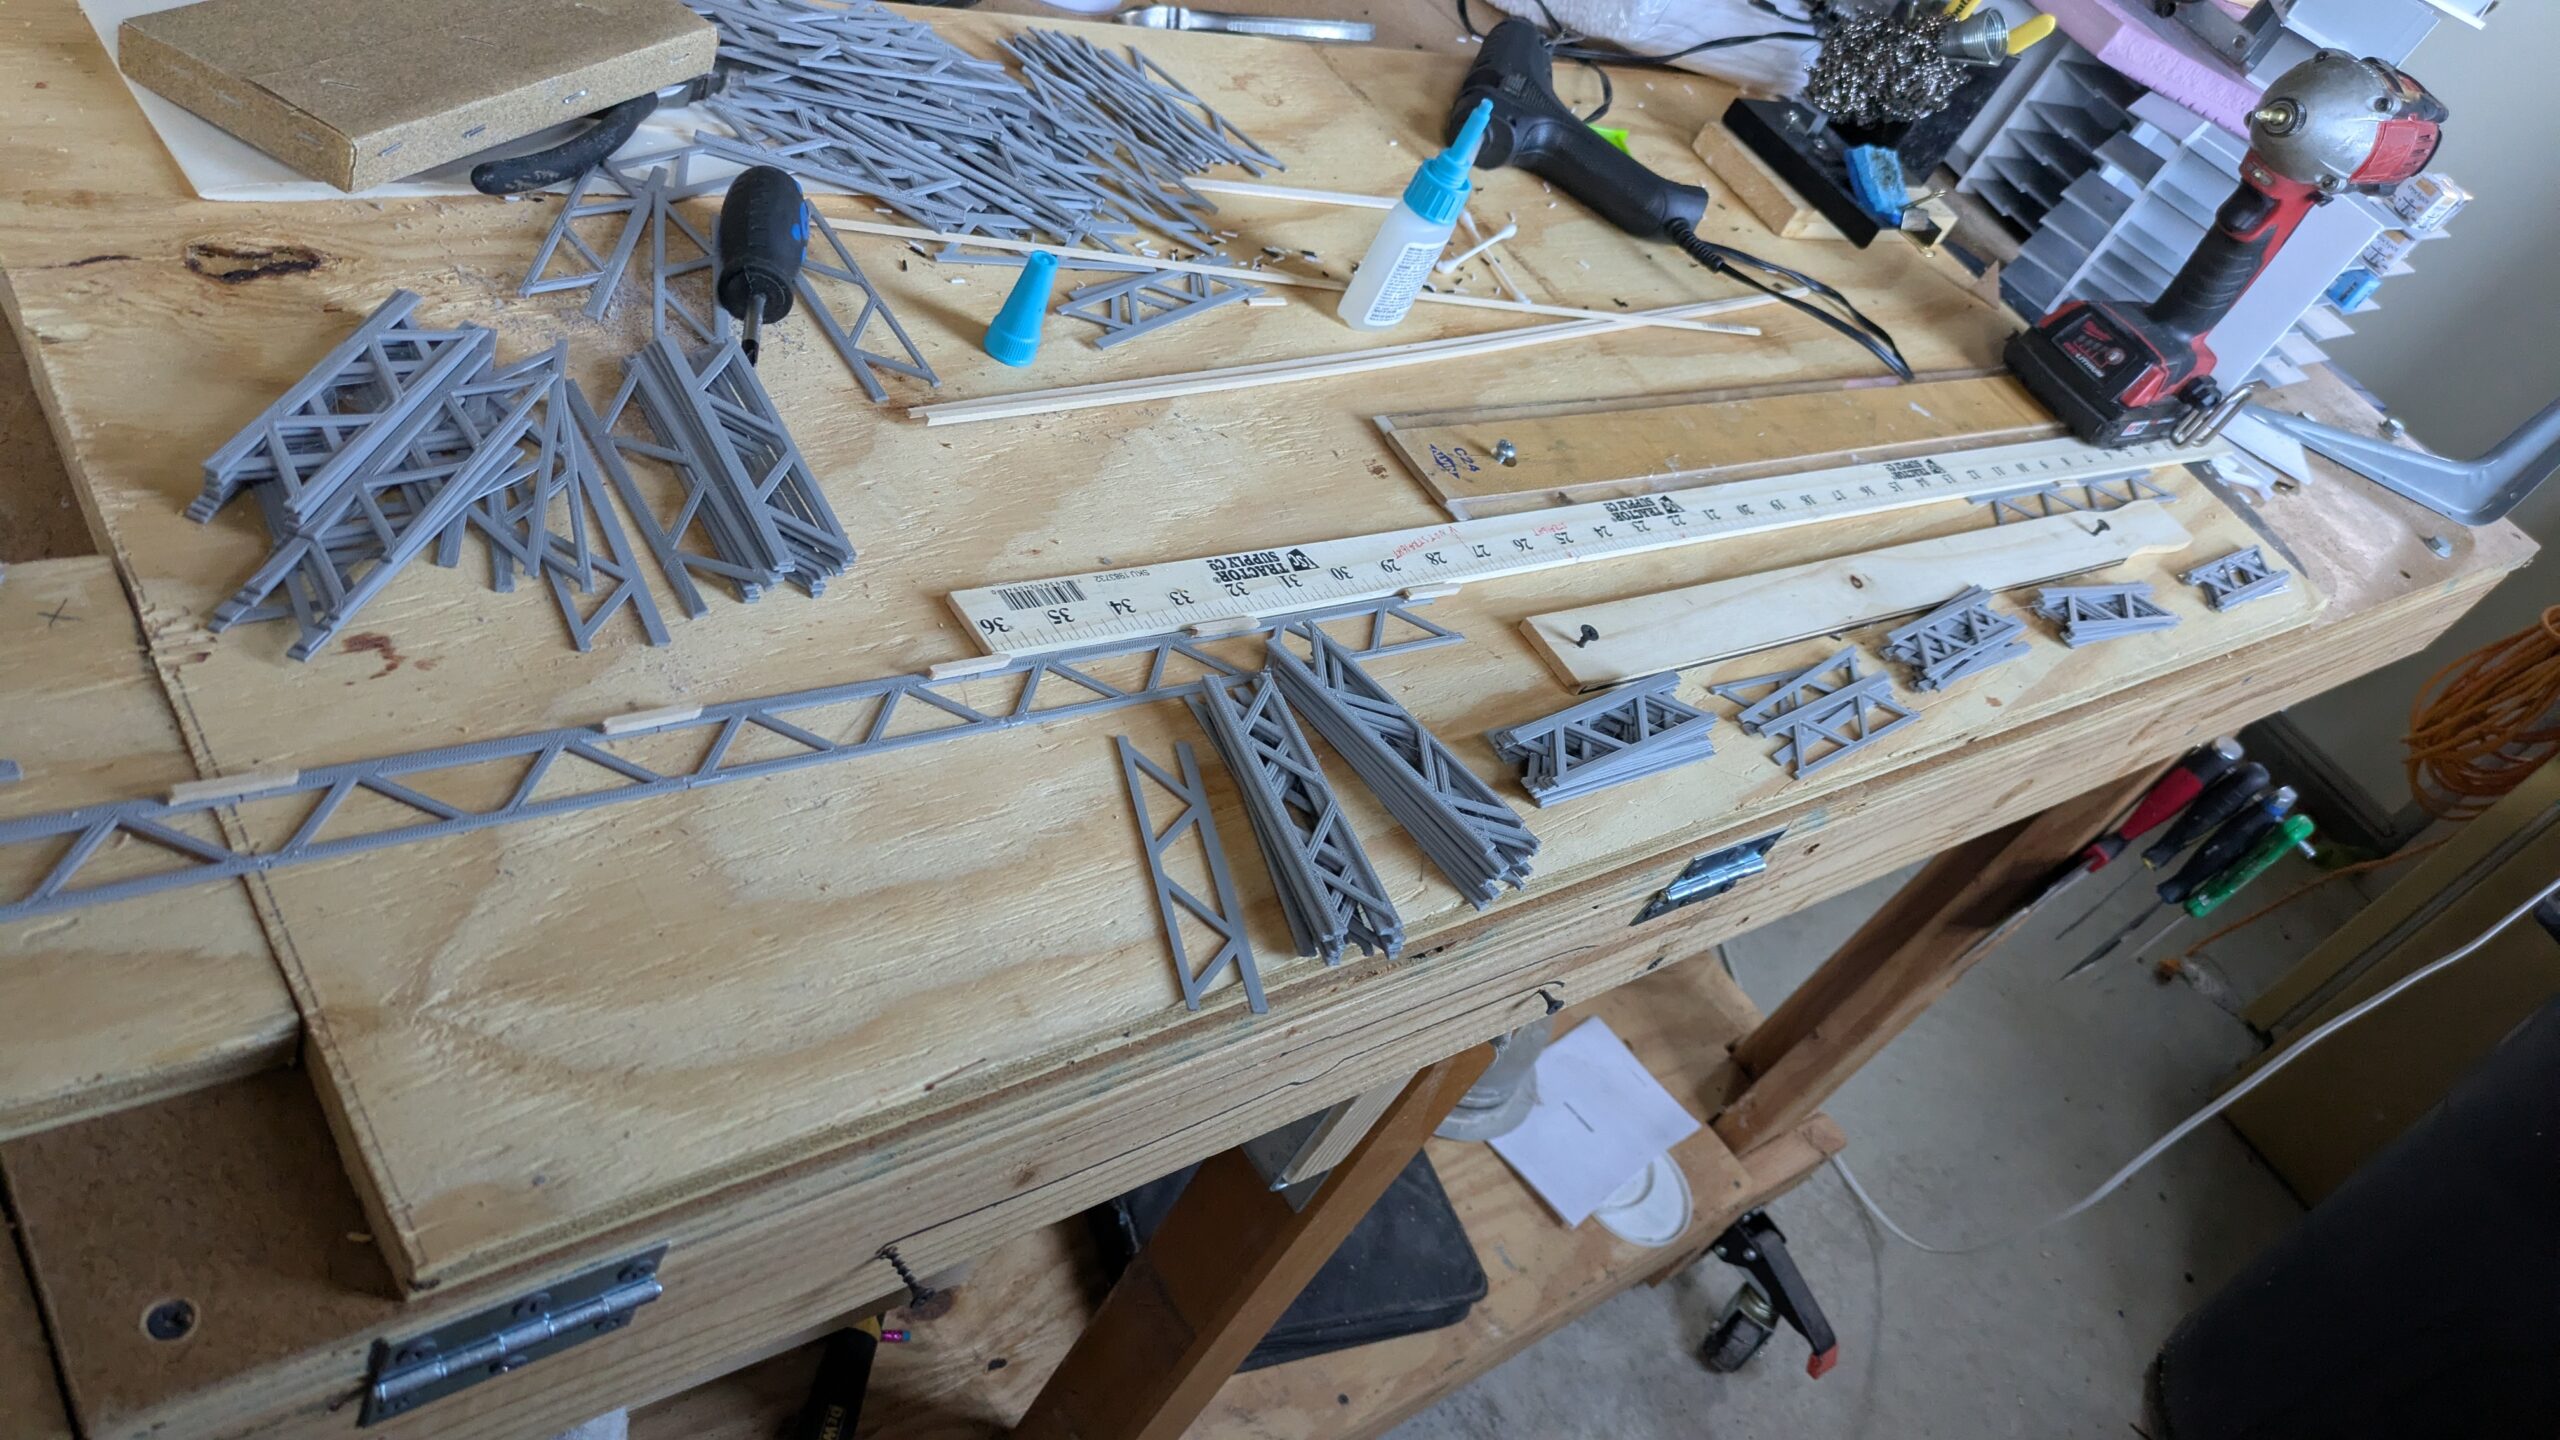
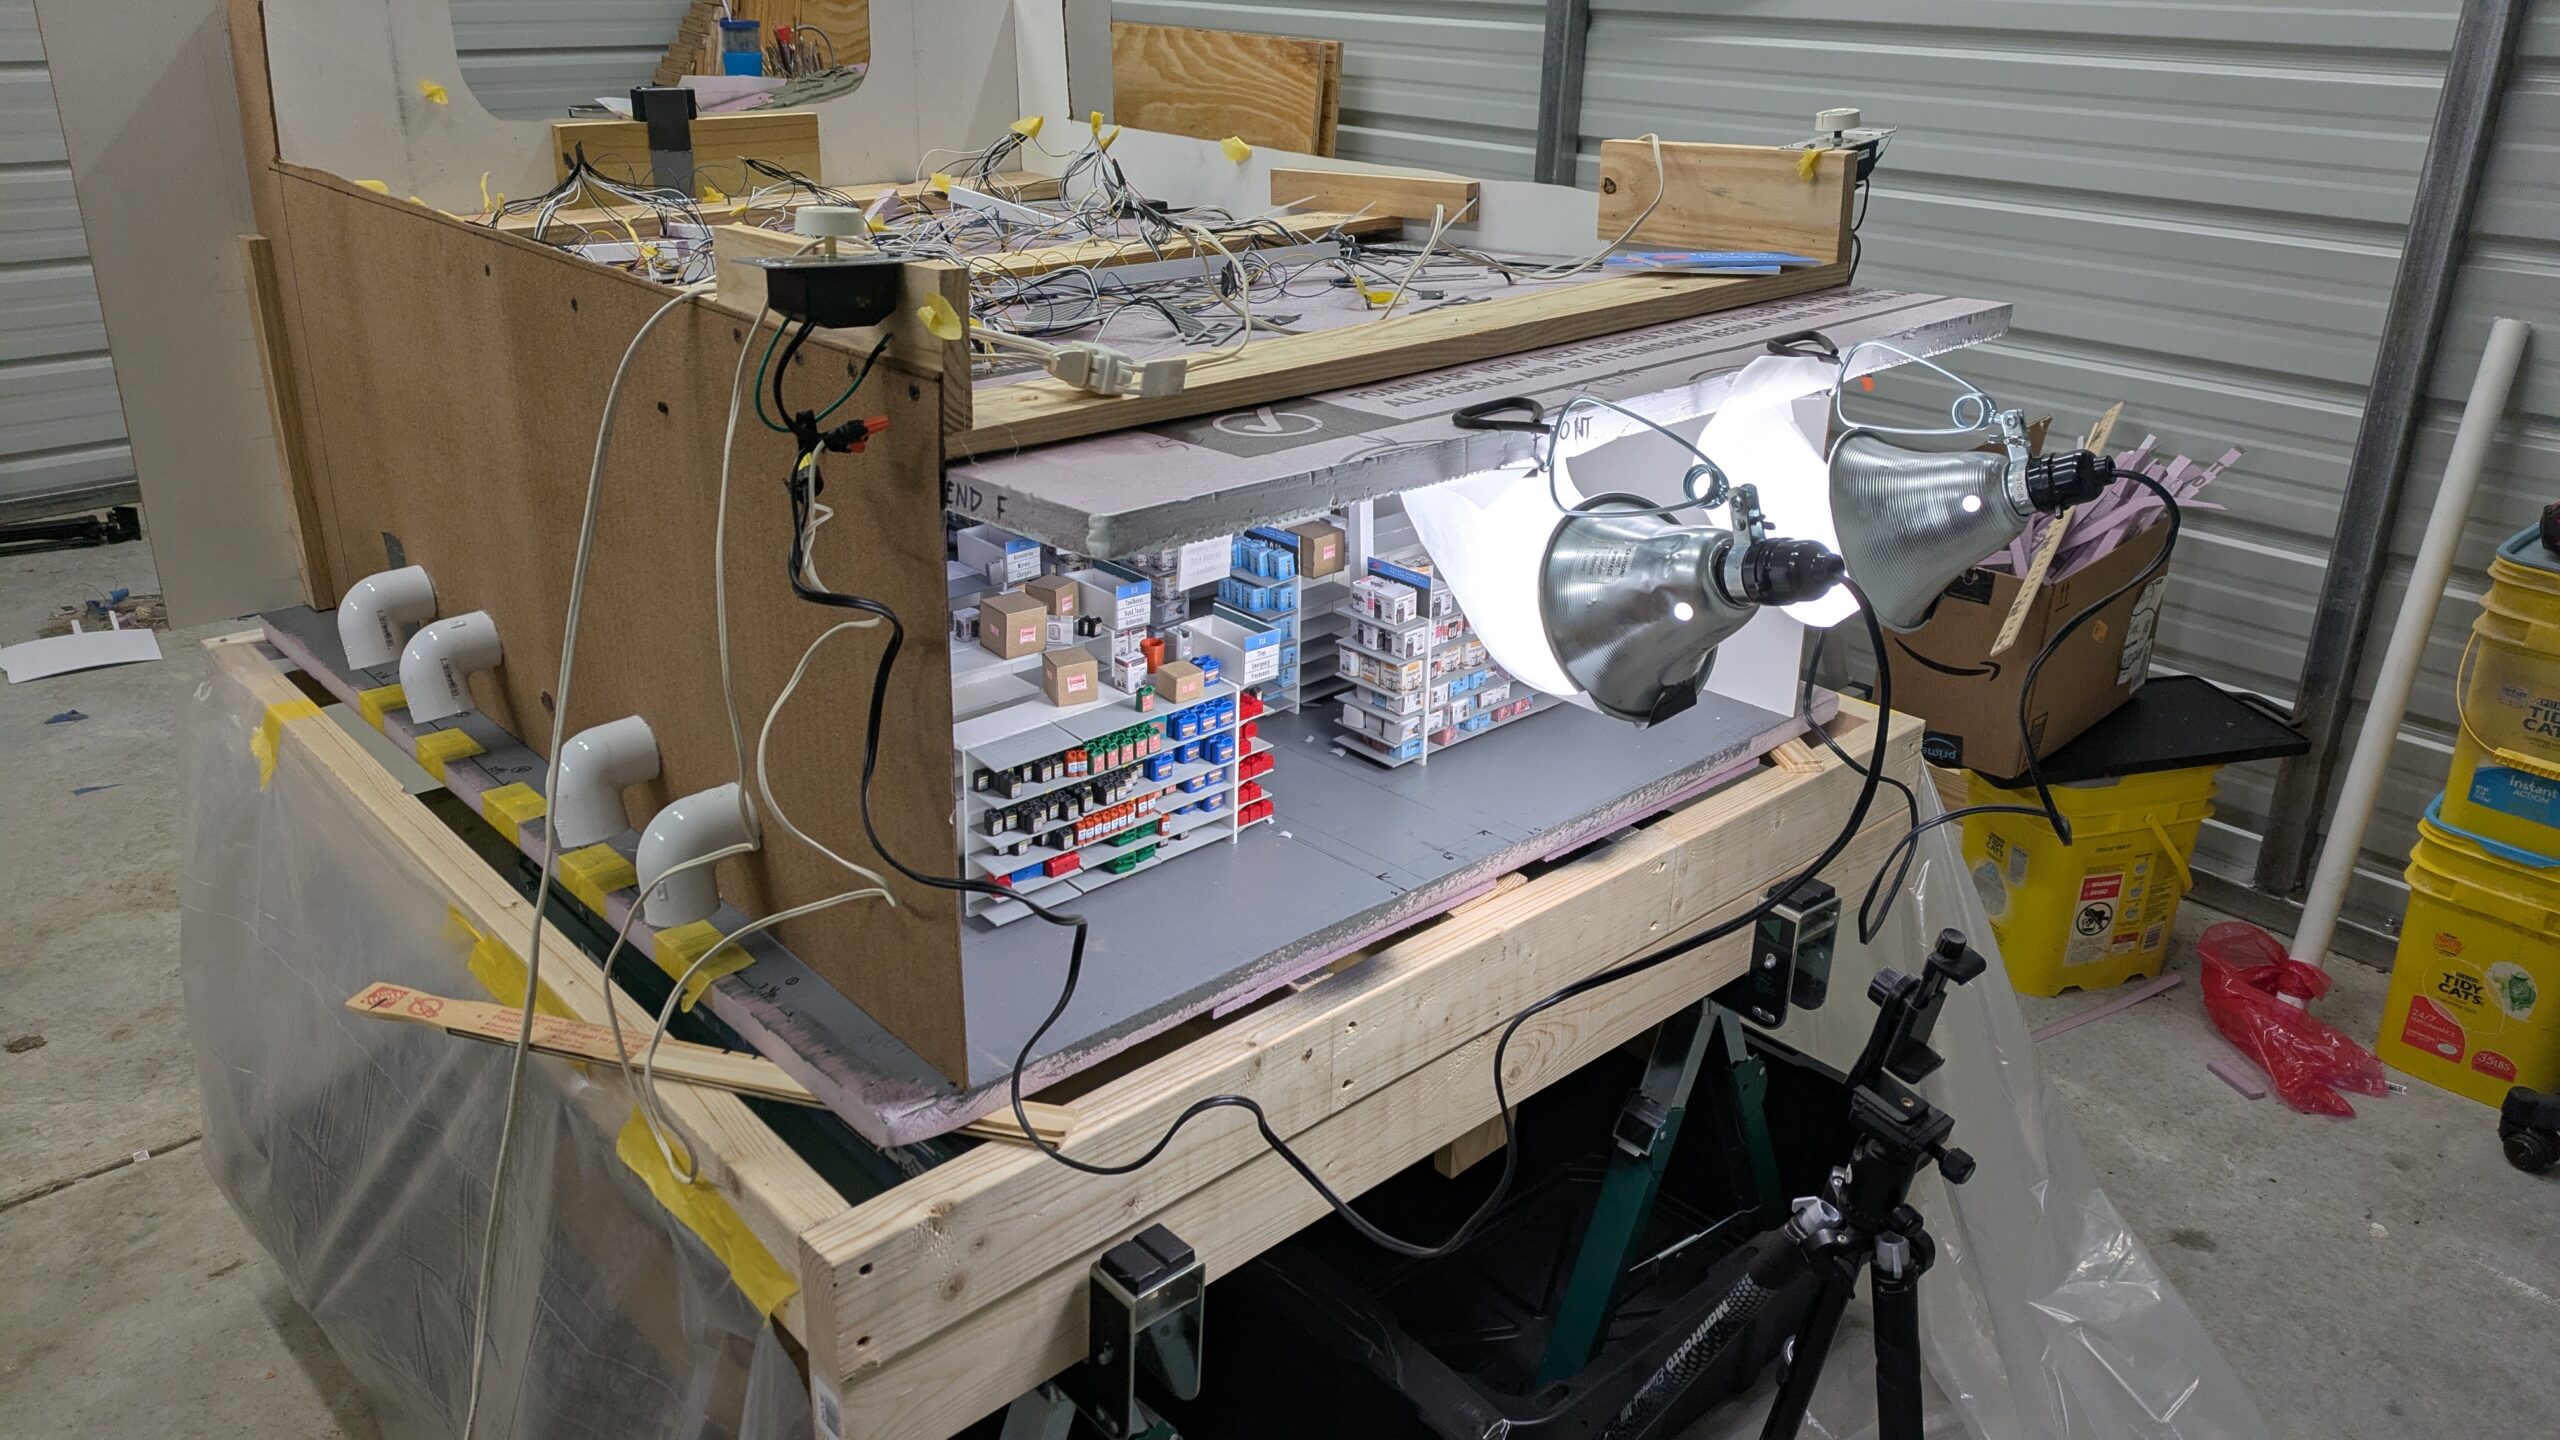
The lighting setup was an updated version of the laser cut models used for a previous project. 3D printing made the solution for the housing of the lighting units a lot easier to work with and with minimal assembly.
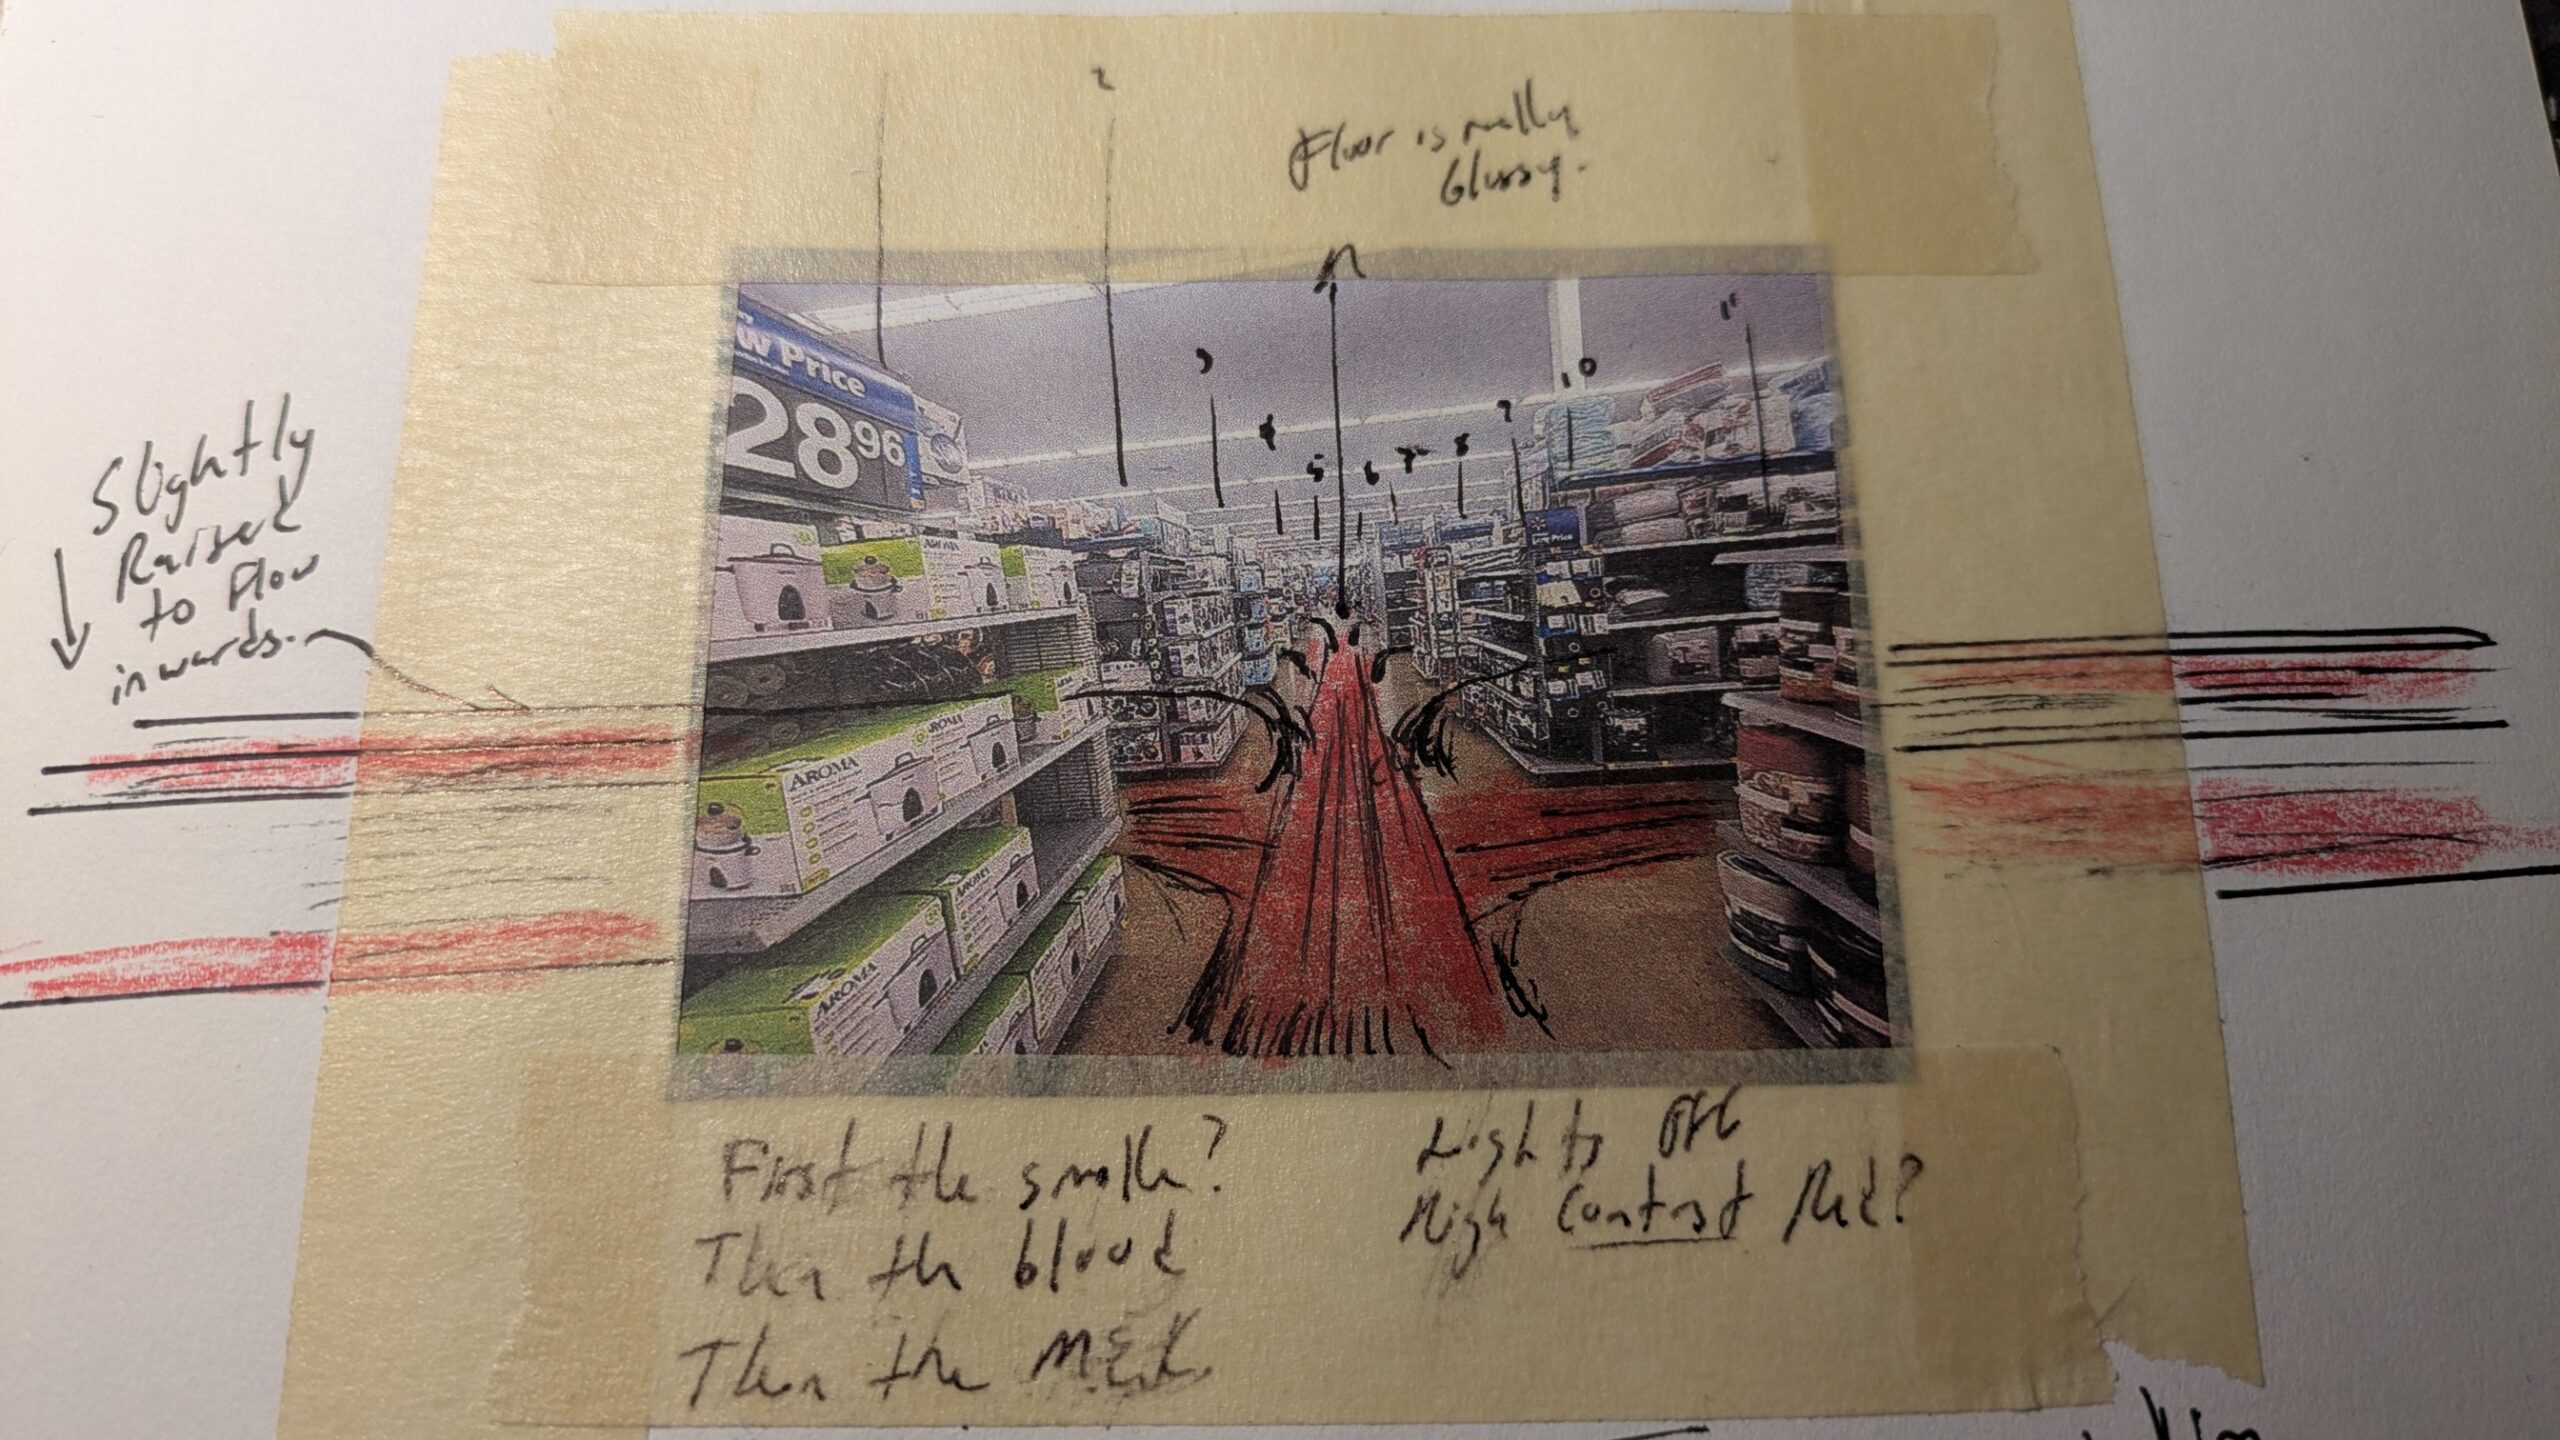
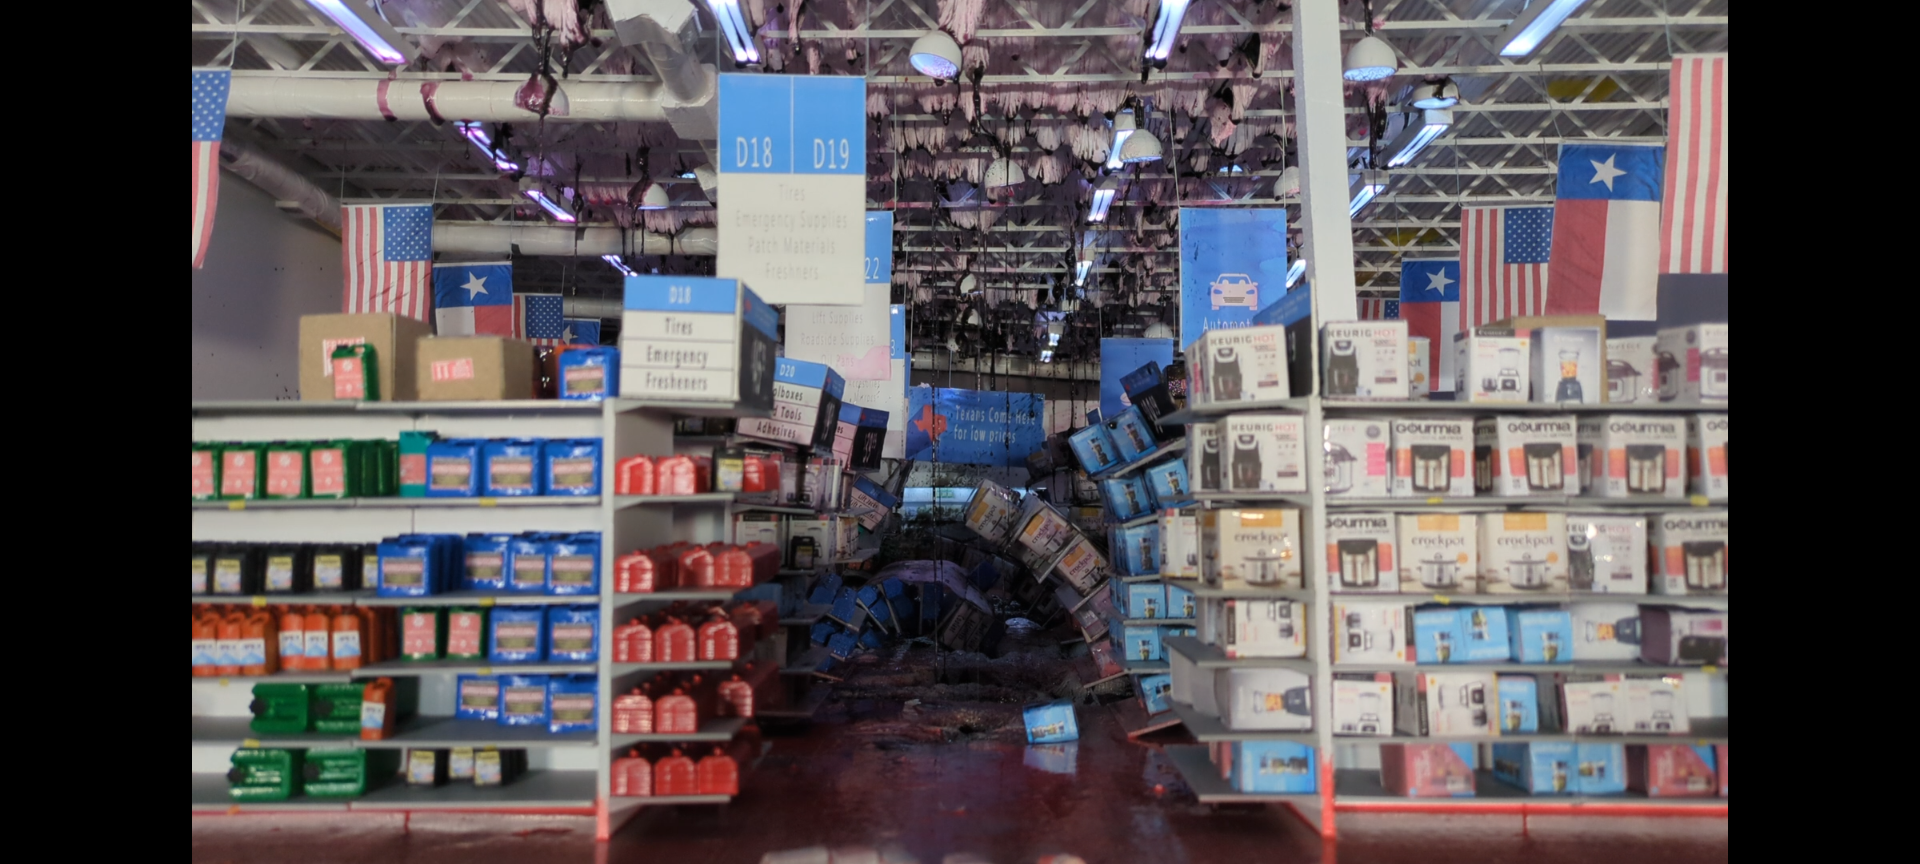
With the lighting figured out, the roof of the structure was one of the most distinct areas of the set and definitely a challenge since corrugated cardboard material could not be used to simulate the ceiling of the structure as it needed to be made out of foam to allow for the fluids to flow freely through the piece.
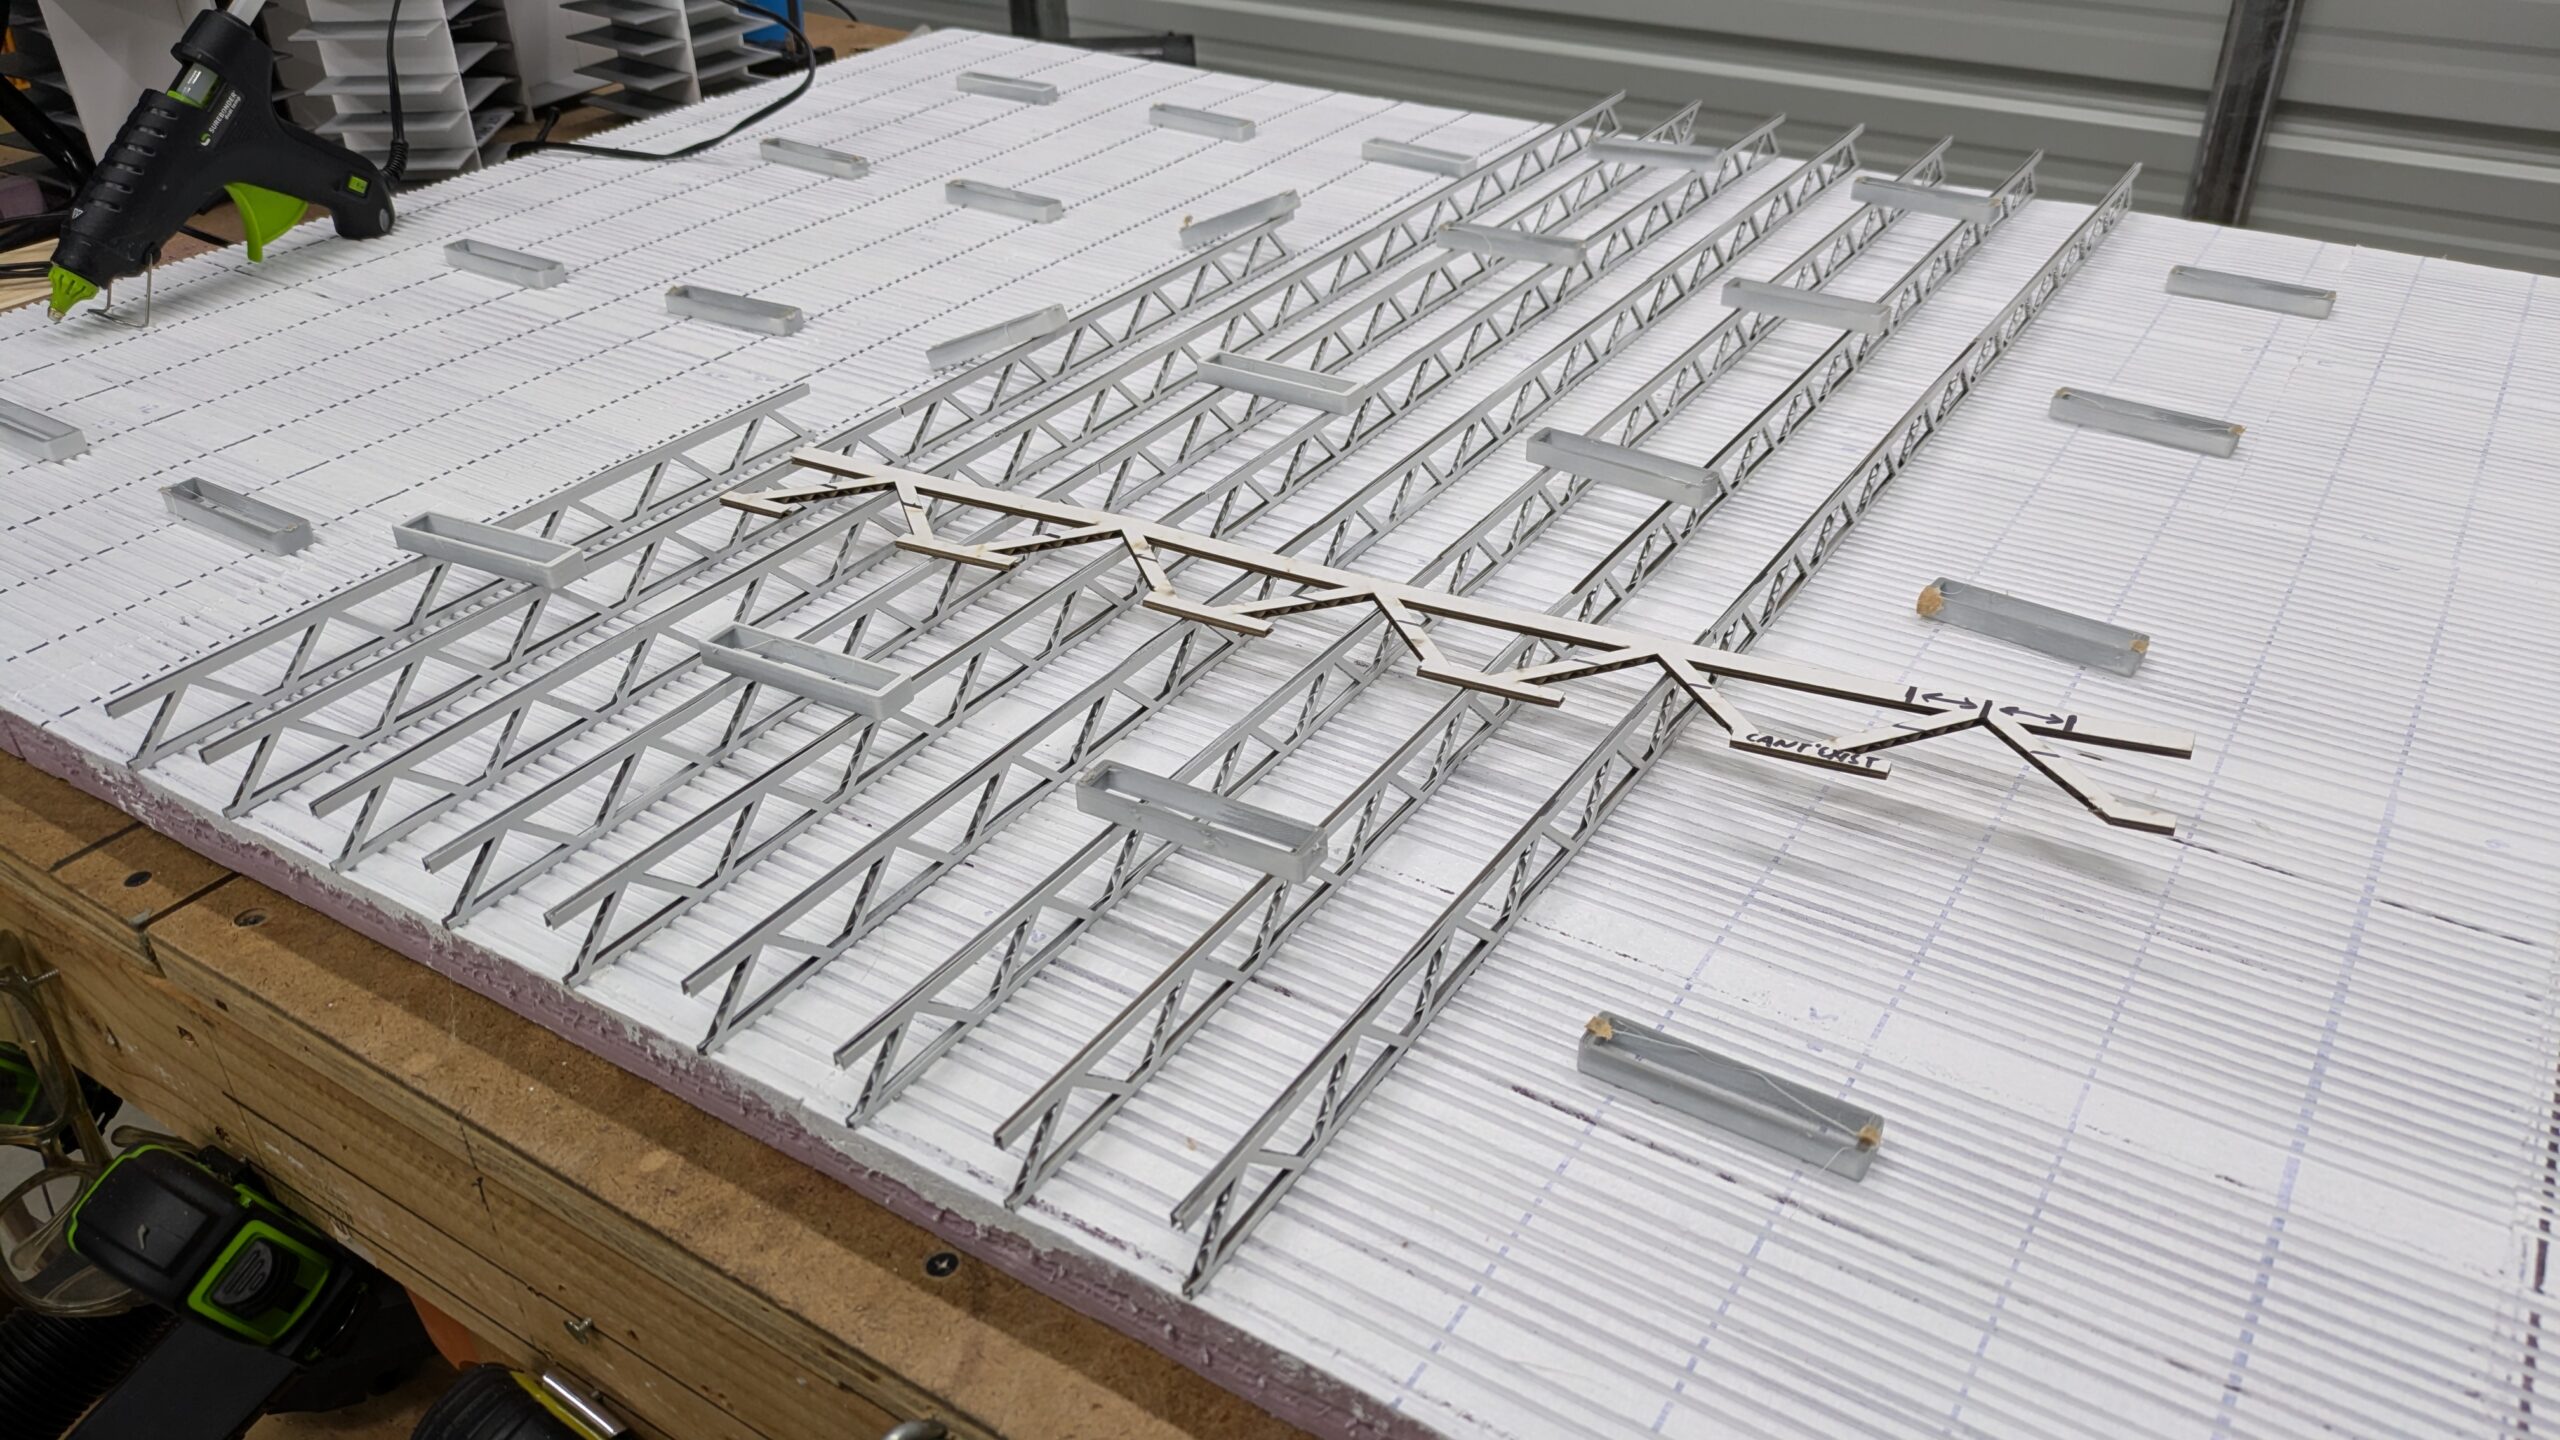
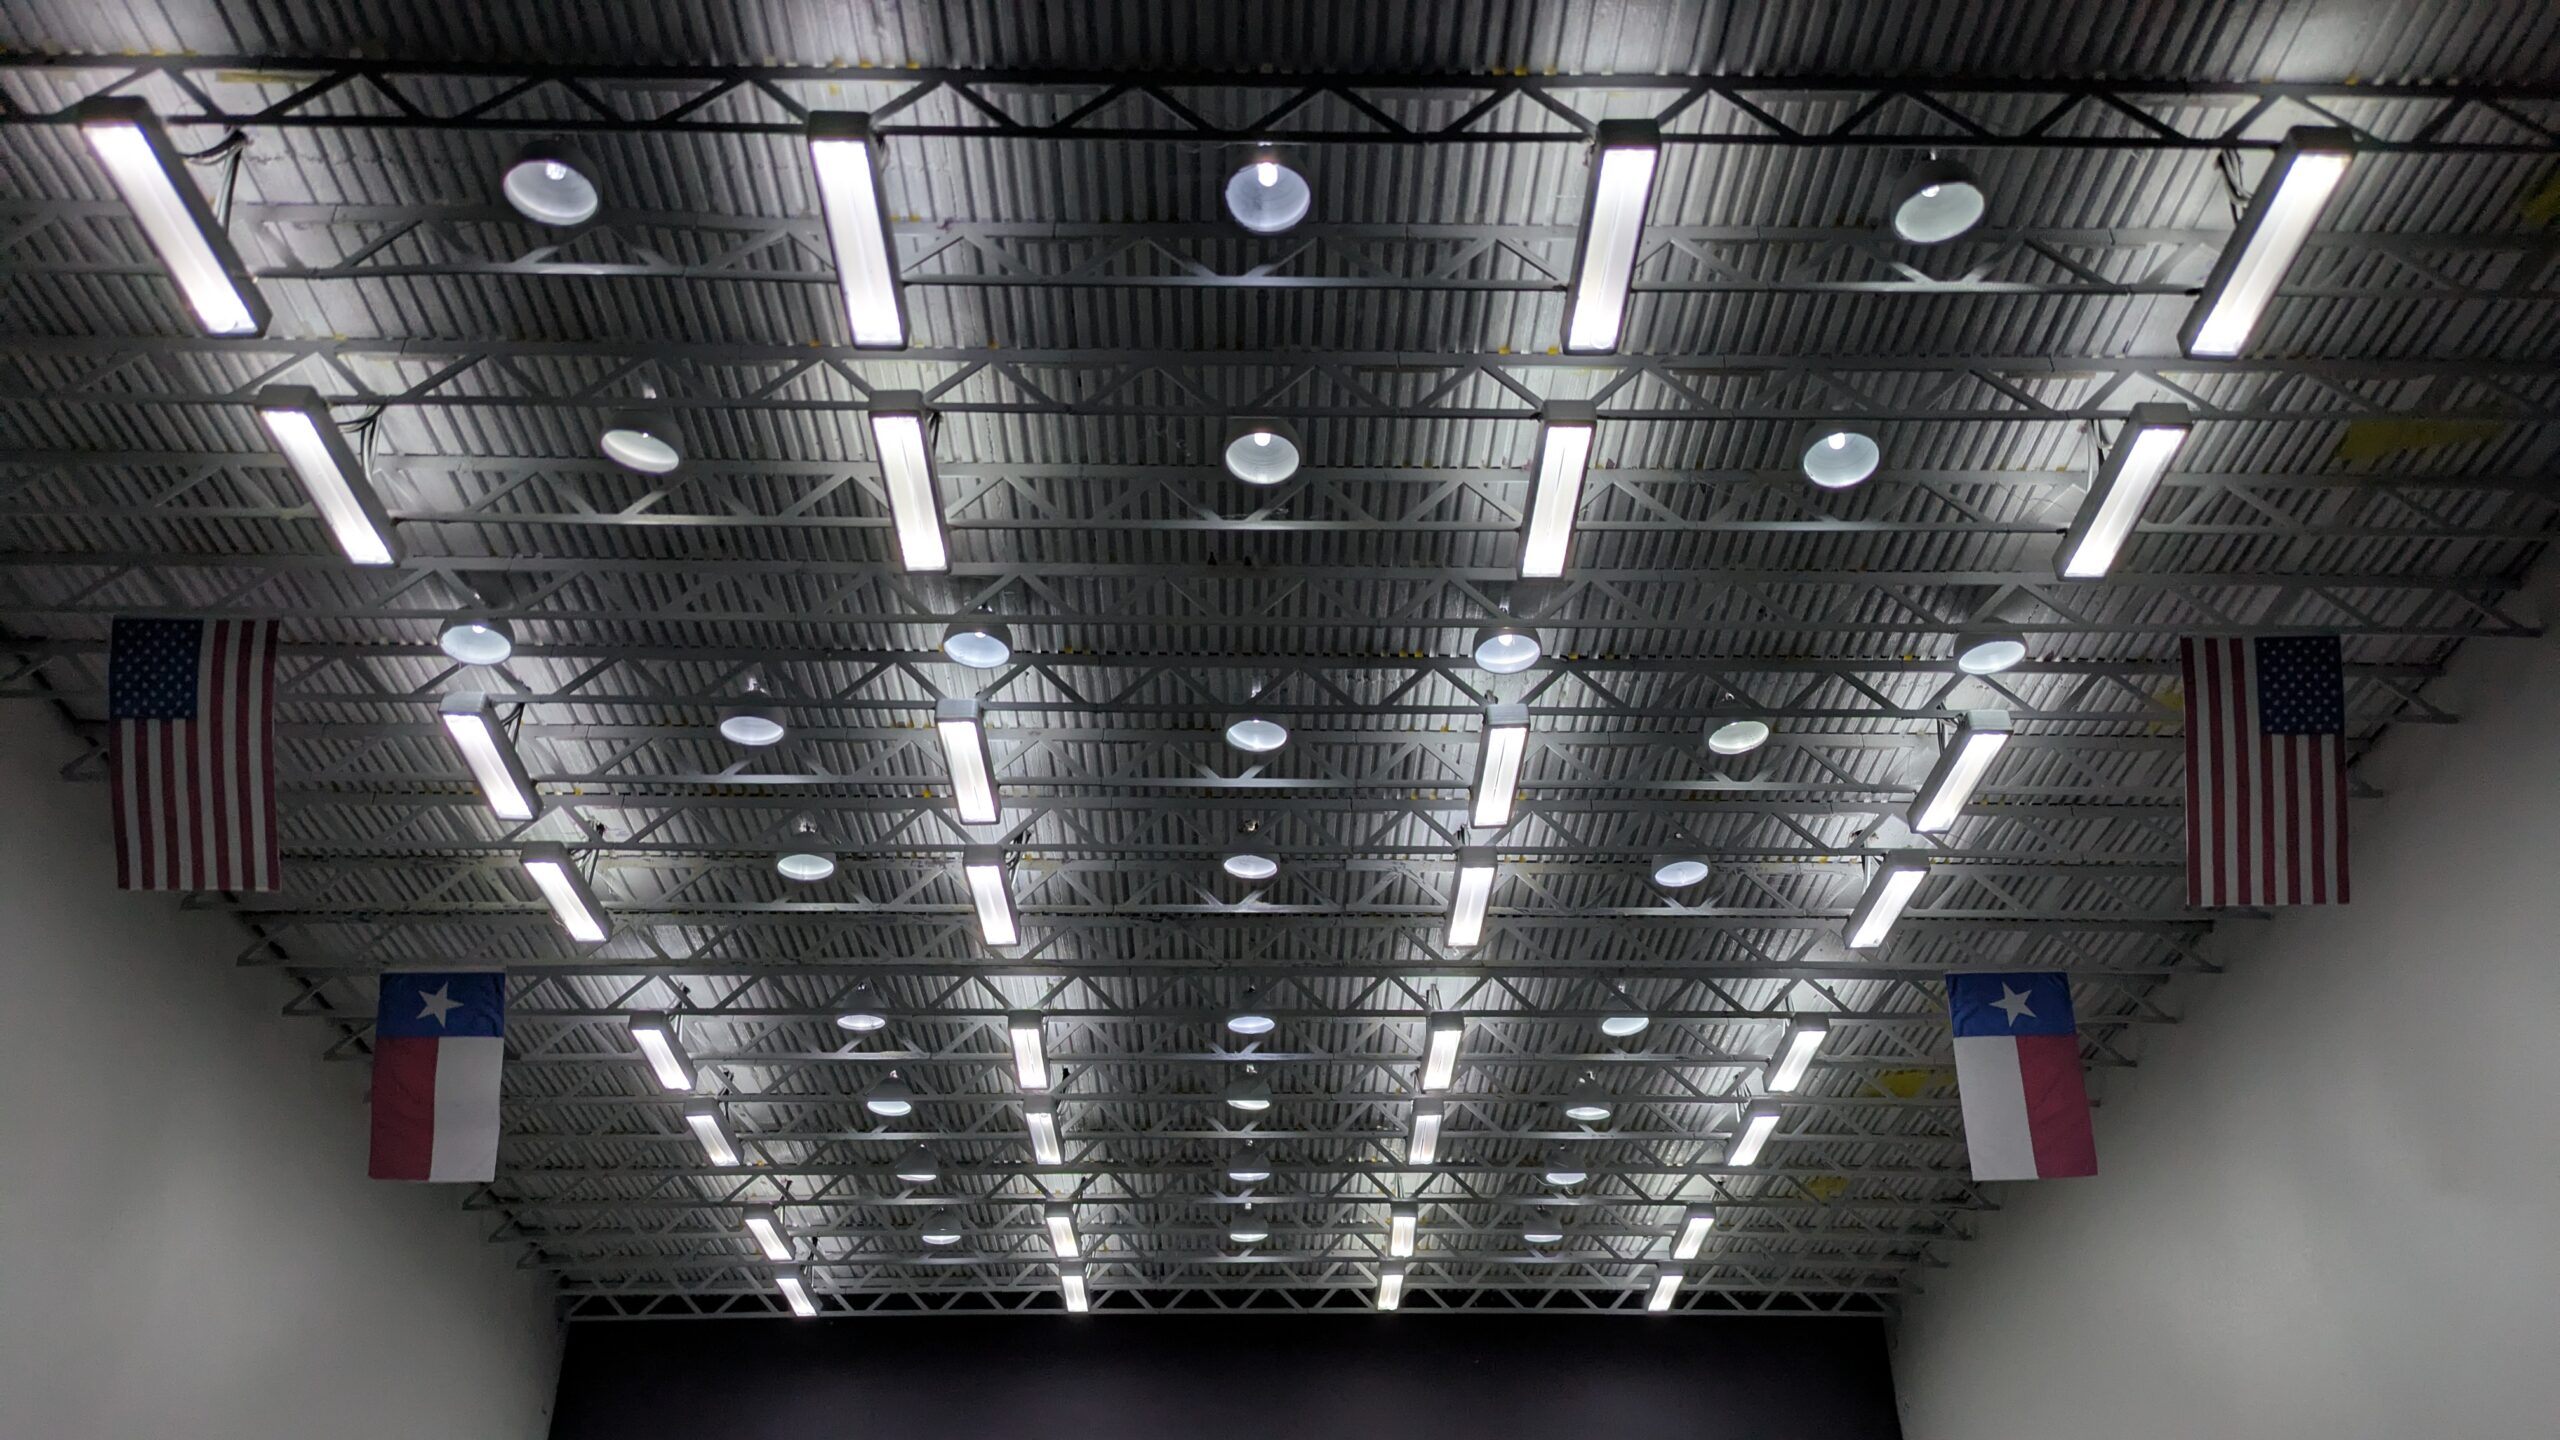
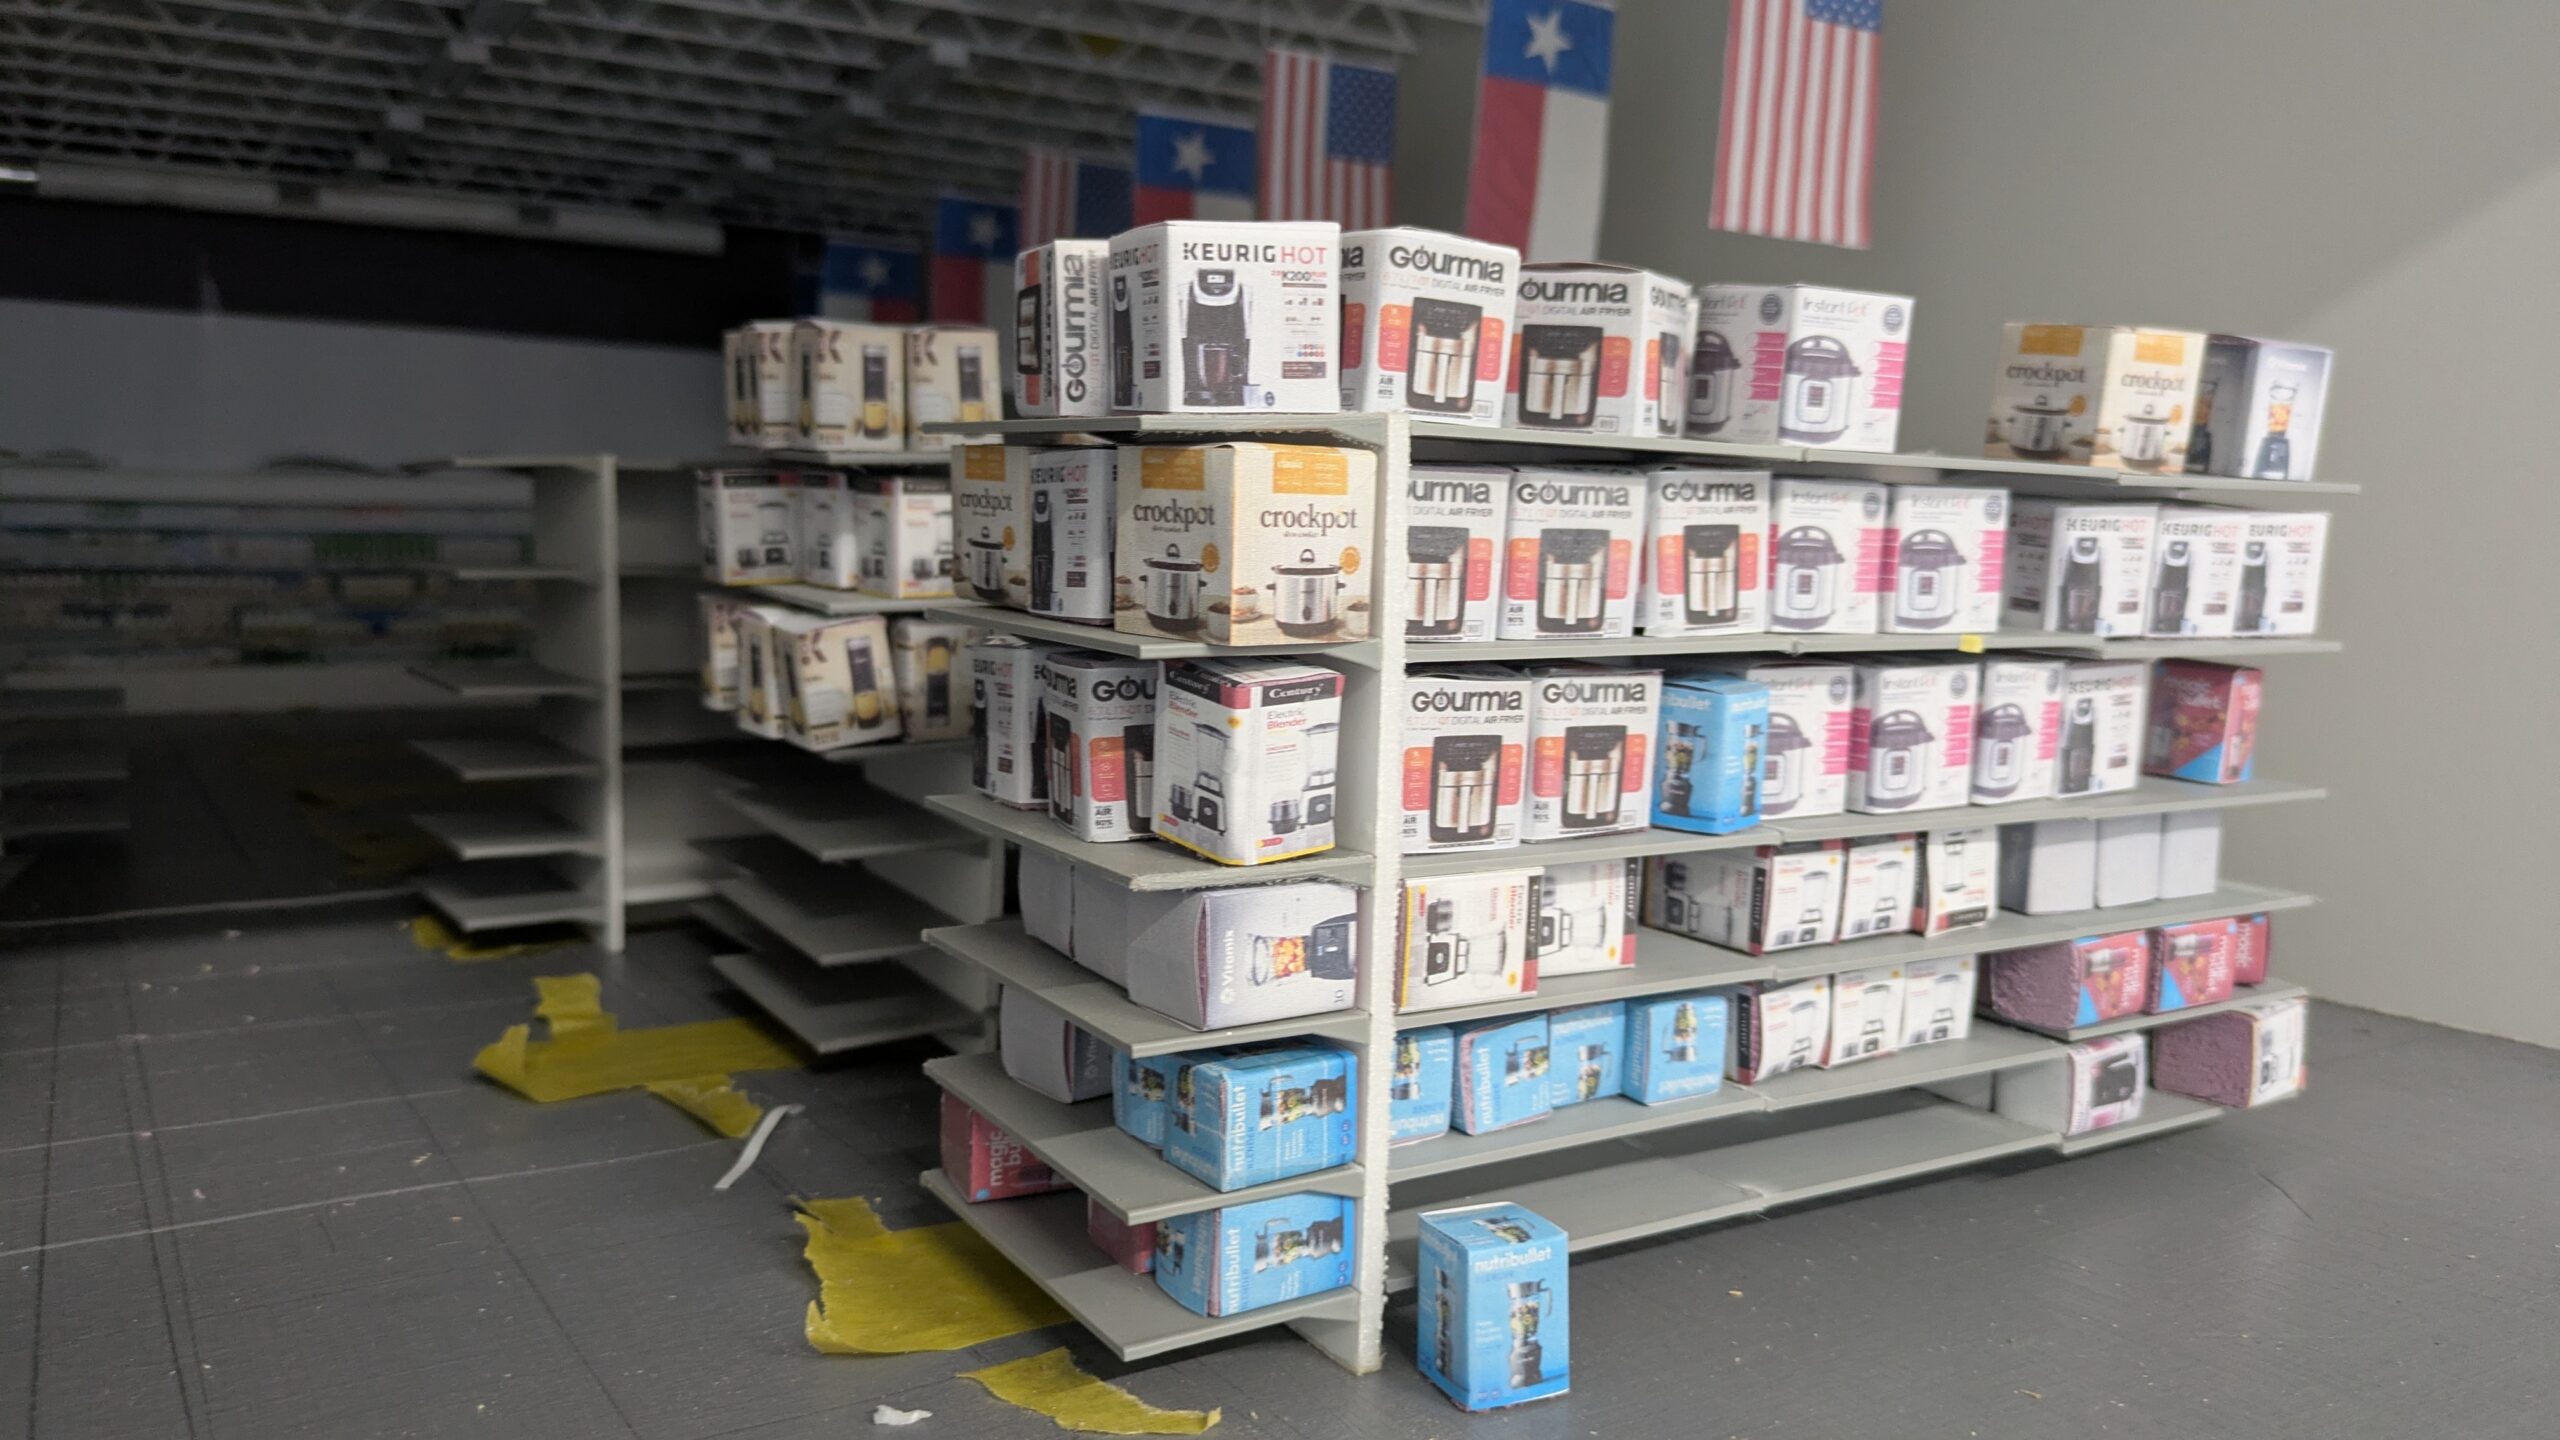
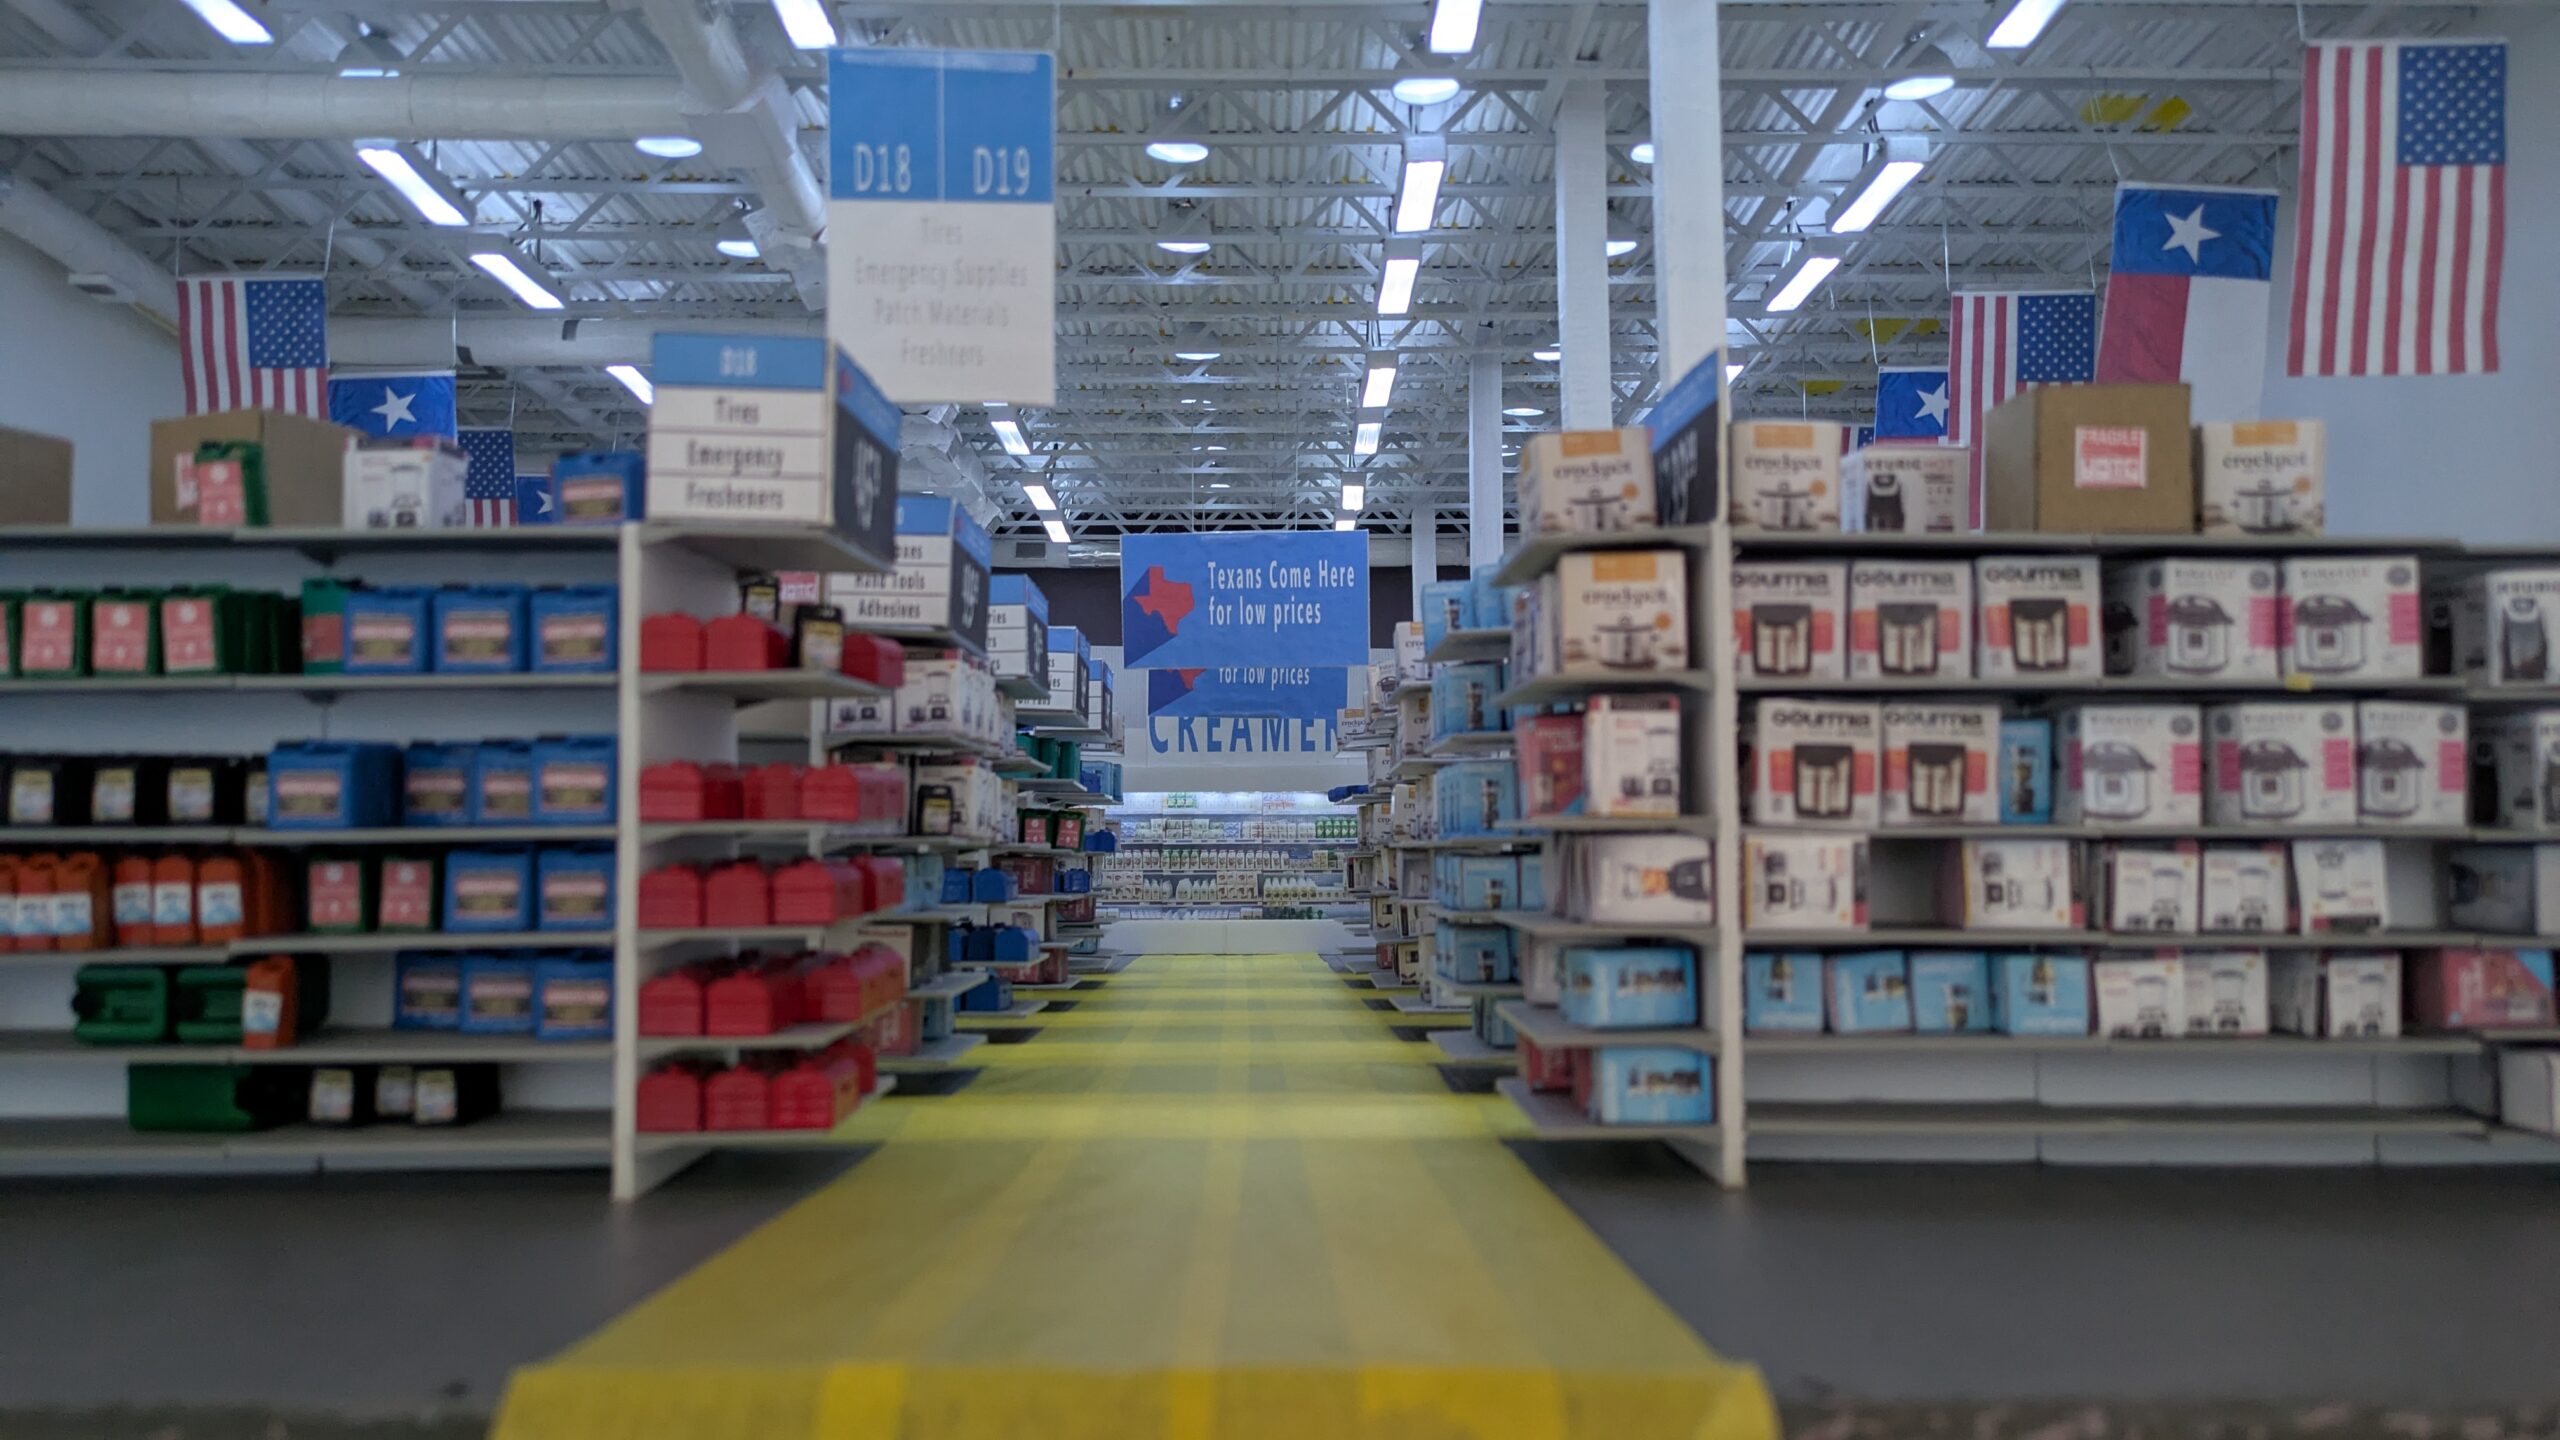
With the lighting finished – I could start focusing on details of the celling that make it distinct and make it look like the ceilings at big box stores. I had never paid attention to the sheer amount of objects hanging from overhead including vents, exposed ducts, flags and of course signage- all things we take for granted and don’t notice yet are always all around us when we visit these places.


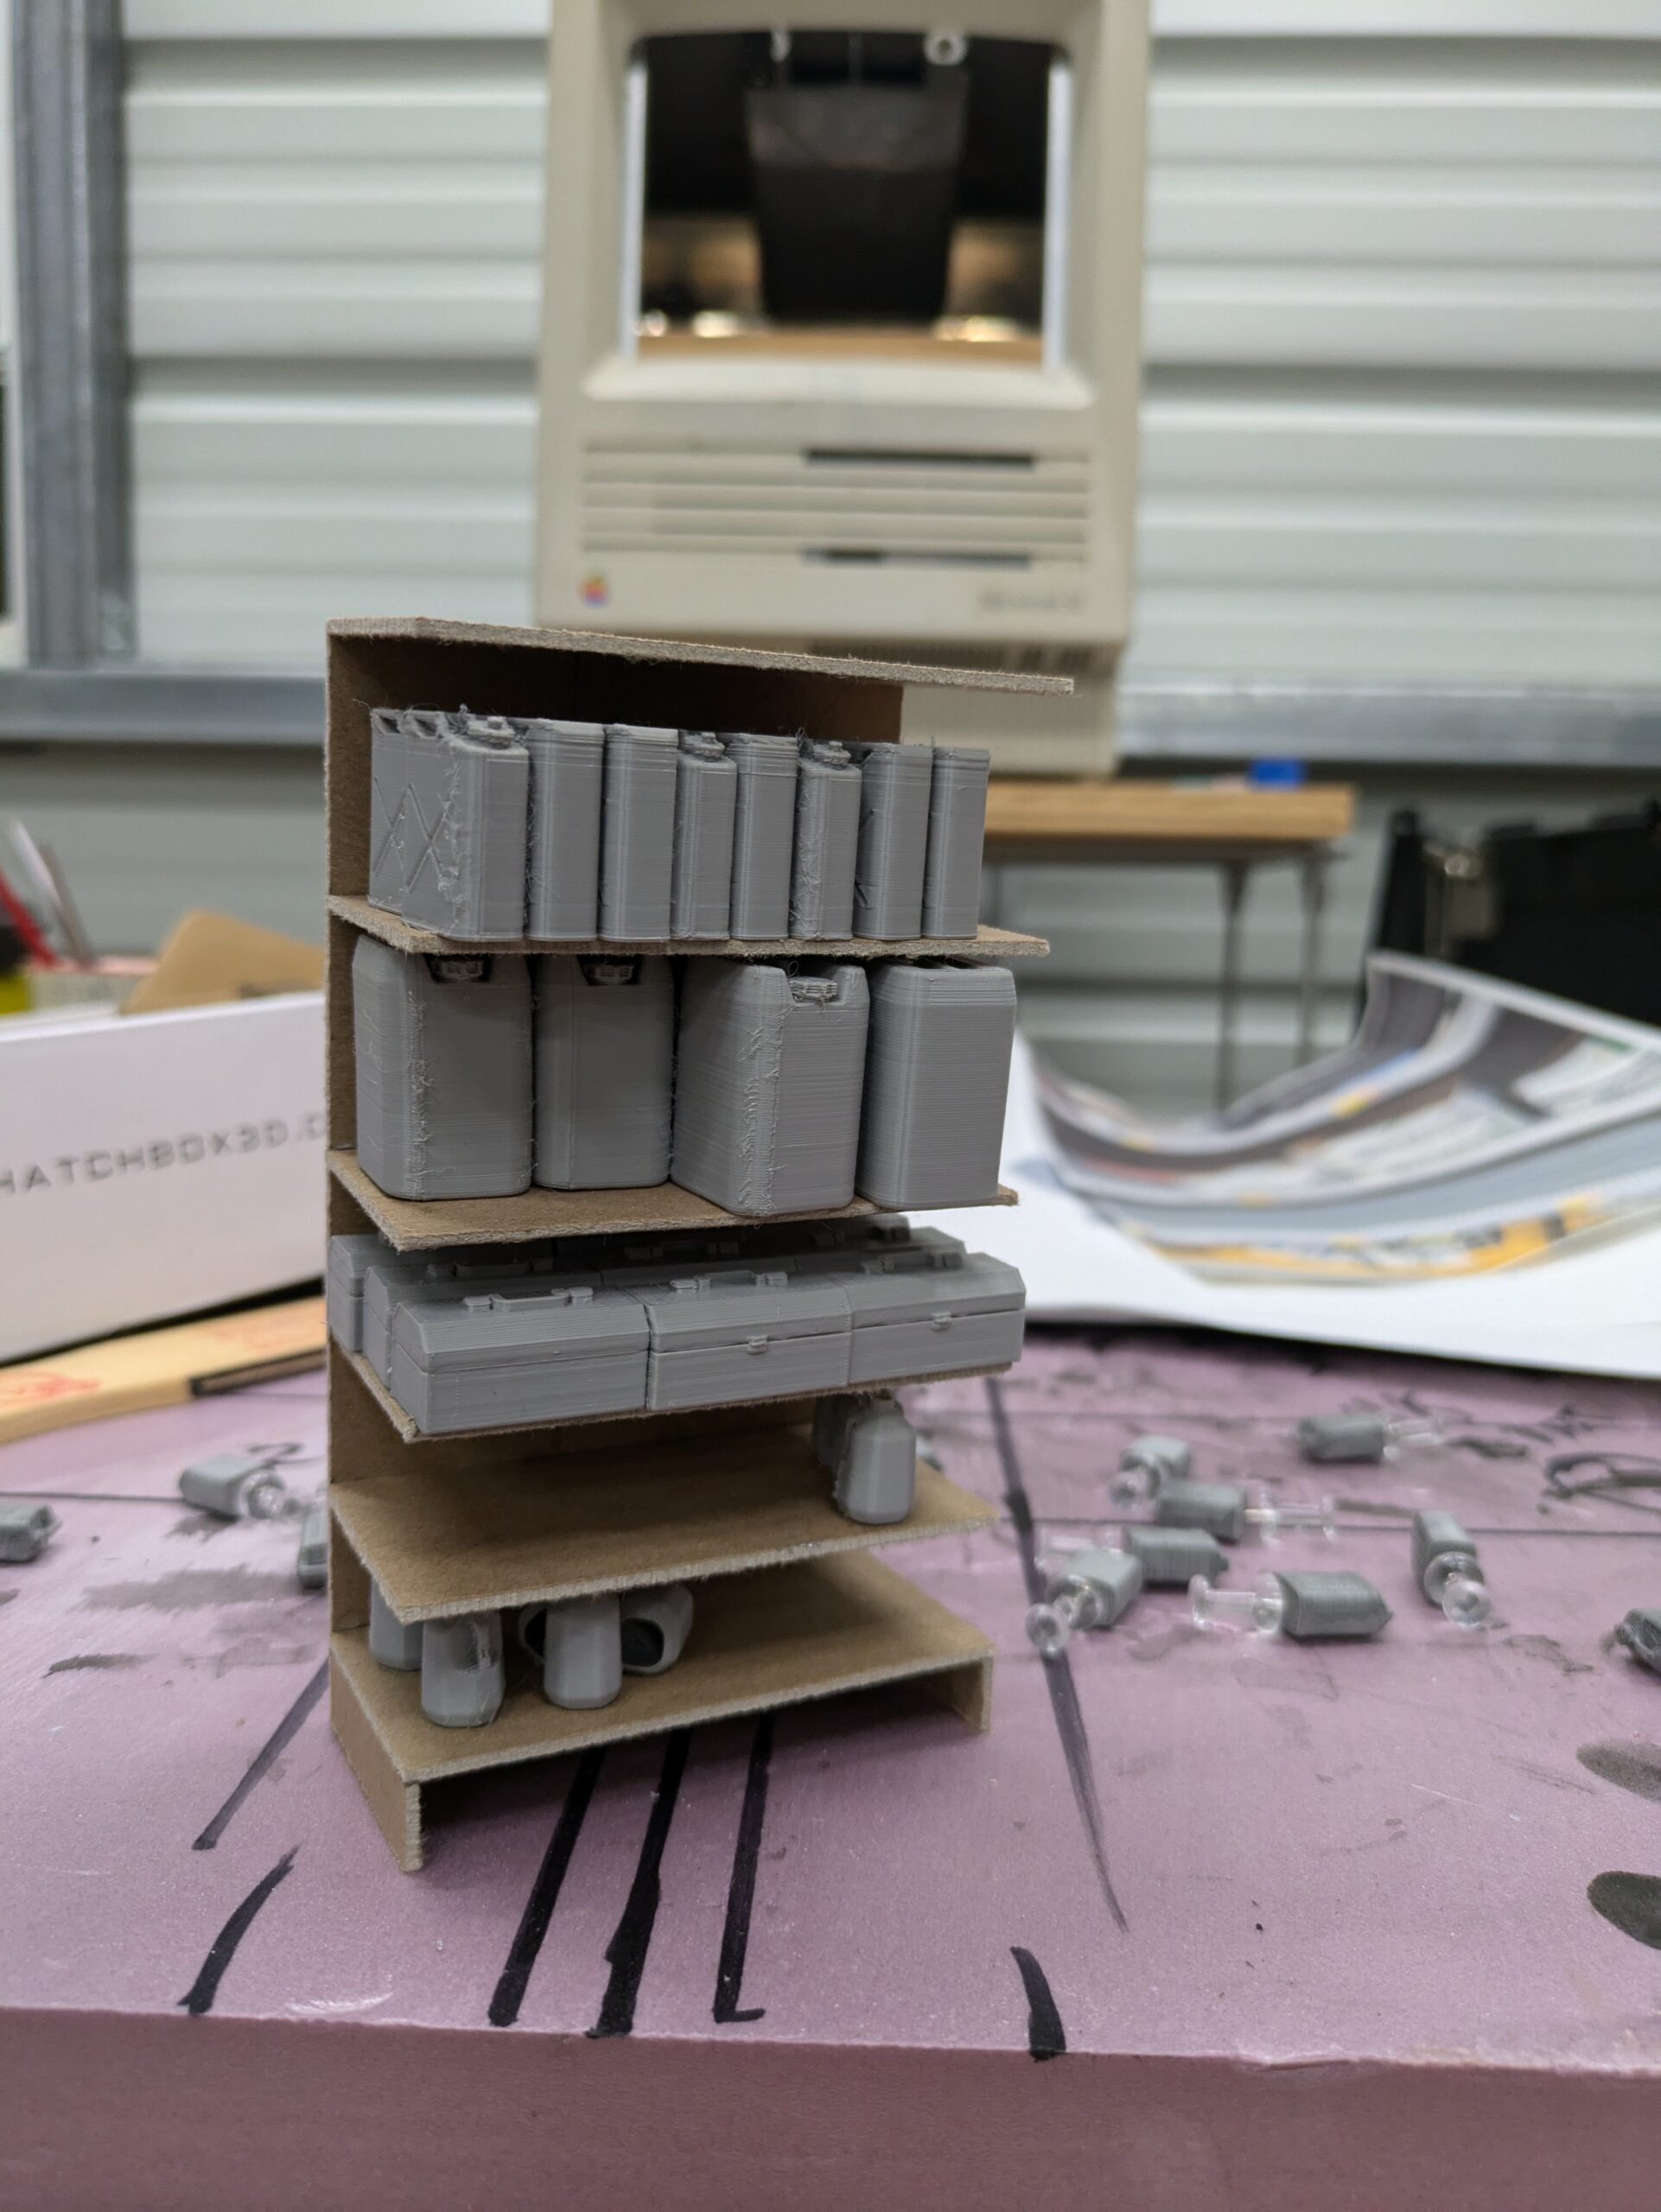
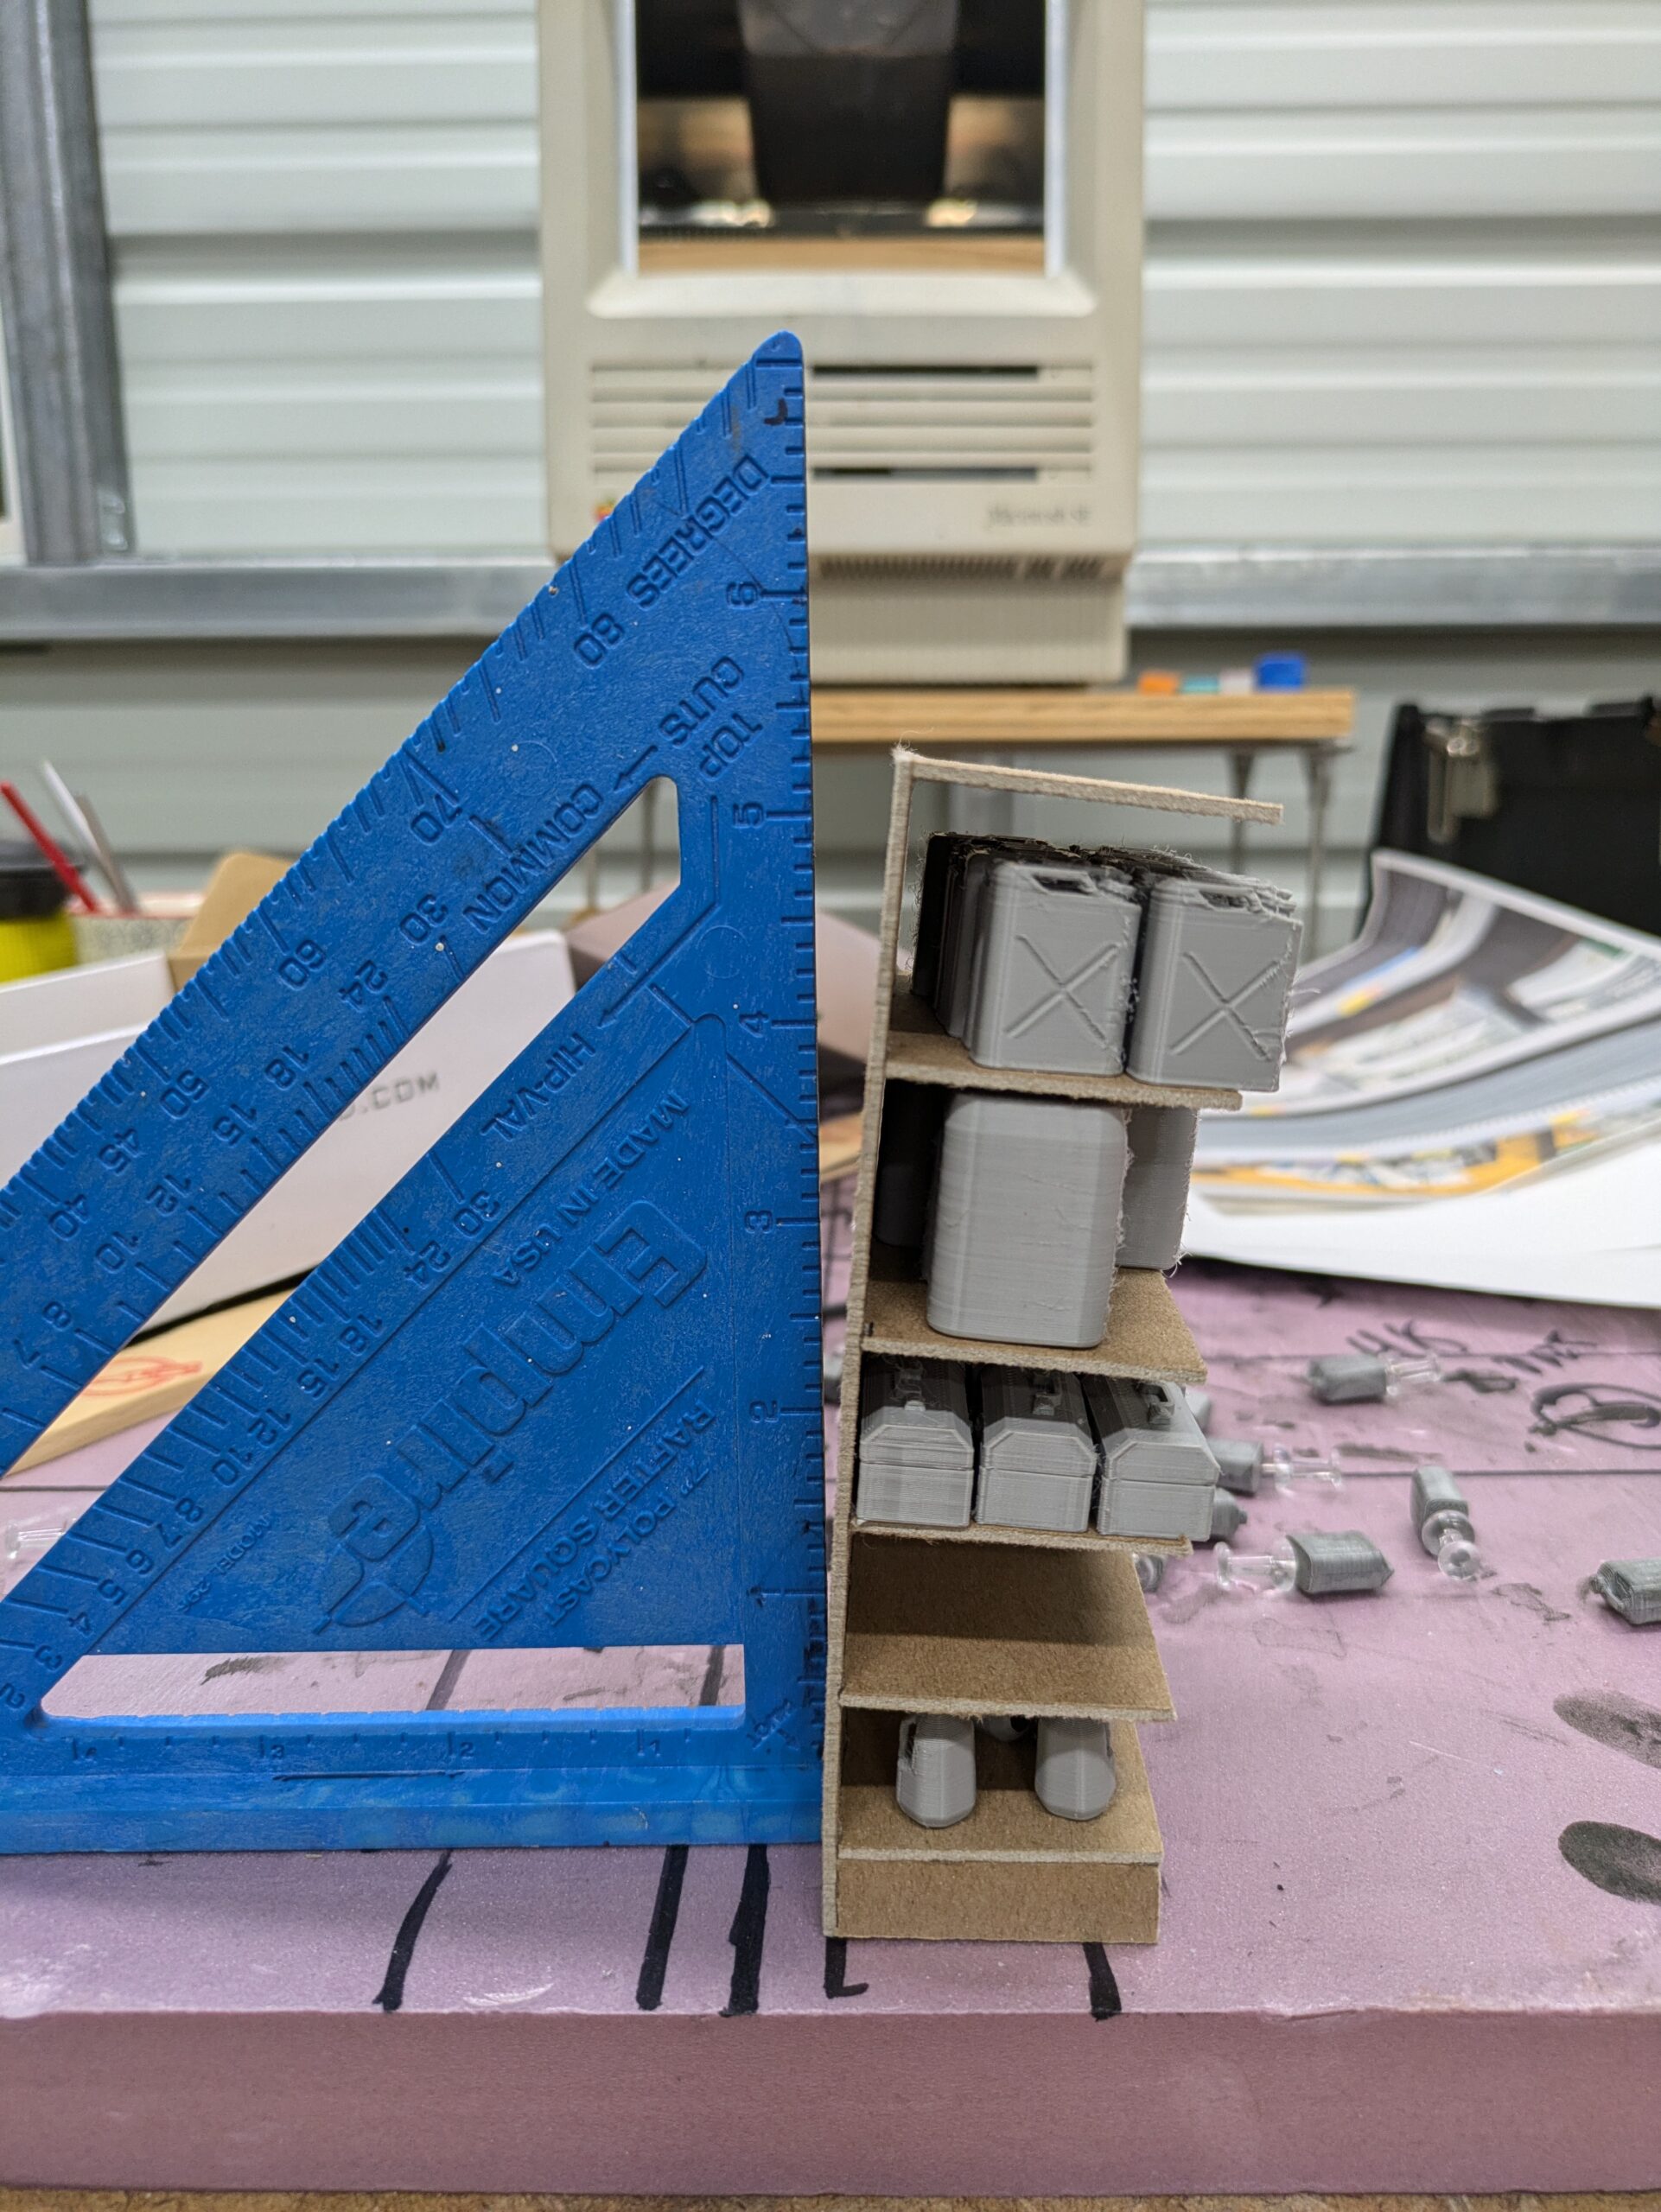
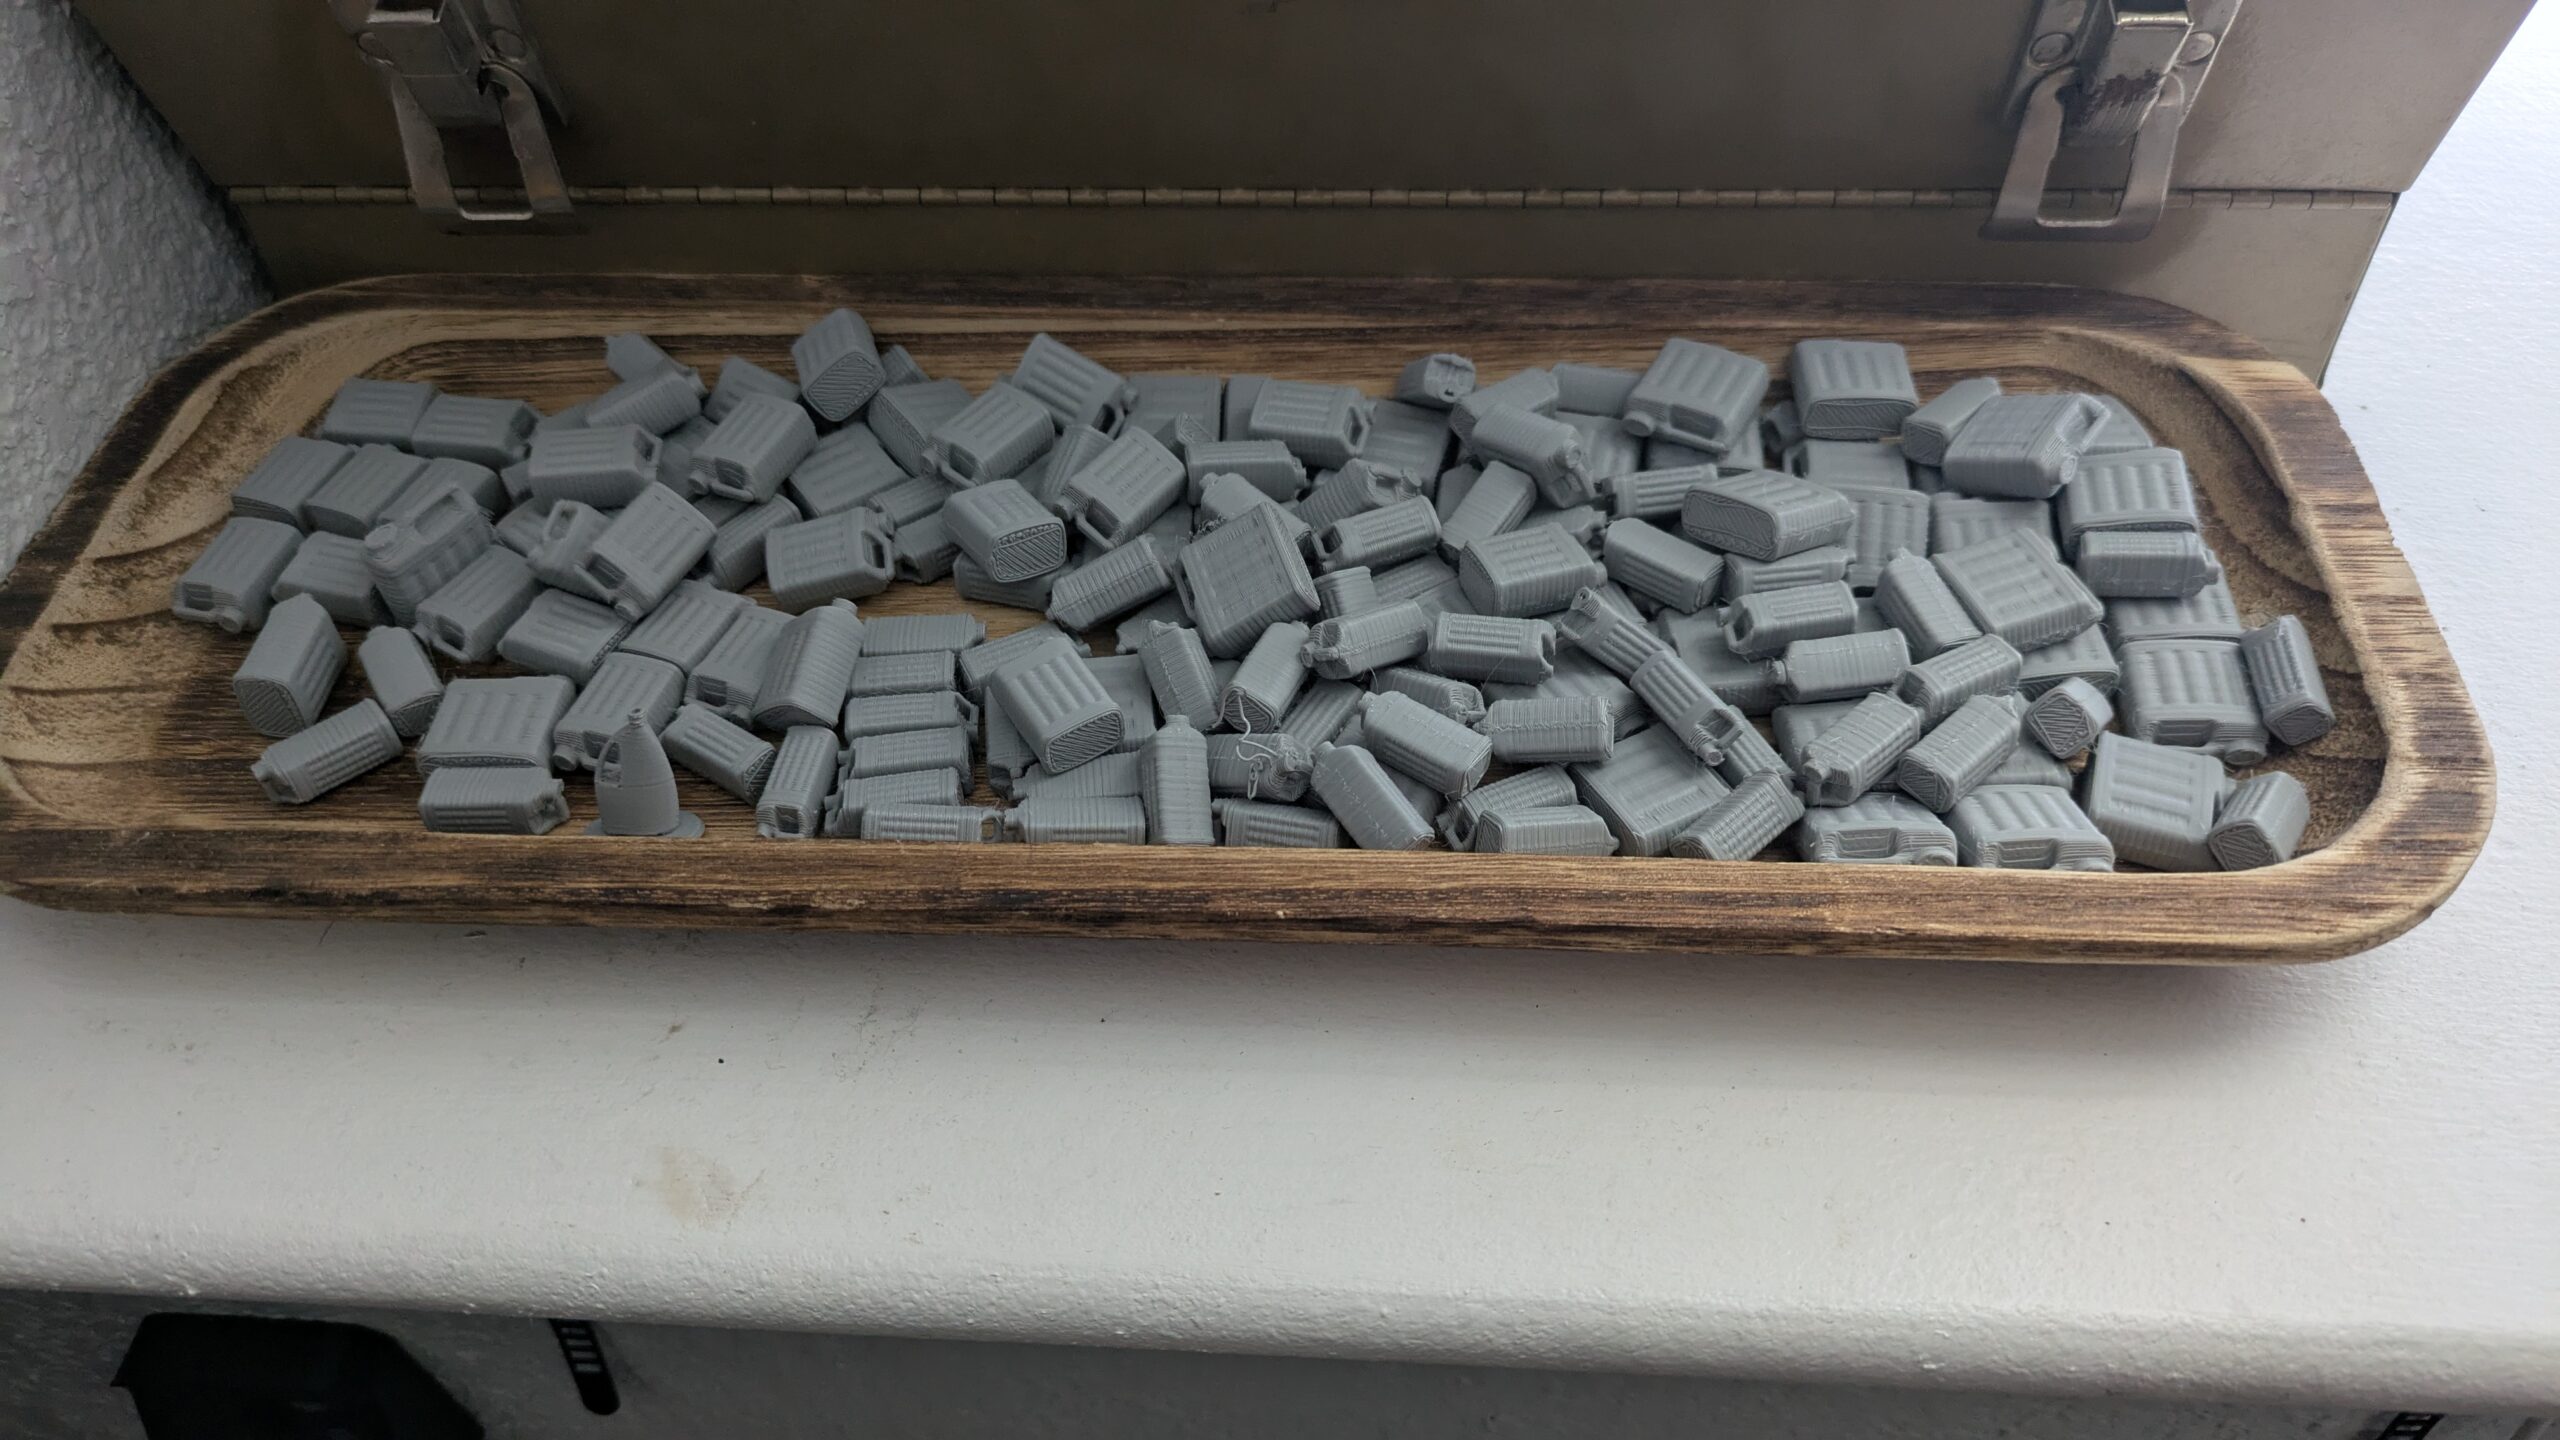
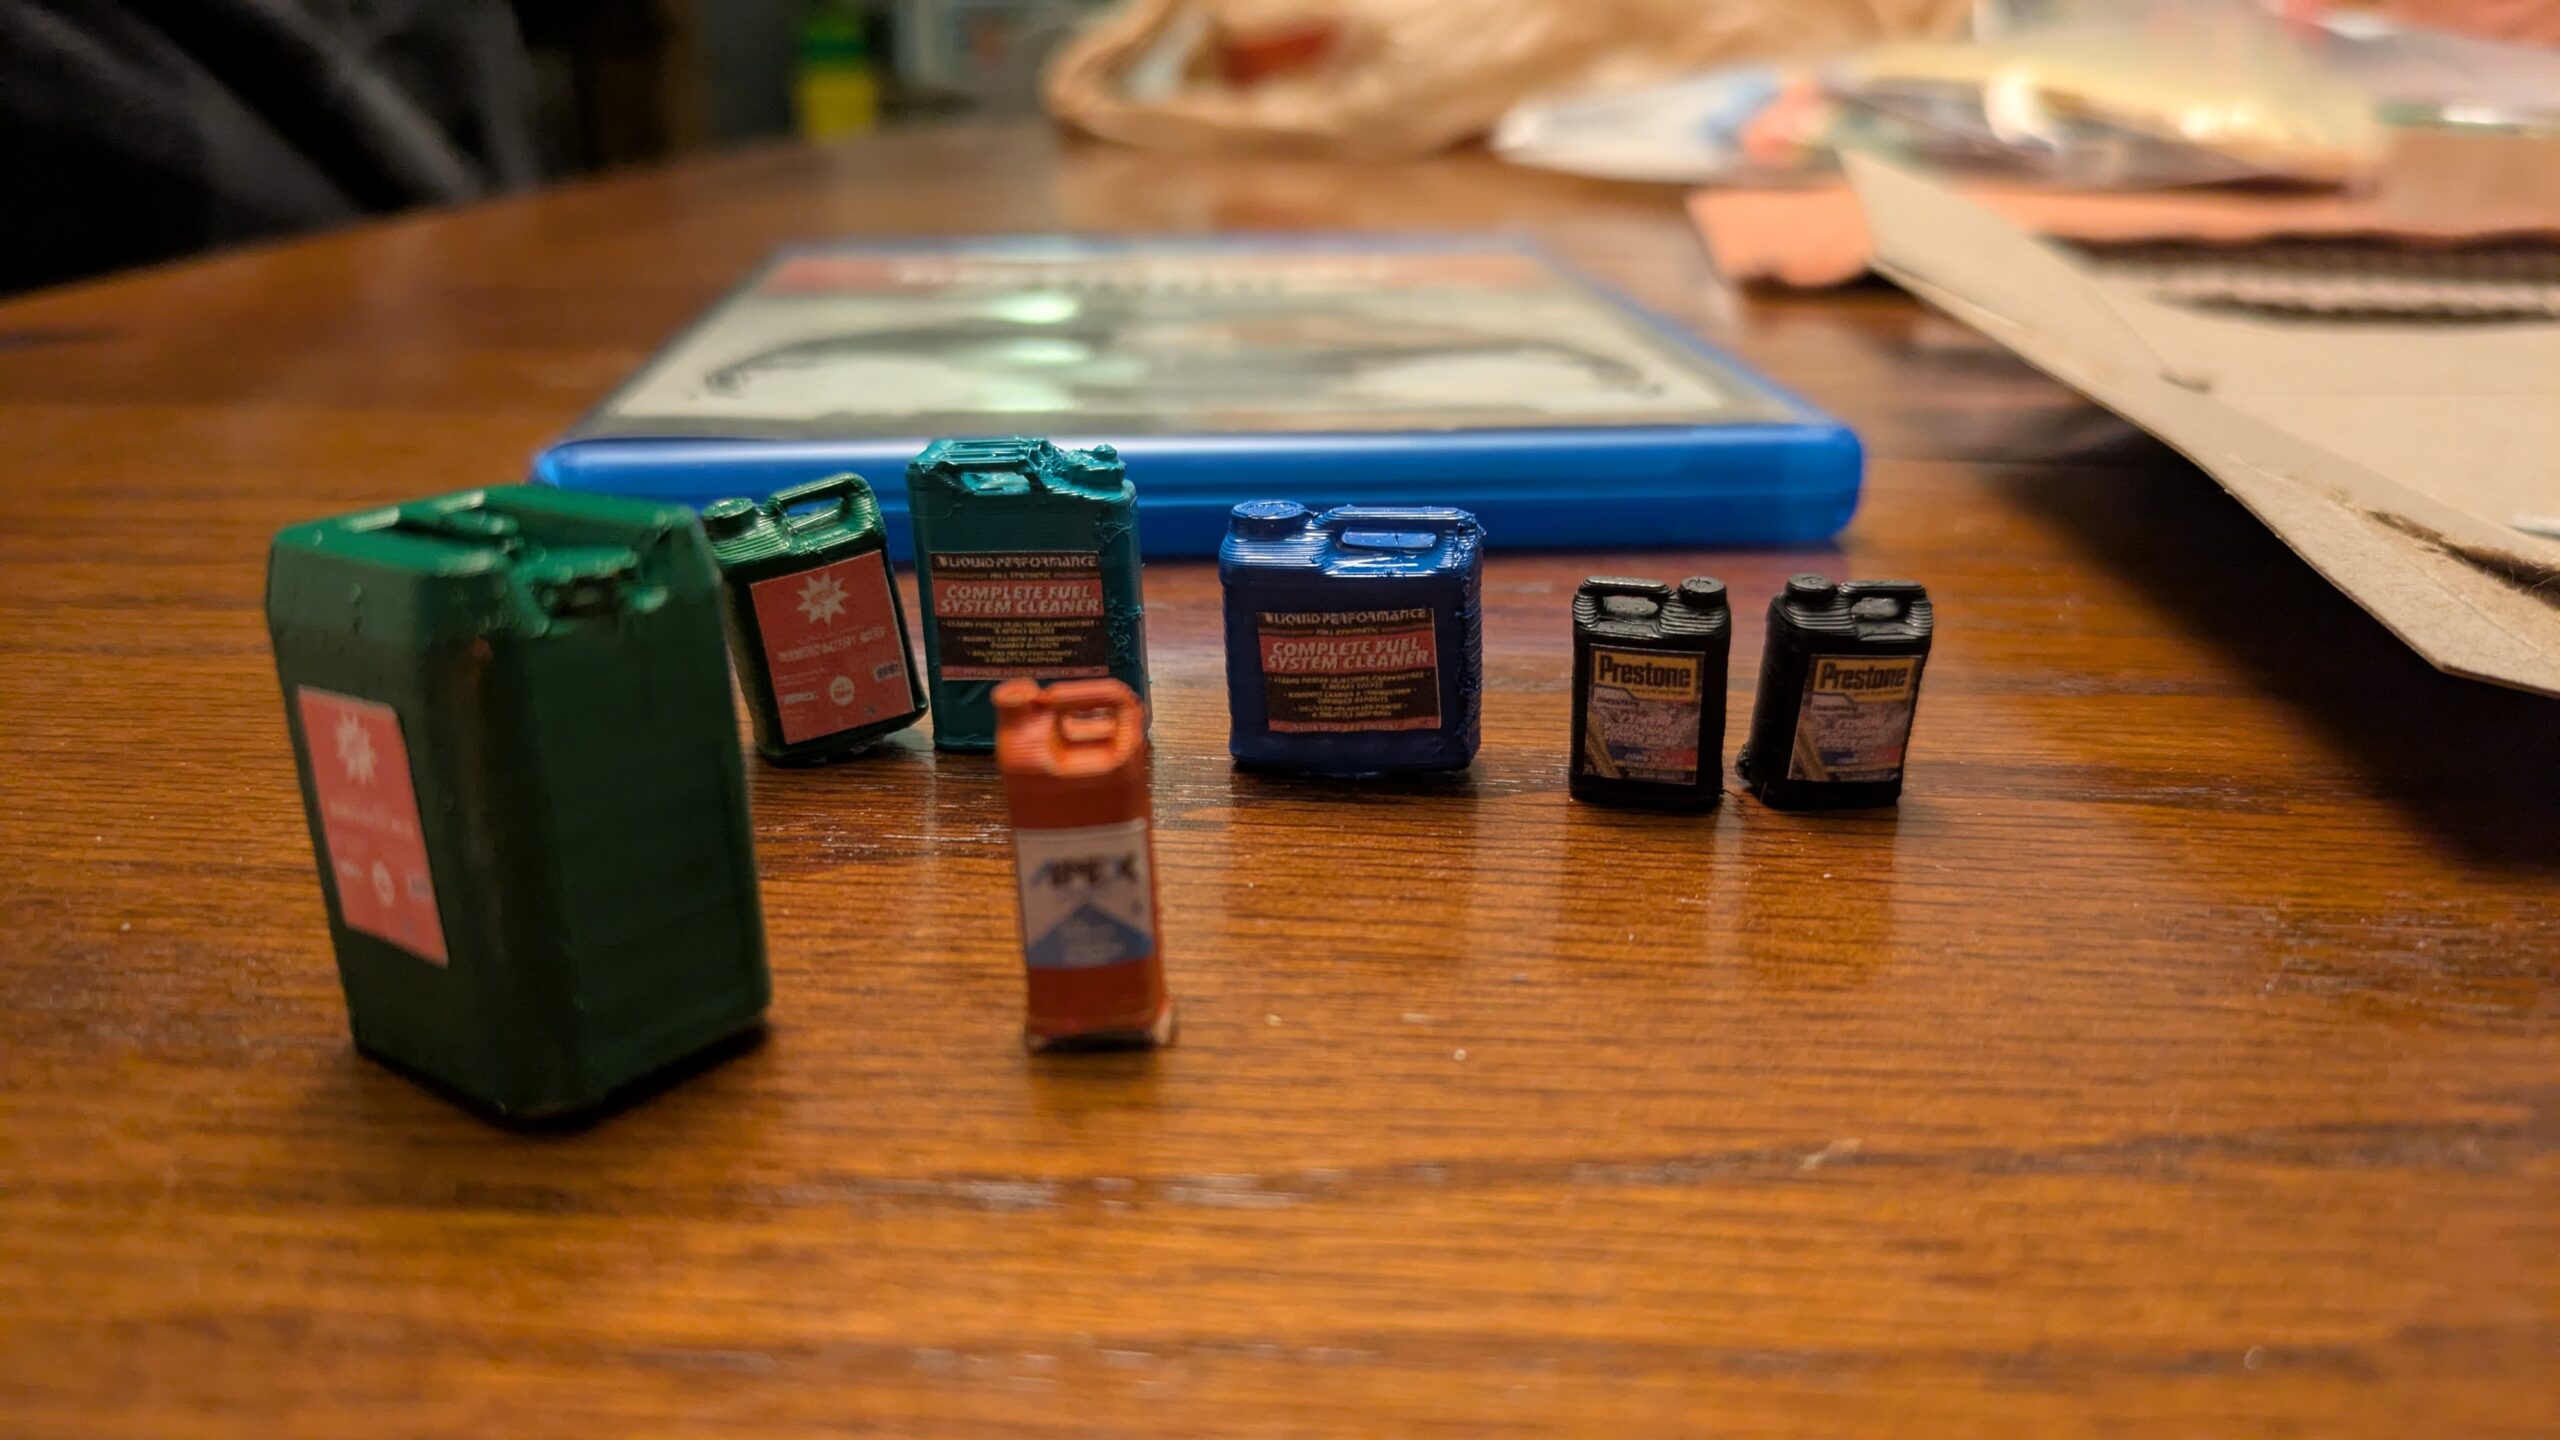
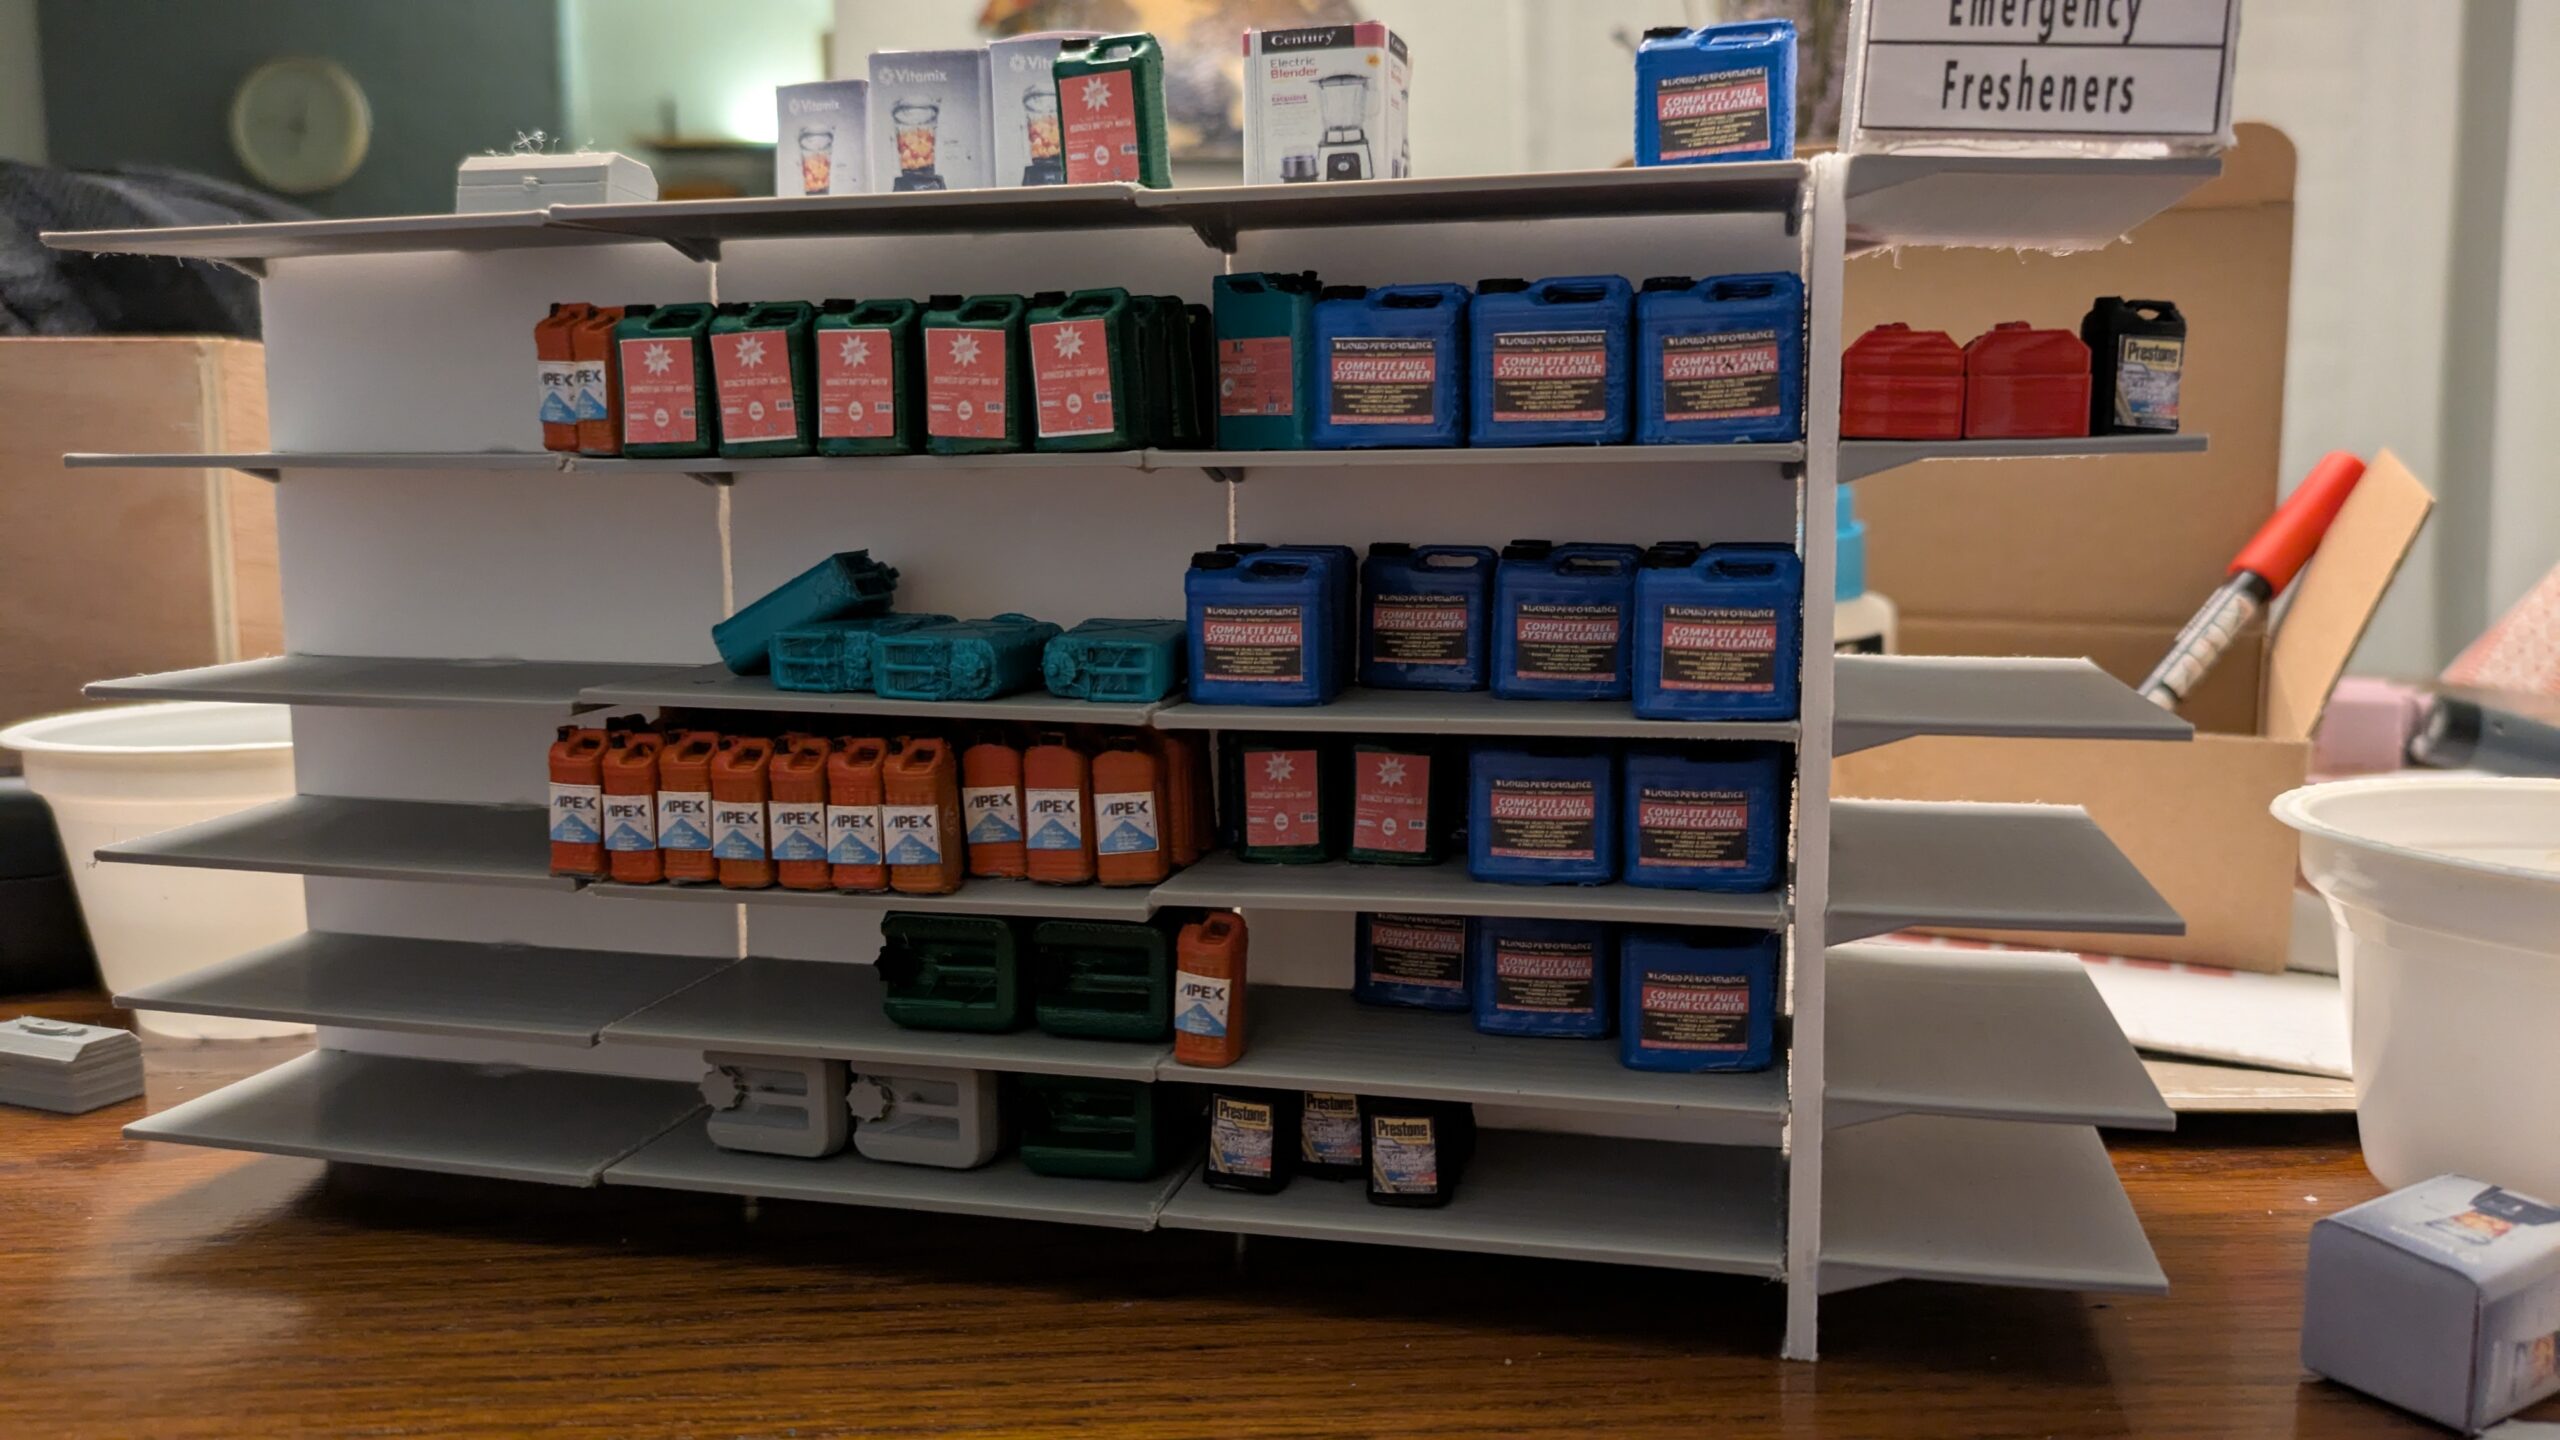
With most of the set arranged and ready for details- the props for the shelves were the next item on the list. This part of the project took the longest due to the amount of volume and detailing necessary in each element- which was not much but when multiplied by hundreds it really did add up. I spent a little over 42 hours over the course of 2 weeks gluing, painting and applying labels on both the boxes and bottles that would go on the shelves.
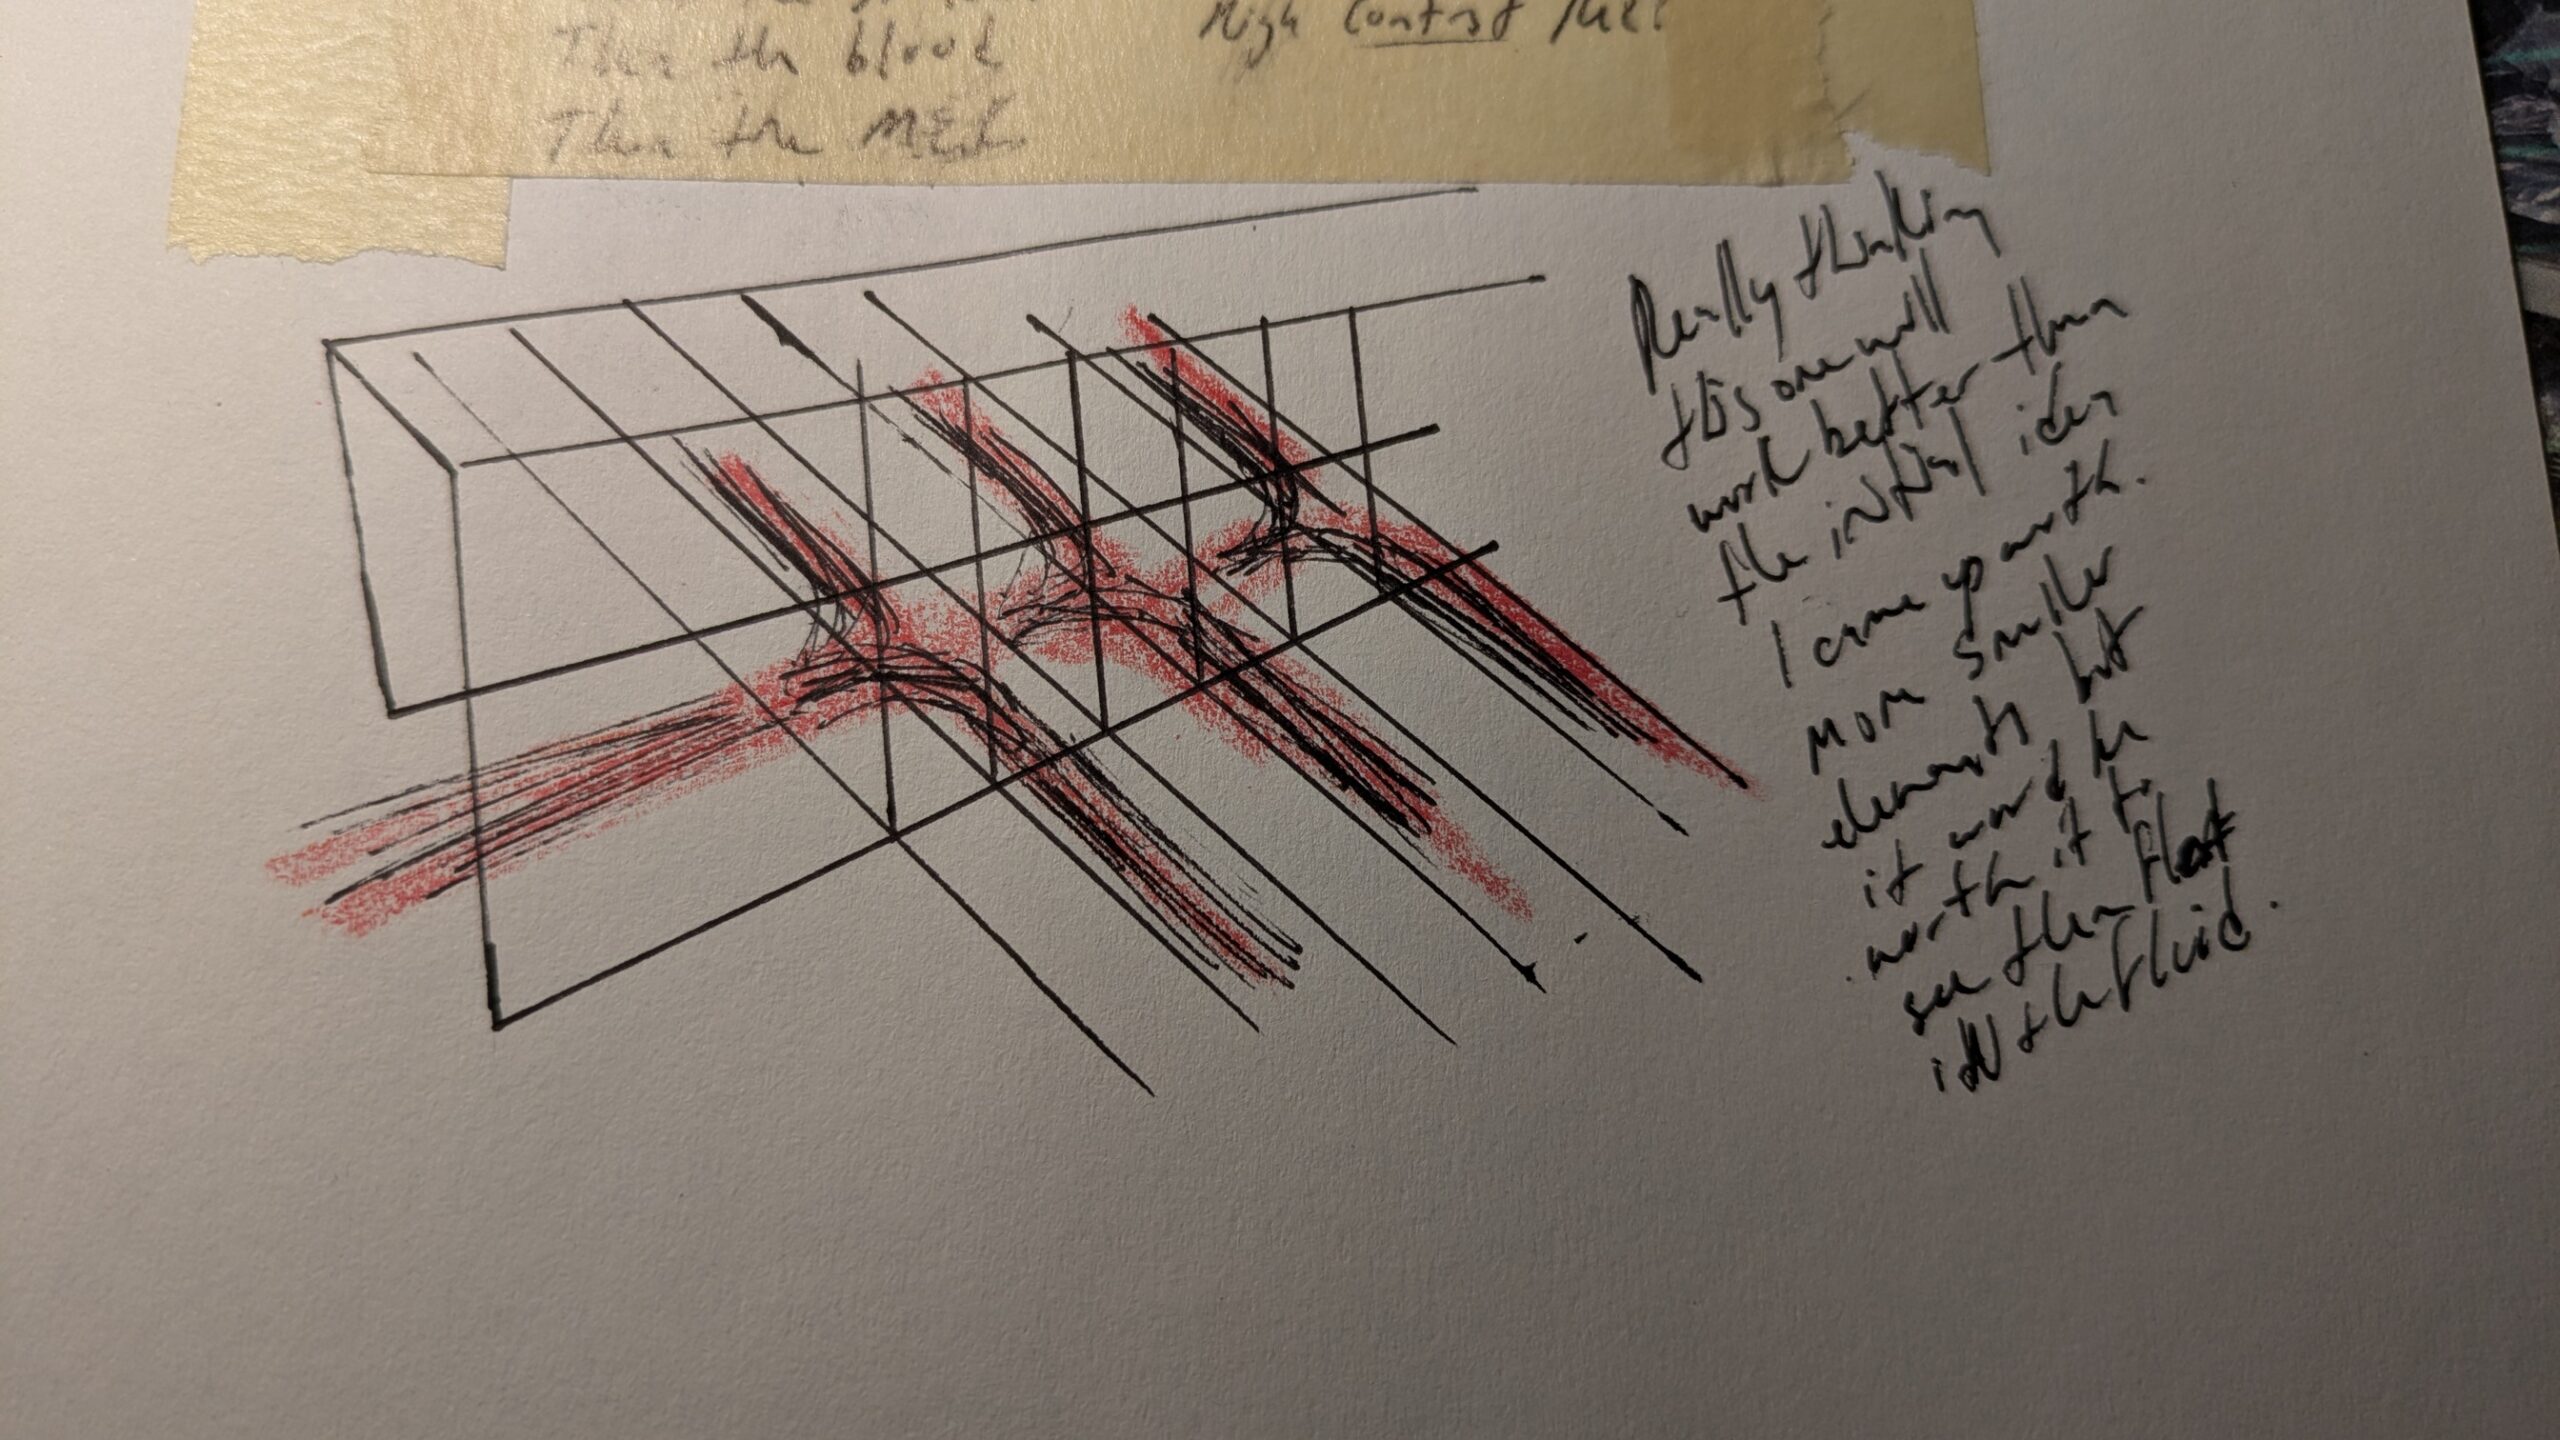
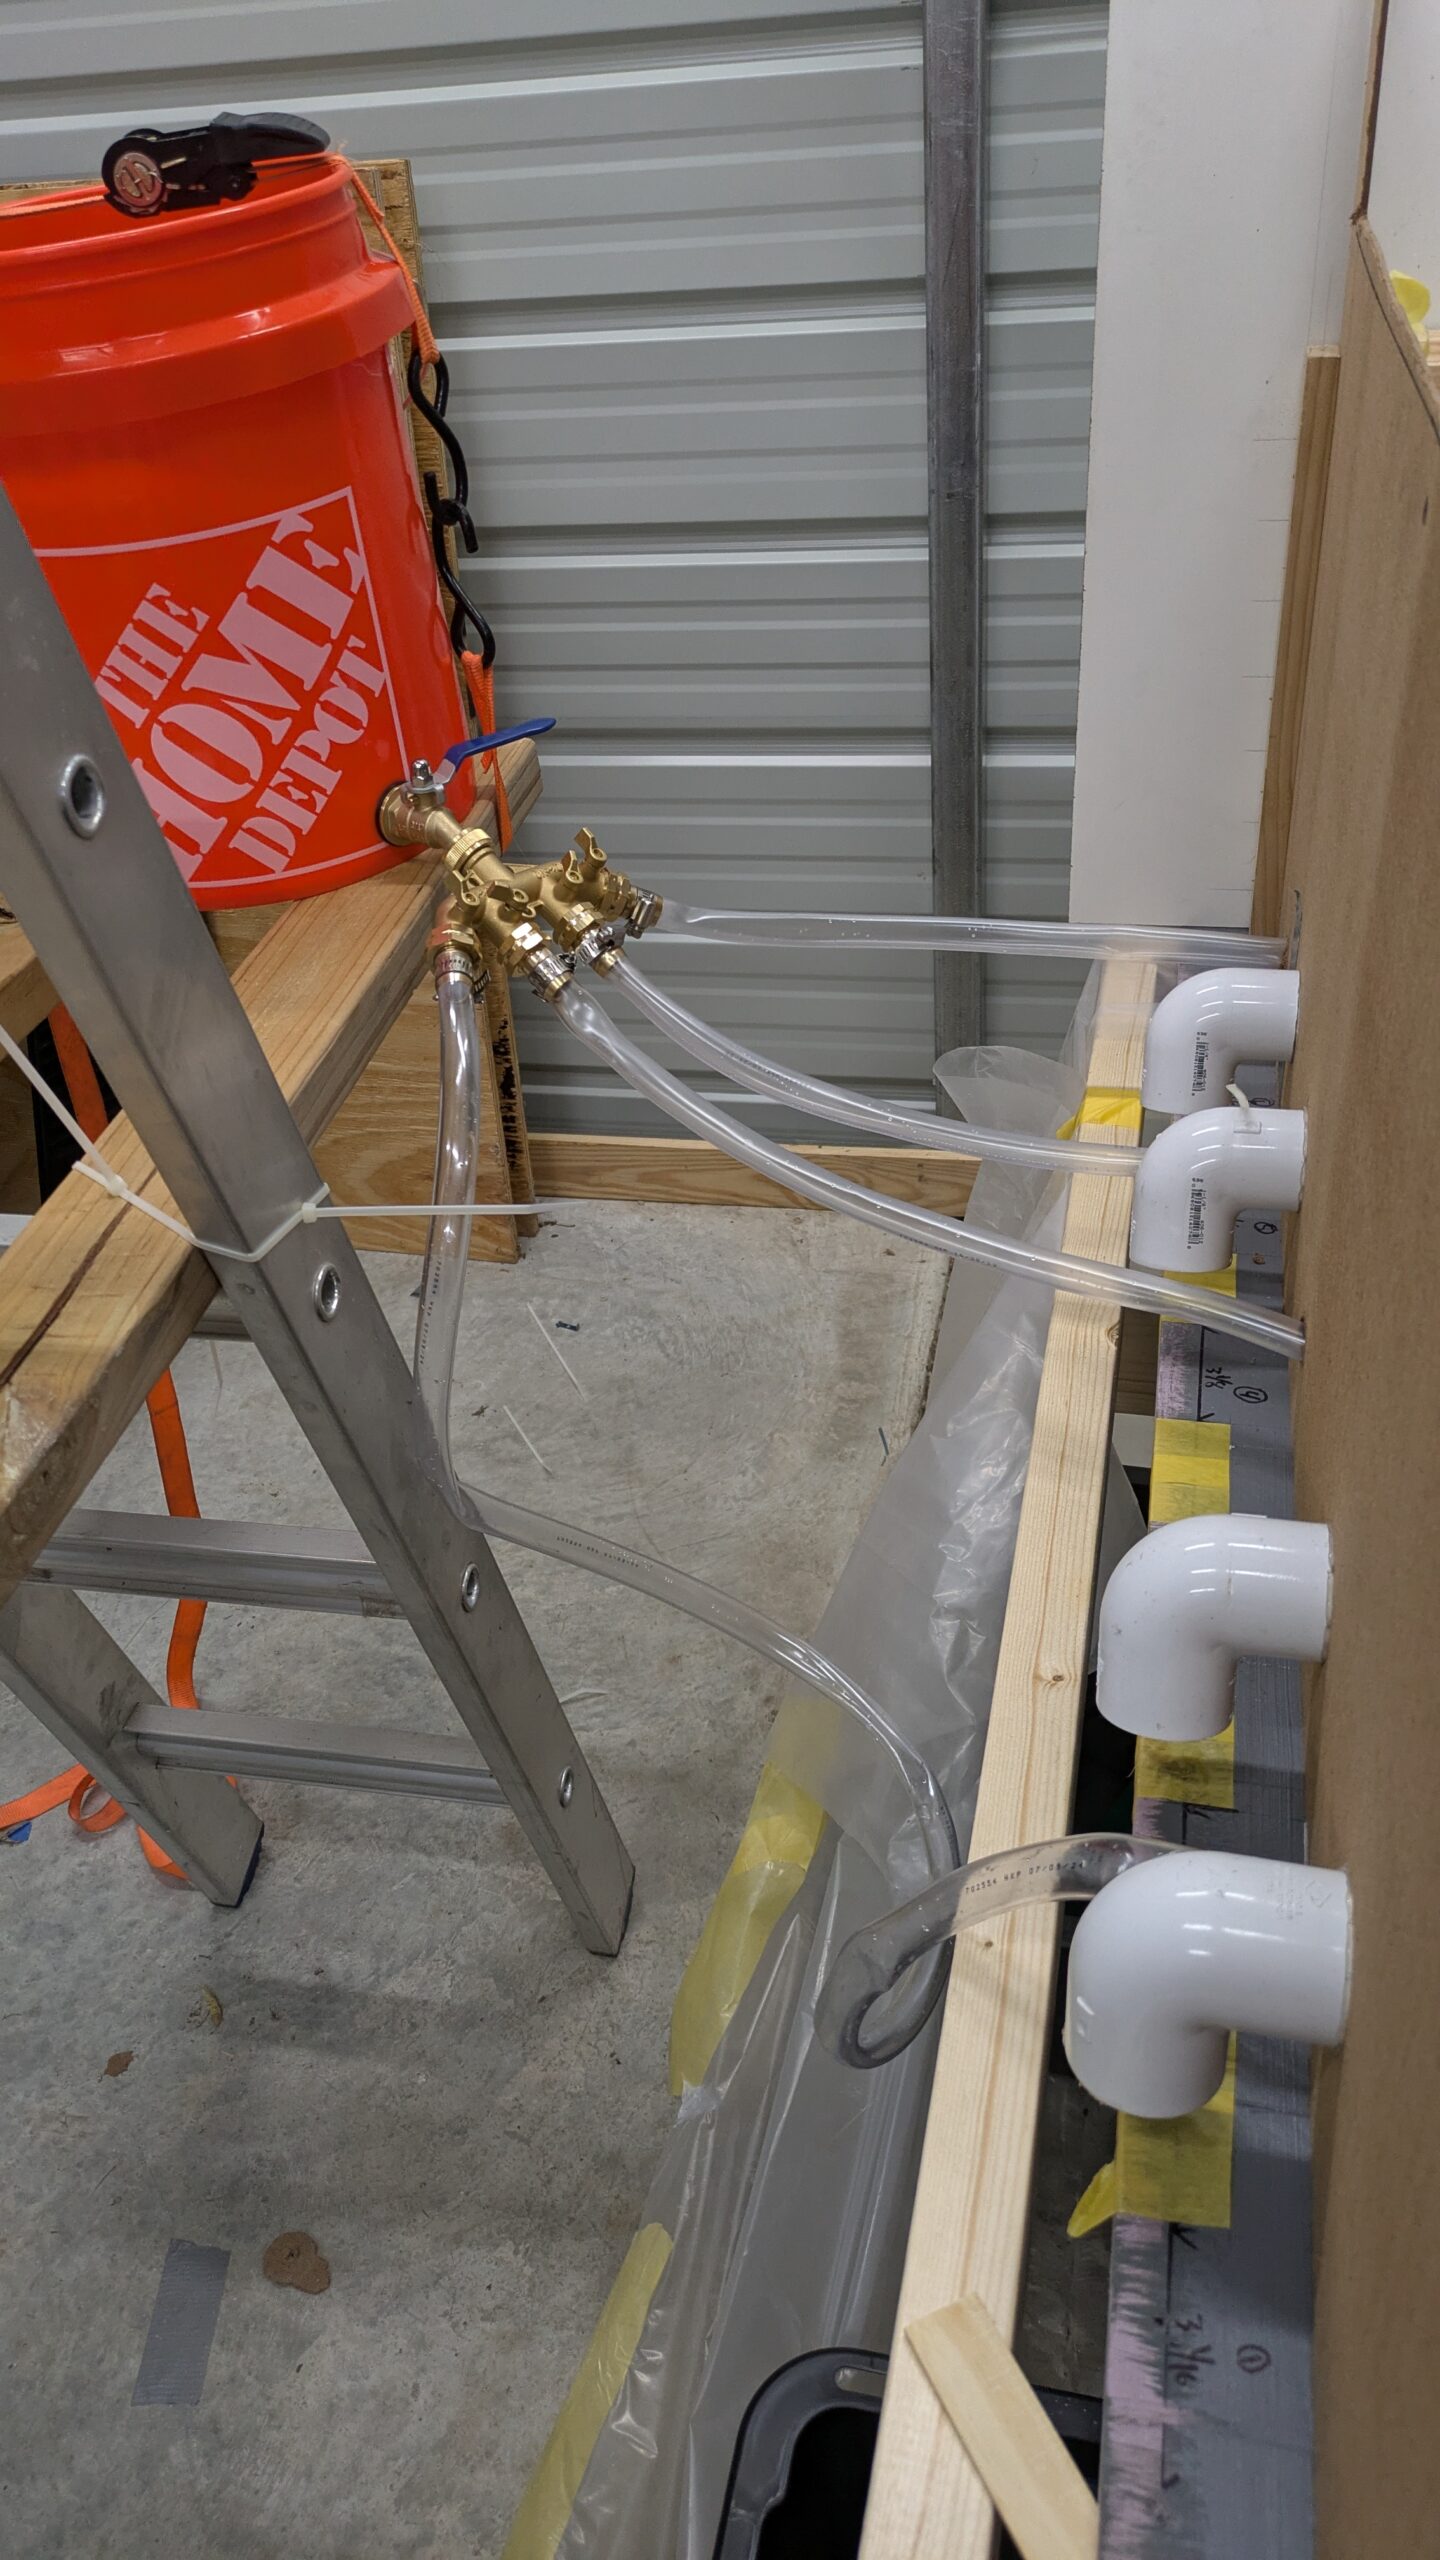
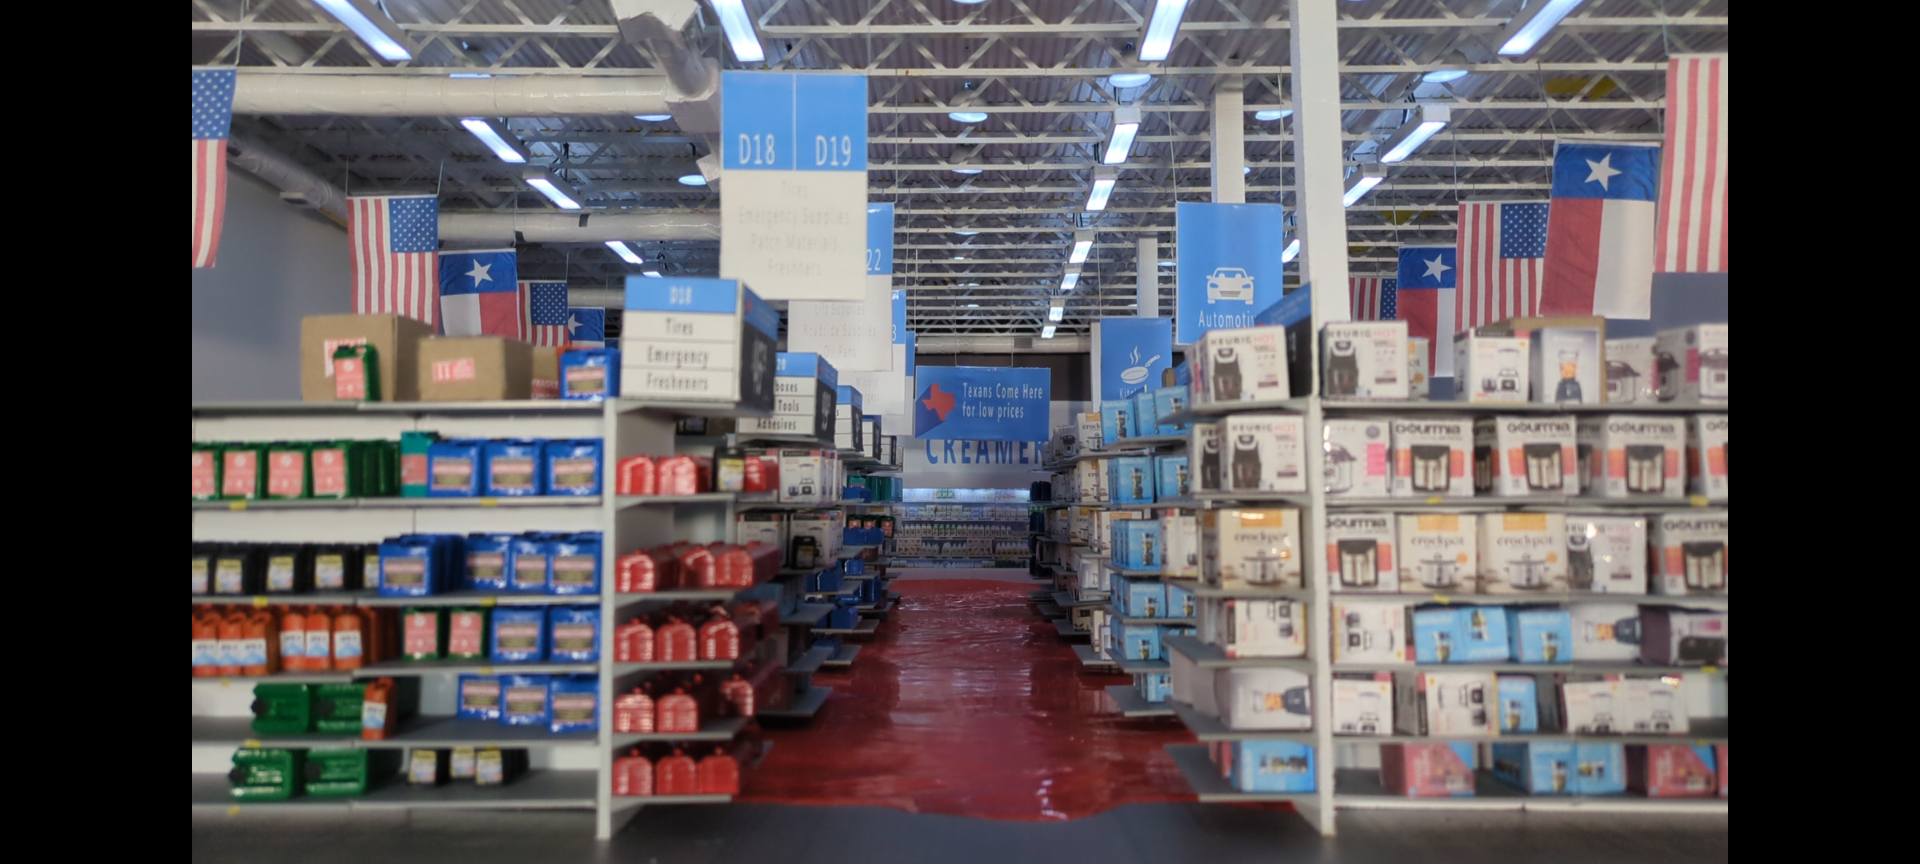
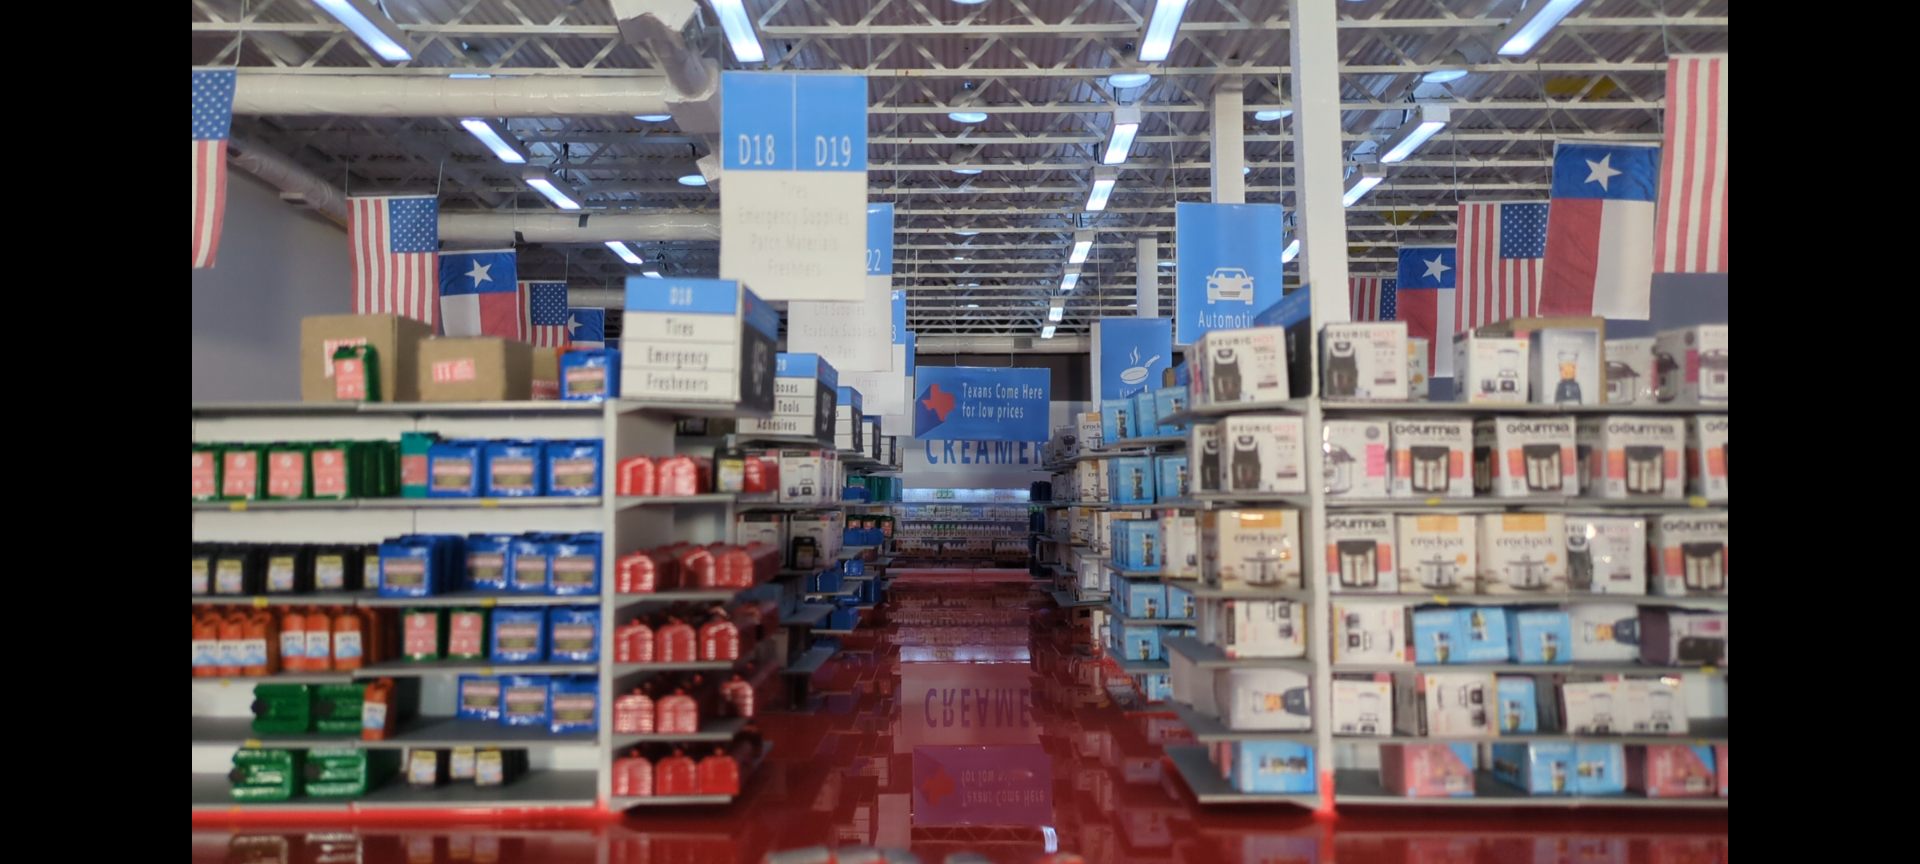
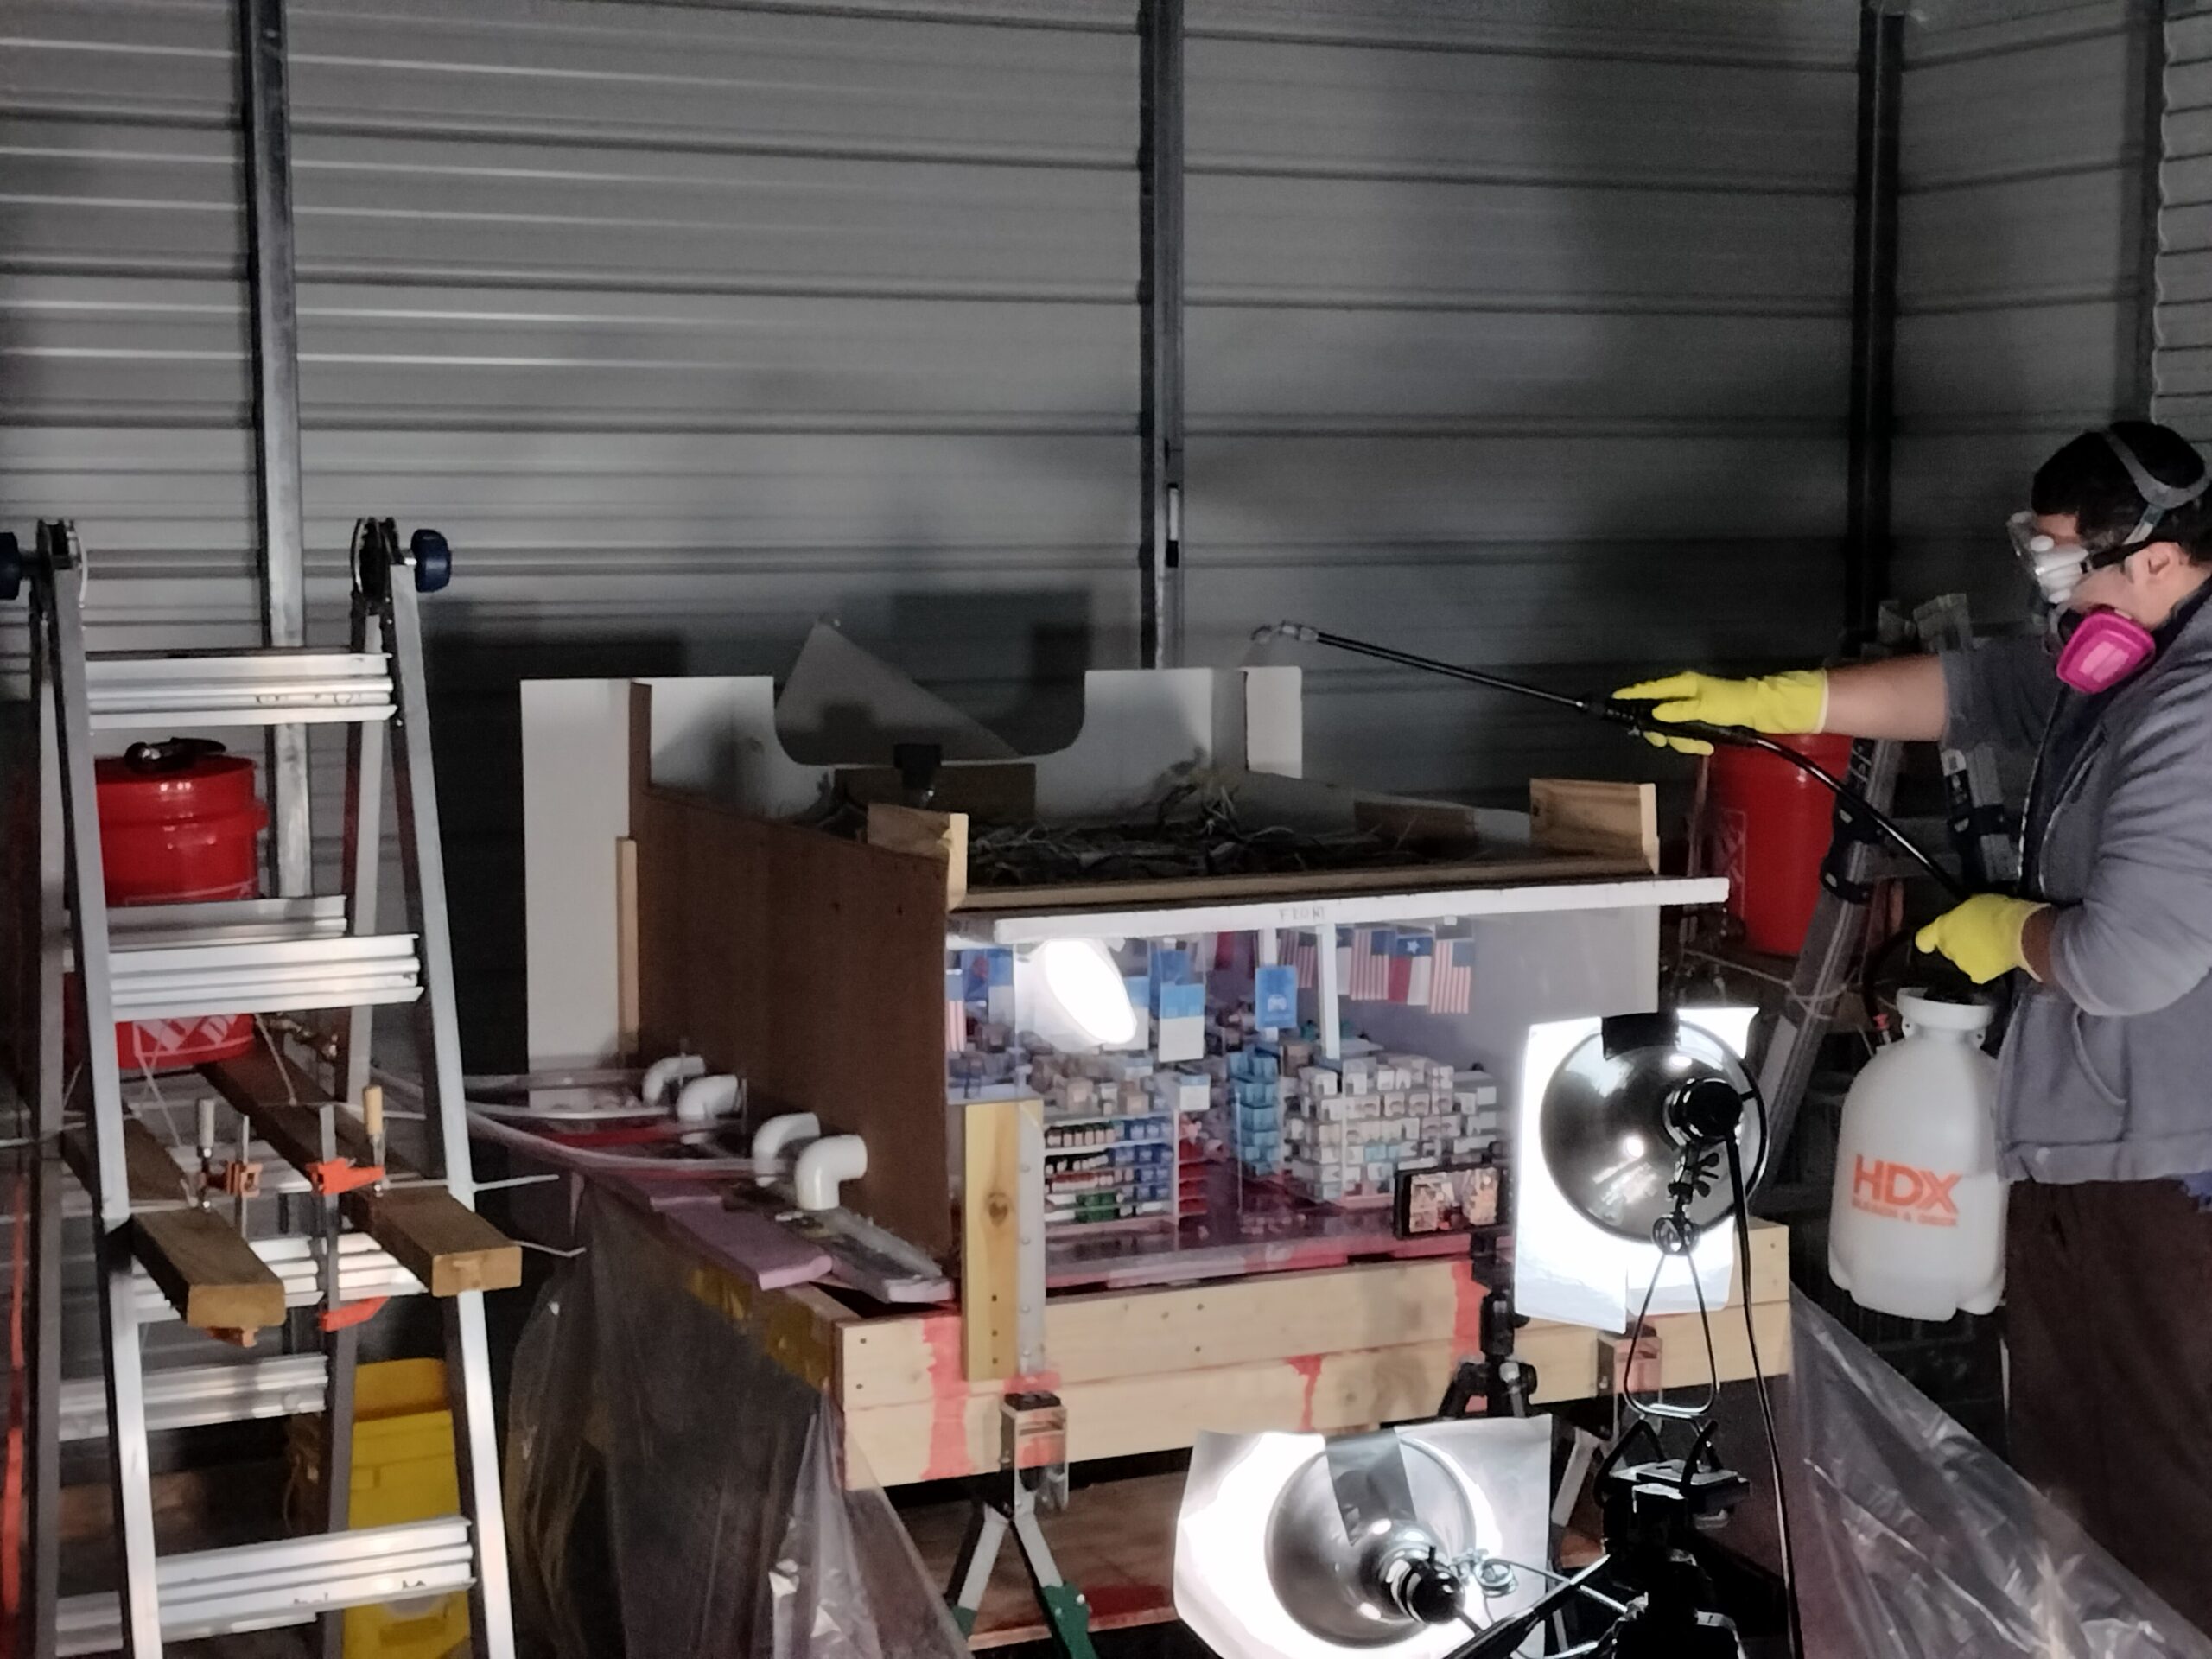
With most of the set done and the props in place it was time to move on to the logistics of how both the smoke and fluid were going to move through the space- I wanted it to be controlled and automated in a way since I would be activating the processes but would not actually be able to see what was happening in the set.
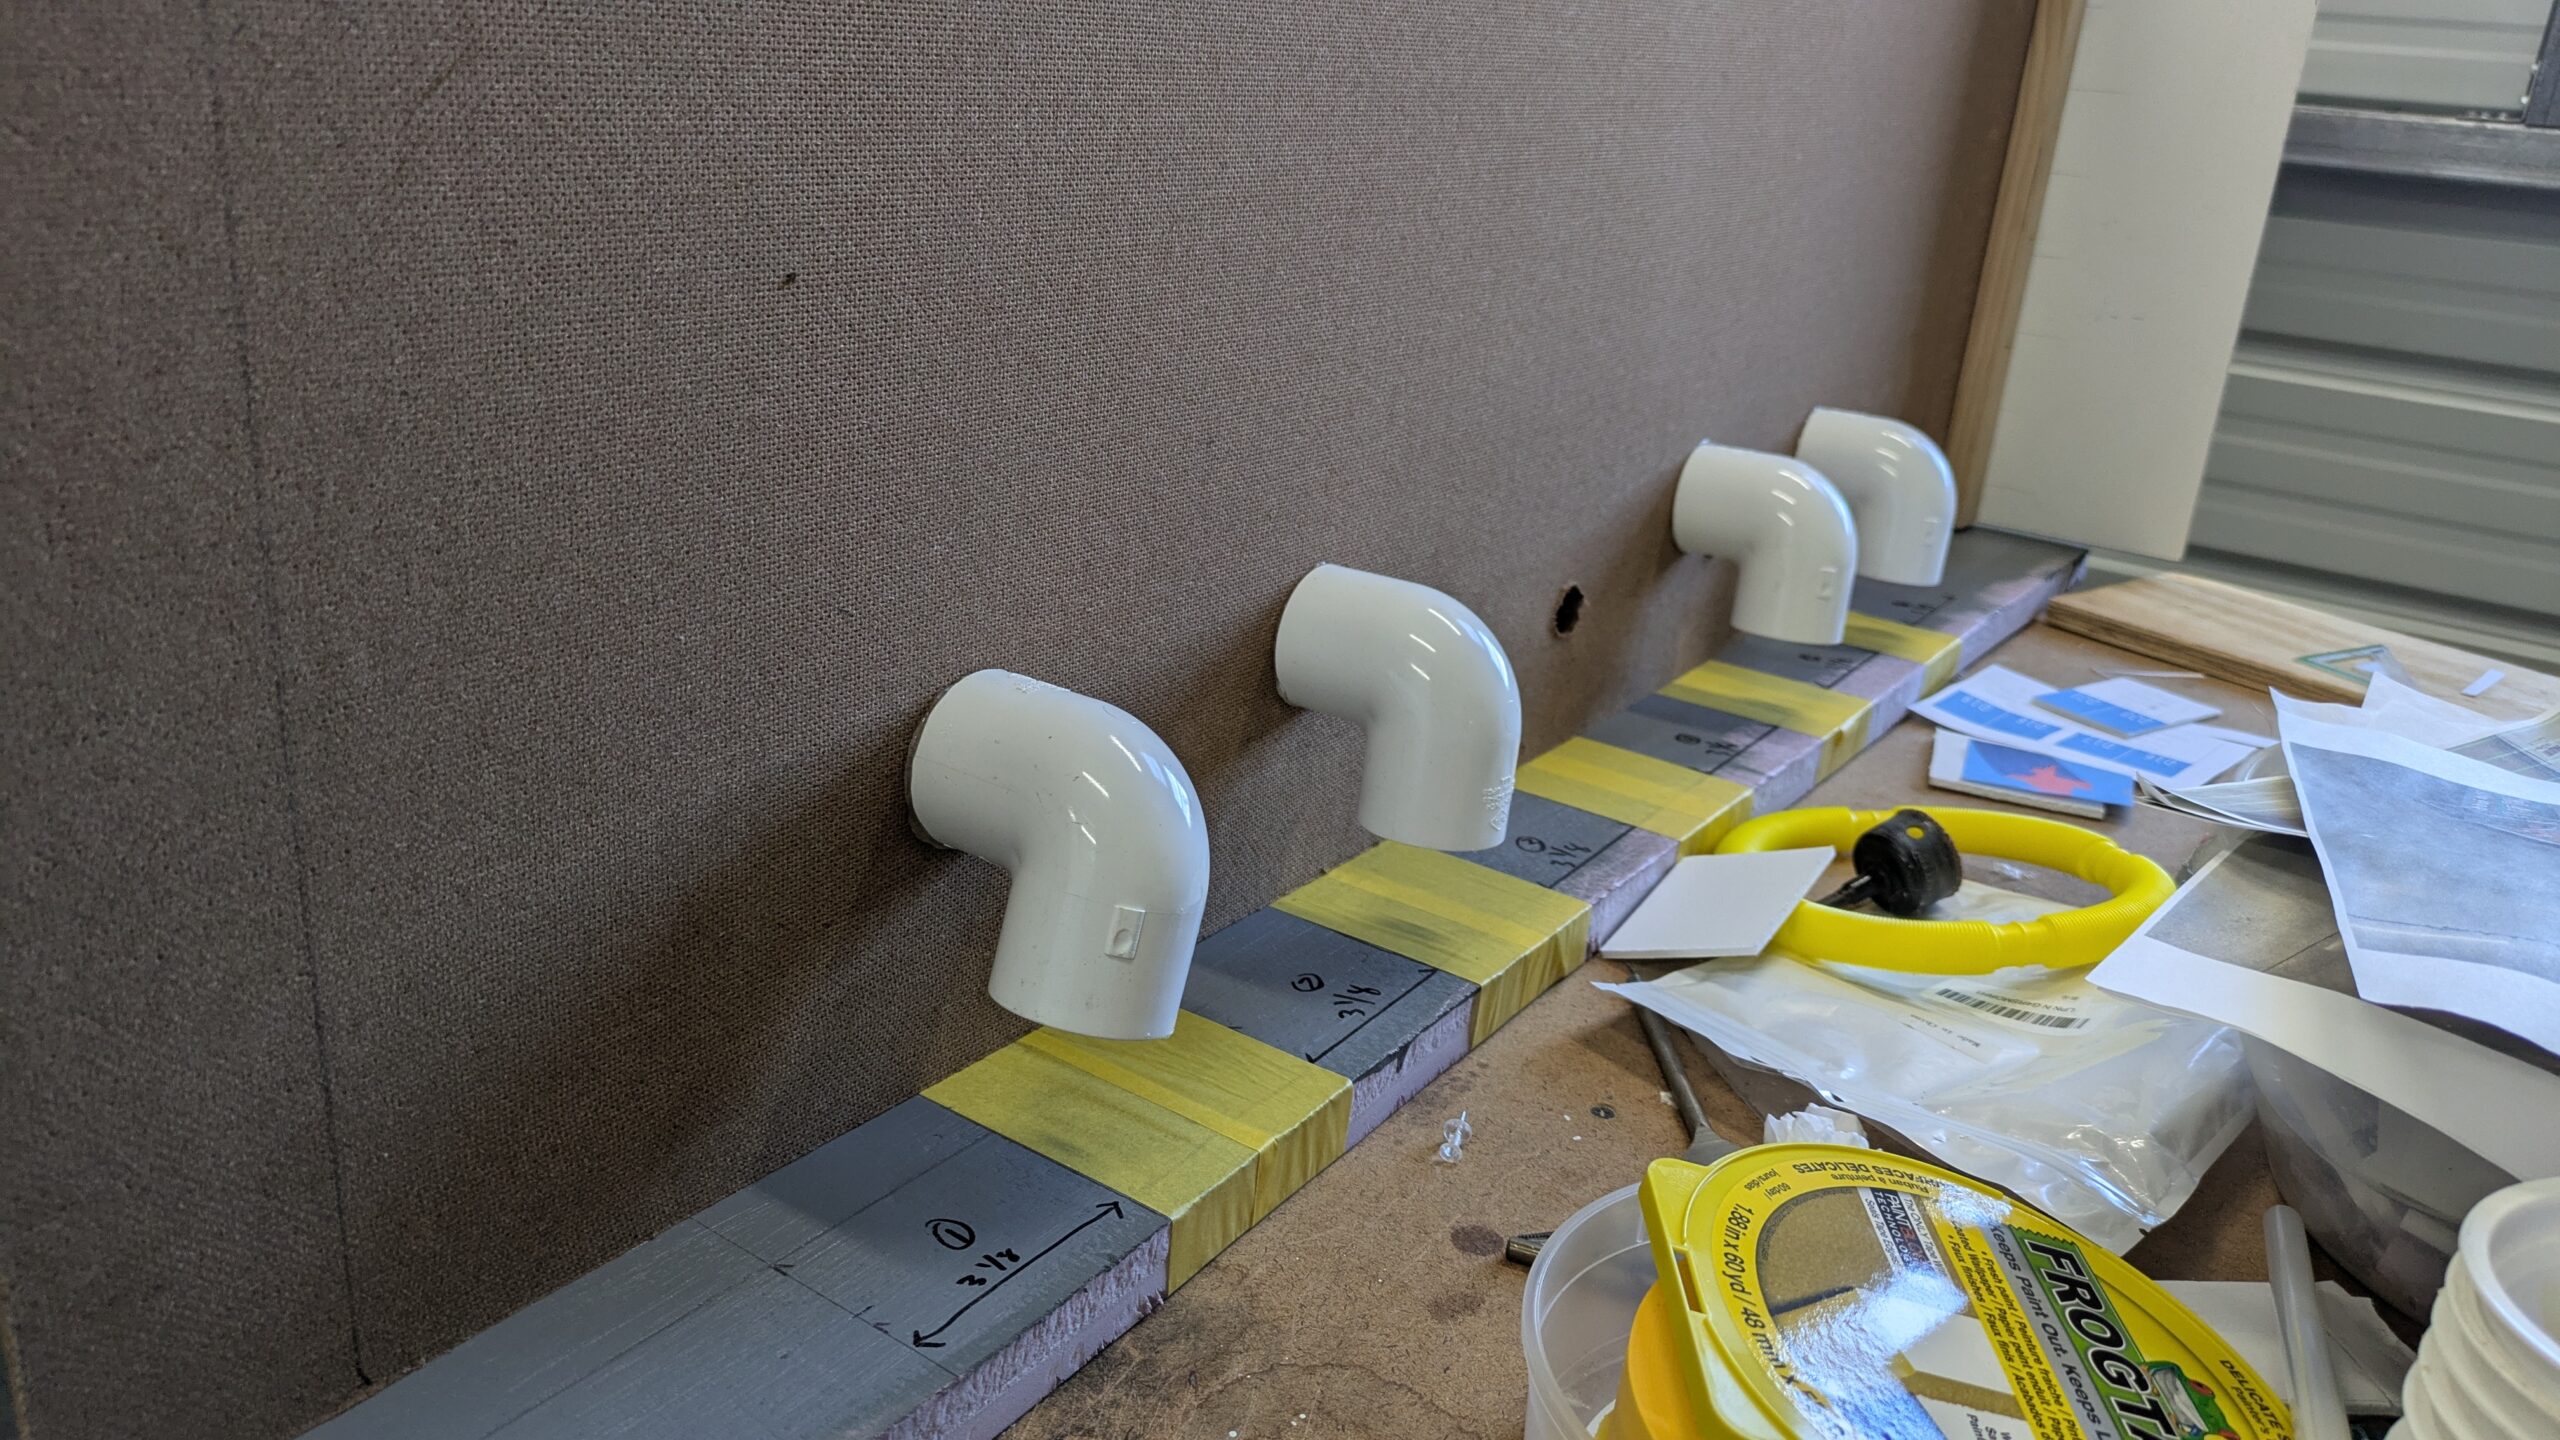
A series of elbow joints were installed outside the set to allow for smoke to enter directly at the hallway sections of the set. These joints were positioned in line with the hallway areas in hopes the smoke would travel through the set evenly.
Additionally, PVC pipe was used in the hallway areas to directly distribute fluid and make it appear as if it were emerging from the hallways directly. These would later hook up to the hose systems outside of the structure and would be released through a series of valves


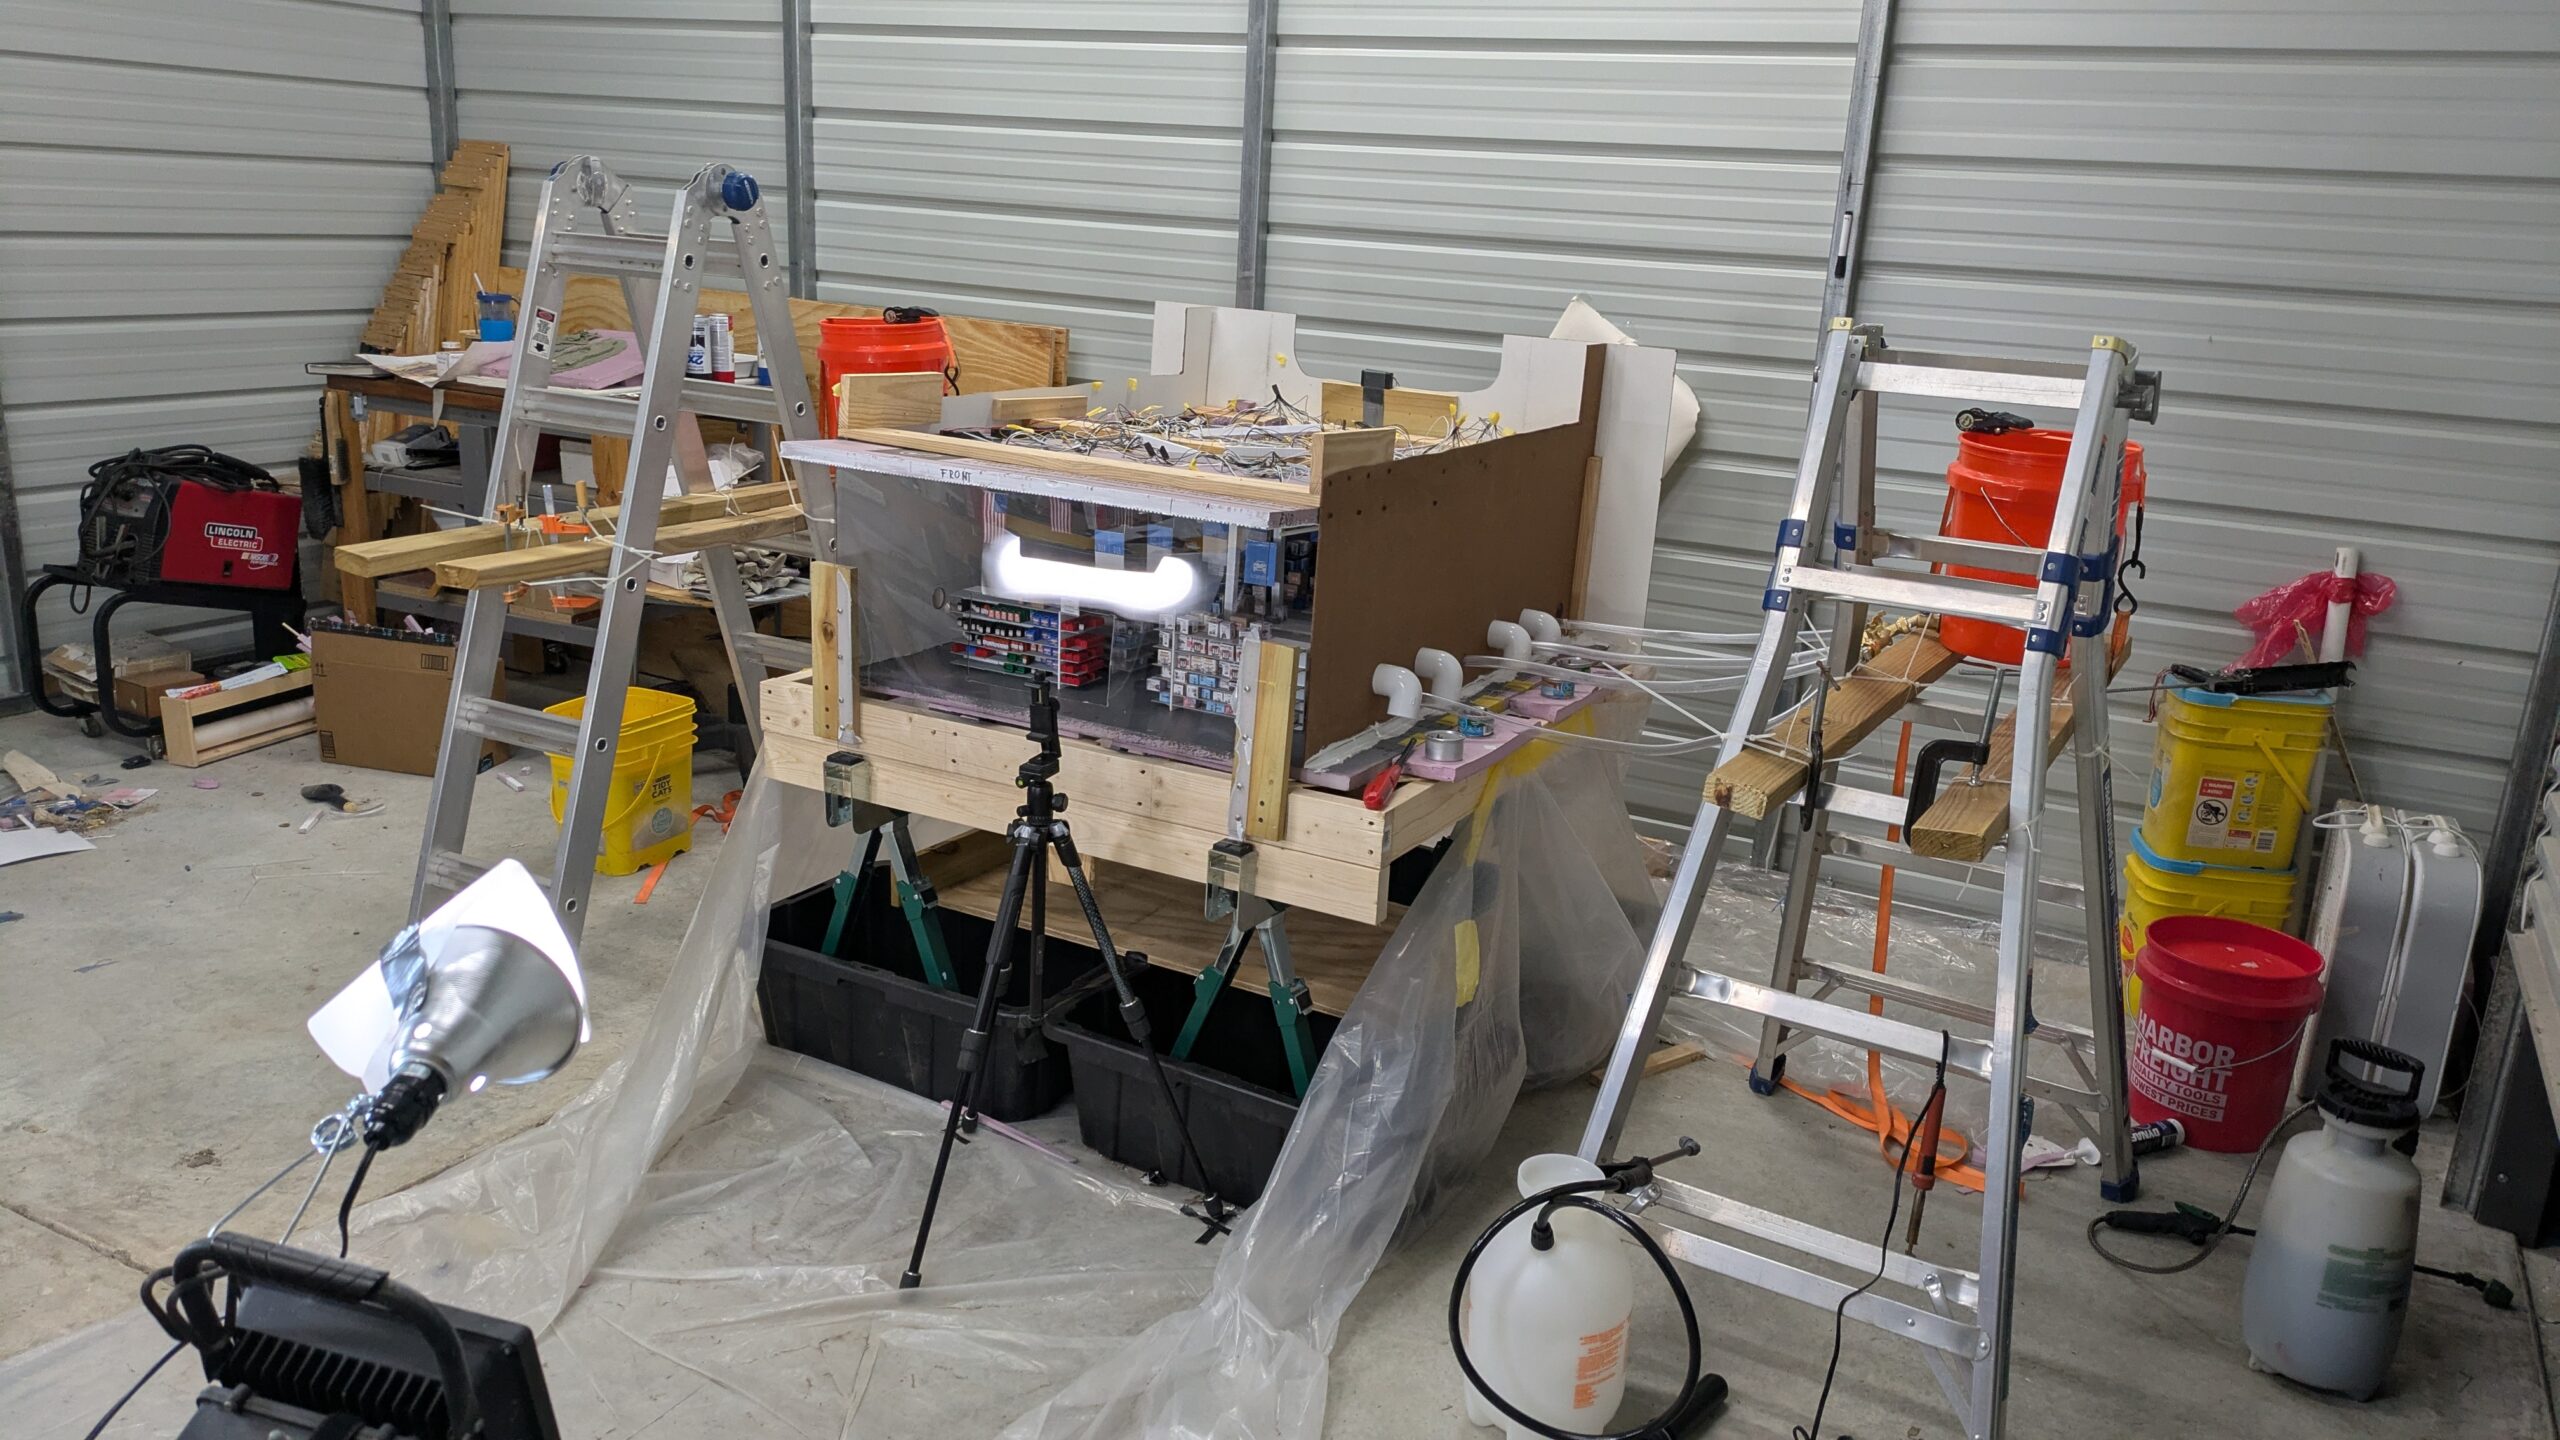
With the set ready and the logistics of the smoke and fluid figured out- it was time to move on the lighting and final camera positioning for filming.


 Follow